Task 1: This week aimed to tackle the first Field Activity, and I admit, I initially questioned whether or not my chosen subject is “non-technical” enough. In the end, I have interpreted the phrase in regard to “not using design or fabrication technologies” and feel confident that the subject of the lesson is itself independent enough:
• This project will hopefully document a lesson created to teach structures of basic syntax, enough to write a simple program. The notion builds on similar tiles of words and grammatic structural elements which are foundational to teaching and practicing structures in many languages.
• This lesson will reference some in the beginning stages of programming, not as a technical process, but as a linguistic one.
Steps followed
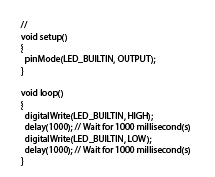
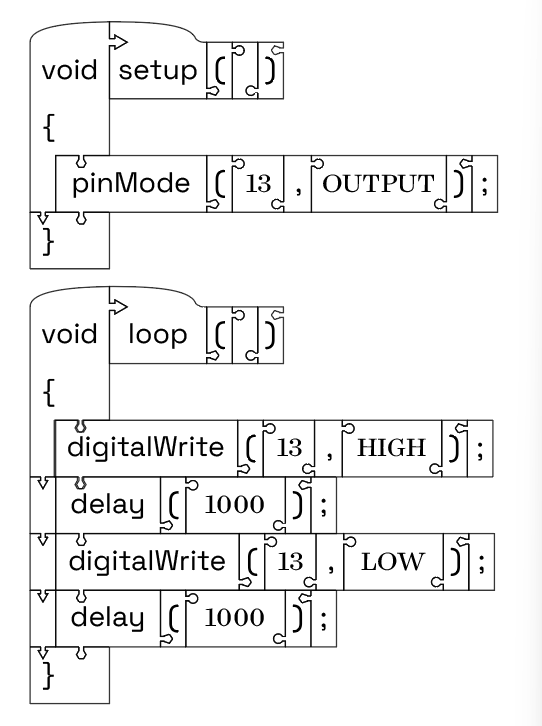
• This project started with a simple, introductory sketch, in Arduino C, and yes, with the intention of making the coding process tangible. I will be using a modified “Blink” routine, which can alternatively run as a “hello world”
• In the vector editor, I created a series of rectangle shapes, one inch high, and as long as was necessary to incorporate the name or structural element which will fit within it.
○ The height of the blocks is arbitrary, the following step enforced it for me, but could be scaled as needed.
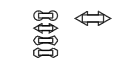
• I created a series of joint structures, and some alignment pattern objects.
○ Guidelines are a great tool for this if you are using Illustrator, but even with other tools, making shapes that represent regular intervals, and either moving, or copying and deleting as you go, ensuring alignment is critical to this process.
○ This is an area where “close enough” might not be. Be precise.
○ The joining structures are created from a recipe of a rectangle extender and a primitive shape.
○ That rectangle is an eighth of an inch wide, and 3 times that long.
○ The primitive shape came in a few options. I tried a circle, a triangle, a pentagon, and a hexagon. I used the variety to create some dependencies, but your implementation might vary.
• The joint structures are then distributed along the blocks, along the following rules.
○ No joint structures must not interfere with text, so they are implemented along the tops and bottoms of the rectangles.
○ Each structure serves to influence the pattern of assembly, so attention is given to allow for some modularity, like having only one parenthetical tile, but otherwise setting tiles up to fit in predictable yet unique ways.
§ For example, the “void” stem block for a function has arrow shaped features to direct a student user to orient and assemble along a specific path.
§ The program statements are interchangeable, along with terms referring to parameters, operators, etc. only fit into specific places along the function path.
• The joints are then merged with the blocks, along with other features which add nuance so that function structure blocks are distinct from program statement blocks.
Students often struggle with syntax in basic coding exercises. These tiles give them the opportunity to practice forming some code in a way that isn’t dependent on a screen, and will offer some natural help without giving too much away.
Theory goes is that the blocks in this form do not obscure syntactical structures in the same way that tends to occur in existing and digital “block-style programming” utilities.
Next steps or improvements
I believe it is likely possible to broaden the scope of the “puzzle-piece” style structure her, to make it compatible with verb conjugation and other sentence structure tools in language learning lessons.