Field Activity
Overview
For this Field Activity, I used the laser cutter to create a facsimile of what a 3D printer slicer program does so students could better understand the process.
The lesson is an introduction to how a 3D printer works as students venture to earn a series of 3D printing badges on the FabFolio website.
Inspiration
Slicing is a concept that can be difficult to understand if you are not adept at spatial reasoning. When I taught Geometry, there was a unit about finding the volume of a prism; the derivation of the formula uses the same concept as slicing a 3D model and I always wished I had a visual aid like this (but more prism-y, of course) to help get the meaning across. This, of course, is also tied to calculus and finding the area under a curve, so a similar visual could be utilized in any of these classes.
Building
To create this visual aid, I found a 3D model of Timmy/Tommy from Animal Crossing by searching the Spriter’s Resource website.
I then opened the file in Slicer for Fusion 360, a legacy helper application for the Fusion 360 CAD program which now runs as a stand-alone program. Using Slicer… I was able to create vector files of the outlines for each layer of the sliced model by inputting the thickness of the material I was using and a few other factors. The process was really pretty straight-forward!
This file went into LightBurn, where I rearranged the pieces in order to preserve space and use fewer boards. I ended up using sheets of 1/8” pressboard material (like a really thick cereal box) because it’s a good prototyping material and is inexpensive compared to mdf, while giving a better side view than cardboard, which was the important part of the visual aid.
When the pieces came off the laser cutter, I knew I had made a little mistake. I wanted to be able to take the visual aid apart and put it back together during the lesson to show how the strange shapes of each layer stack up to form a recognizable 3D model. However, I didn’t think about HOW I would do this while still allowing the aid to stay together on its own! (OOPS!) Because the cut used quite a few sheets of material, I decided to stack them in sections and use the drill press to bore some holes through the layers that would accept small bamboo skewers I had. Each piece has tiny registration holes and the outline of the next piece to make lining things up easier, unfortunately, none of the registration holes went all the way through the model, so I couldn’t just make them bigger to accept the skewers. It took a long time, but I felt good about preventing some waste and it was an interesting process.
Once it was assembled, the soot from the laser cutter was still getting everywhere, so I sprayed it all over with a Workable Fixatiff used on charcoal drawings and the like in the art studio. I thought the resulting look was quite nice, so this one graduated from prototype to final version!
Lesson
The learning outcomes for this lesson are pulled directly from FabFolio (see below) and is part of a 3-part lesson that introduces students to the workflow of a 3D printer.
This is the second part - Slicing, that follows Modeling, where students learn some important function of TinkerCAD and how to import & export files, and precedes Printing, where student learn how to set-up and run the 3D printer itself.
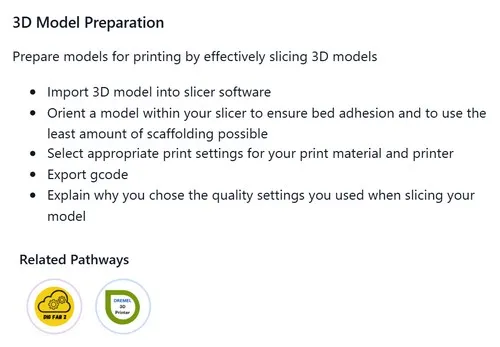
In this part of the lesson, students are importing a model into a slicing program; learning about the relationship between print time, quality, and layer height; and discovering ways to reduce the likelihood of a failed print. This model is used in conjunction with some example 3D prints to help explain why we are in yet another design program (showing what a layer is and how the printer uses them) as well as in selecting appropriate settings (showing what happens as the layer height gets bigger, and when that’s okay or not).
View the full lesson on Scopes-DF!
Reflection
Could you have done this activity without the teaching aid you have fabricated?
Yes! I have done this lesson in part years without the Timmy model, but I found that slicing something is tricky for most students to understand on first exposure.
What value did the teaching aid add to the lesson, or if it didn’t add value, why not?
Students seemed to enjoy disassembling and reassembling the model and I think it helped solidify the concept a bit. Having something to touch where they could see the shapes the printer is drawing and see them combine into a single form, I think, added value to the lesson.
What are some challenges you expect when you do the activity with your class?
I wasn’t sure what to expect when teaching the lesson with the new model, but was hoping for some improvement. What I discovered was that this lesson could really benefit from multiple models like this, so students could be touching the model while it is being explained. I also think the old way of presenting this lesson, where it is mostly demonstration-based could be completely transformed into a lesson where students are then challenged to create their own “sliced” model of a provided object by free-hand cutting cardboard, giving them another opportunity to demonstrate understanding and explain the process in their own words.
What did you learn during the fabrication process?
During the making process, I learned how to use the Slicer for Fusion program. This is something I want to spend some more time with. I also learned a bit more about anticipating design problems. I think I was feeling so accomplished having gotten the program to work, that I was distracted by it and forgot to design an assembly method for the pieces.