2_ Pedagogies and Sustainable Practices in Digital Fabrication
Digital fabrication providing foundations for a mindset change in the educational environment.
For this first week we were asked to create a 3D object with the laser cutter.
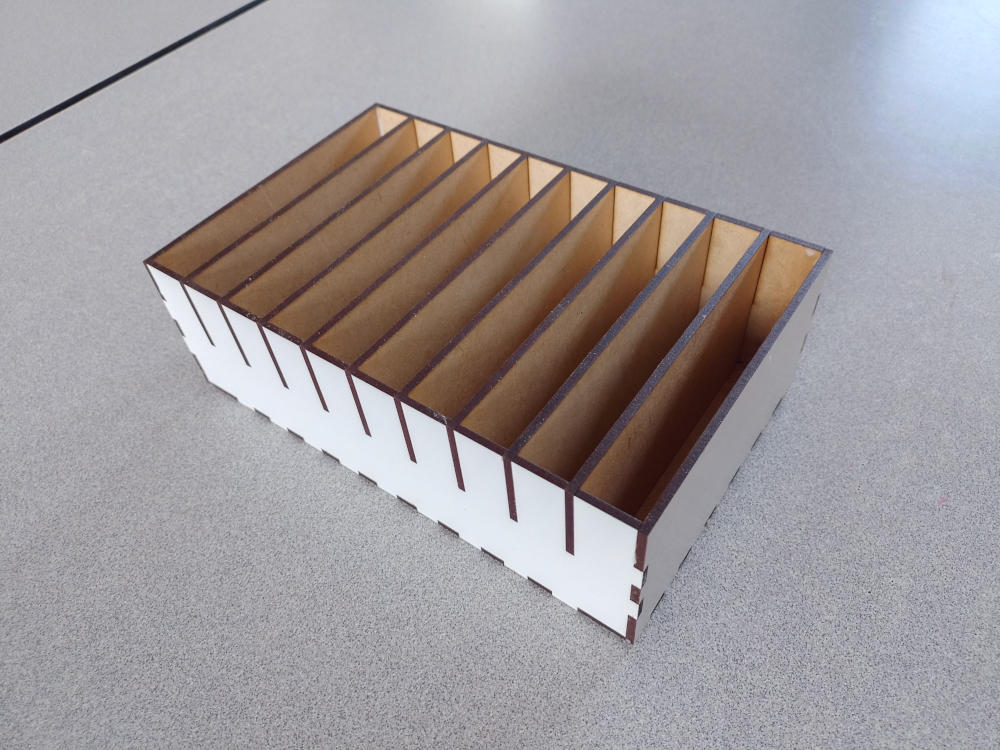
I decided to create a box to store the cables we use on our labs when working with micro:bit boards. For this I used an online tool called MakerCase. This tool is great for creating blueprints for different kinds of boxes, and once designed you can download the model as an .svg file, ready for loading into your laser cutter's software.
In MakerCase I chose the "Boxes with dividers" category and configured it to build a box with 10 slots. I took some measurements and entered the numbers into the software and in no time I had the parts ready to be cut. After cutting I assembled the box's base and outer walls and some of the dividers to test cable fitting. Once I was sure everything was alright, I decided to glue the base and outer walls (which use finger joints). After that, I added the dividers - they fit tight enough to not need any glue at all.
The box works gerat for helping keep things tidy in our lab. It makes easy to retrieve and replace cables, and helps in checking if any cable is missing.
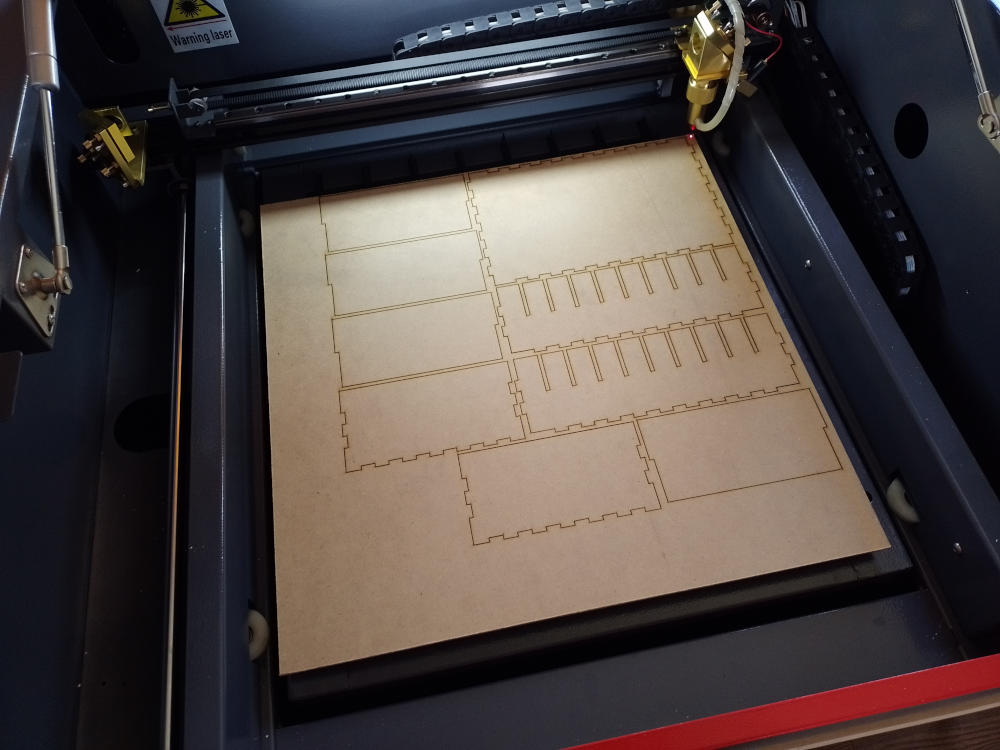
First batch of parts in the laser cutter.
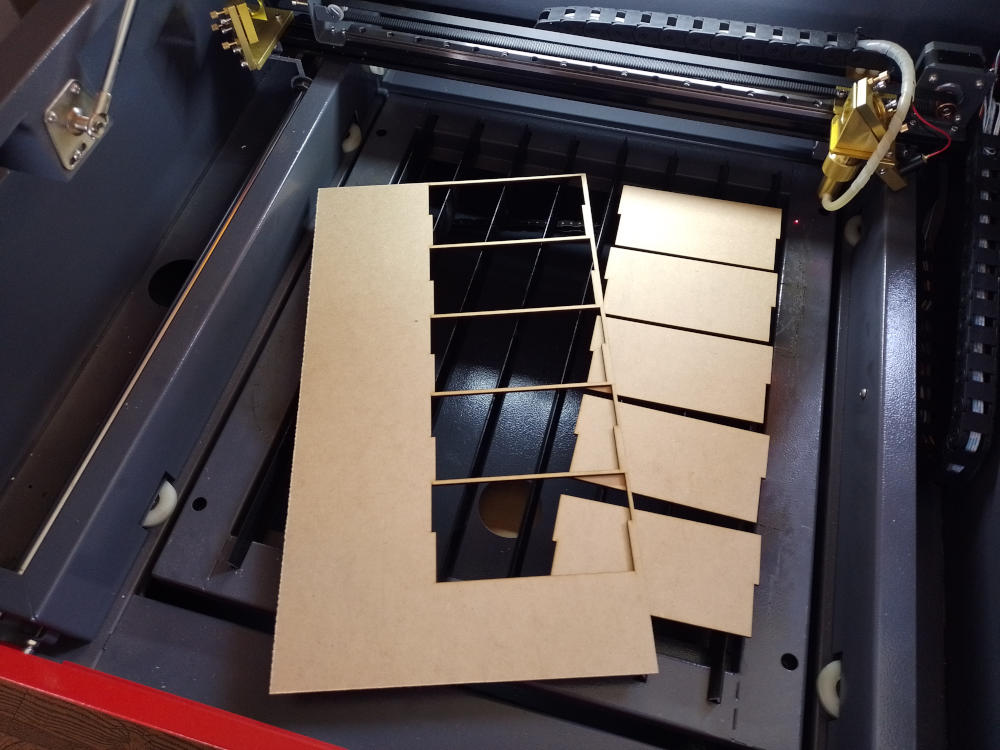
The rest of the parts for the box.
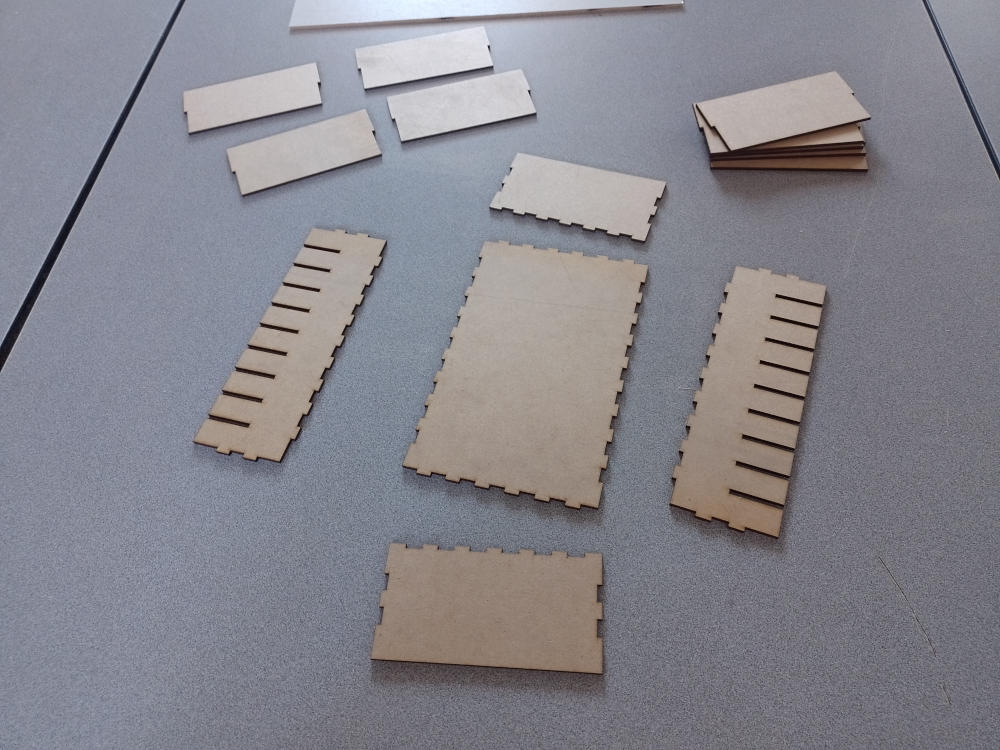
All the parts, ready for assembly.

Checking if the cables actually fit in the slots of the box.
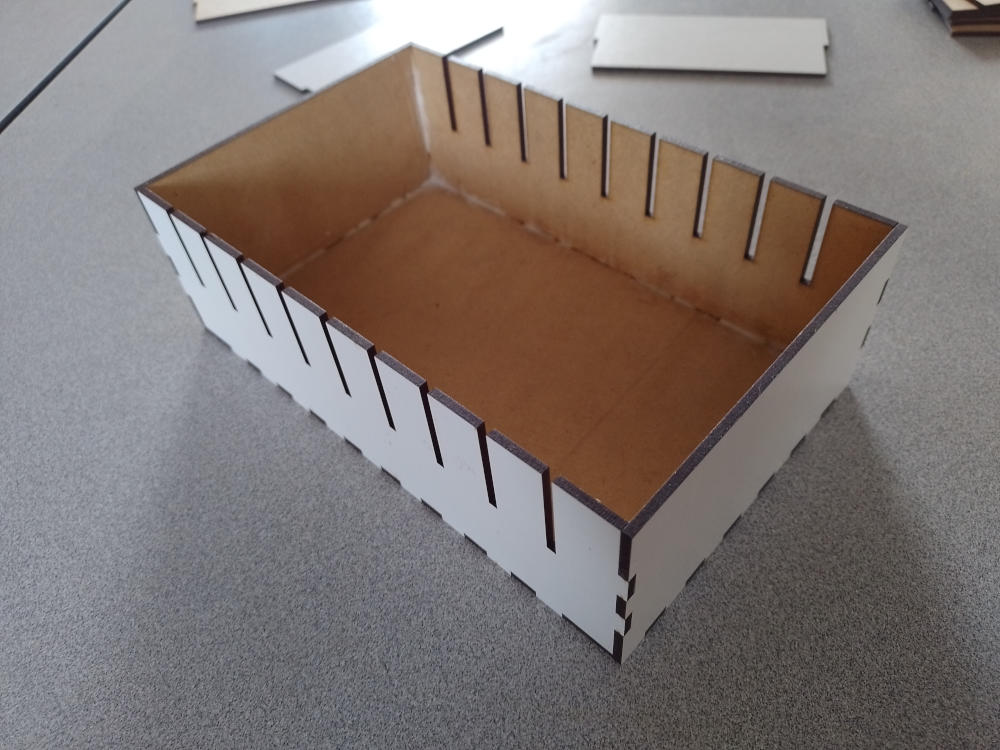
Glueing the outer walls and base of the box.
Adding the dividers to the box./p>
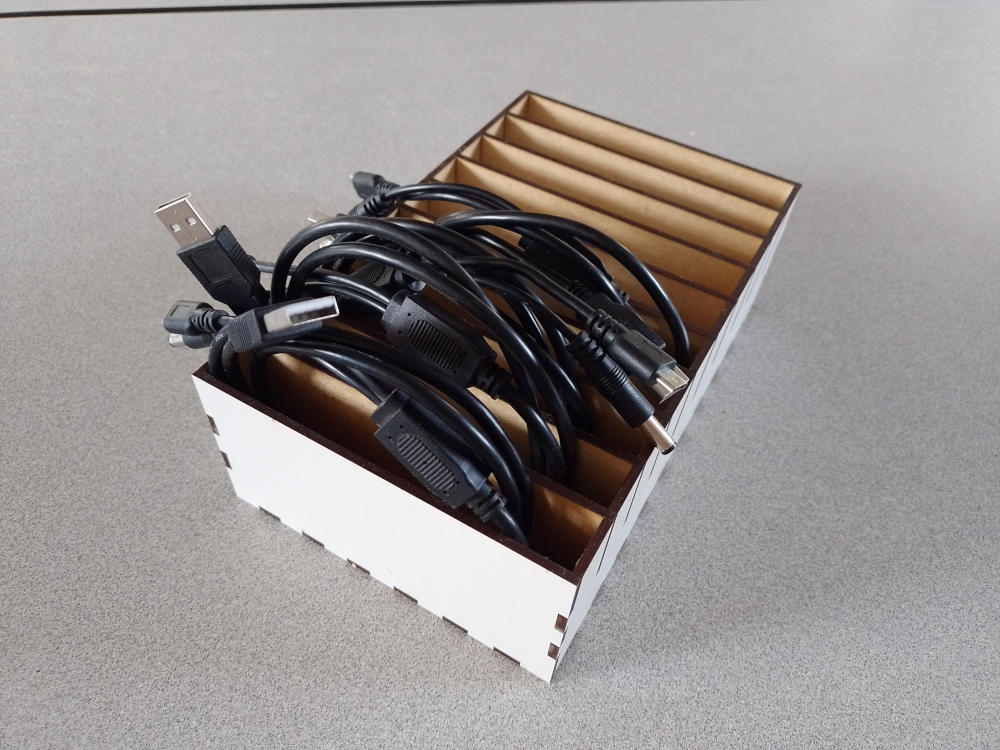
Testing the box with more cables.
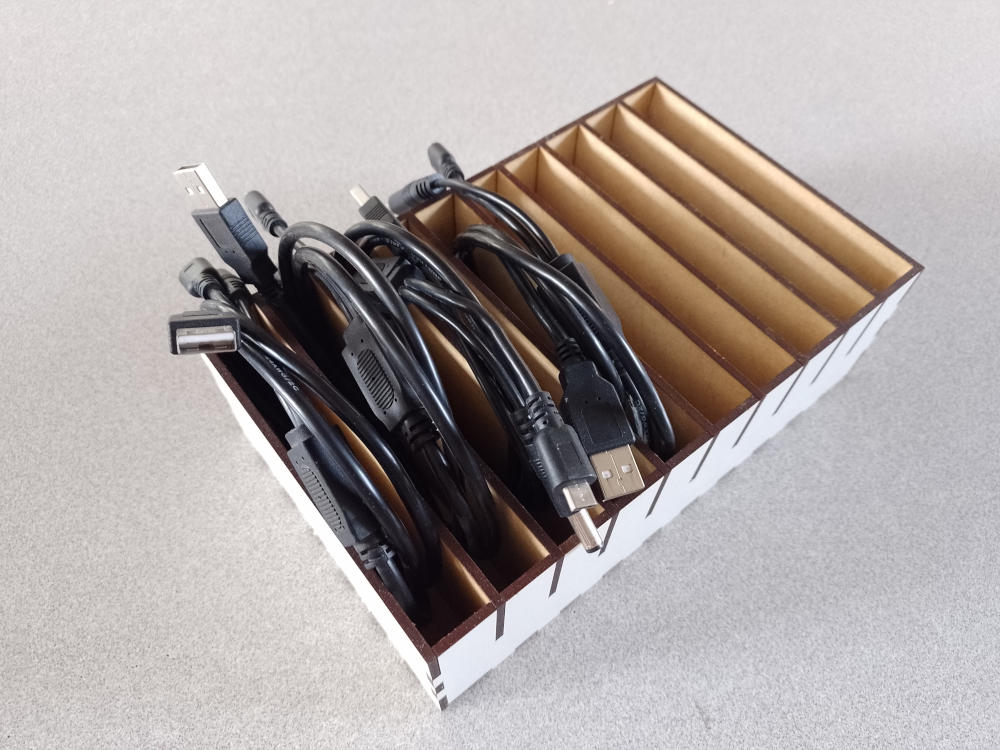
Cables fit perfectly...
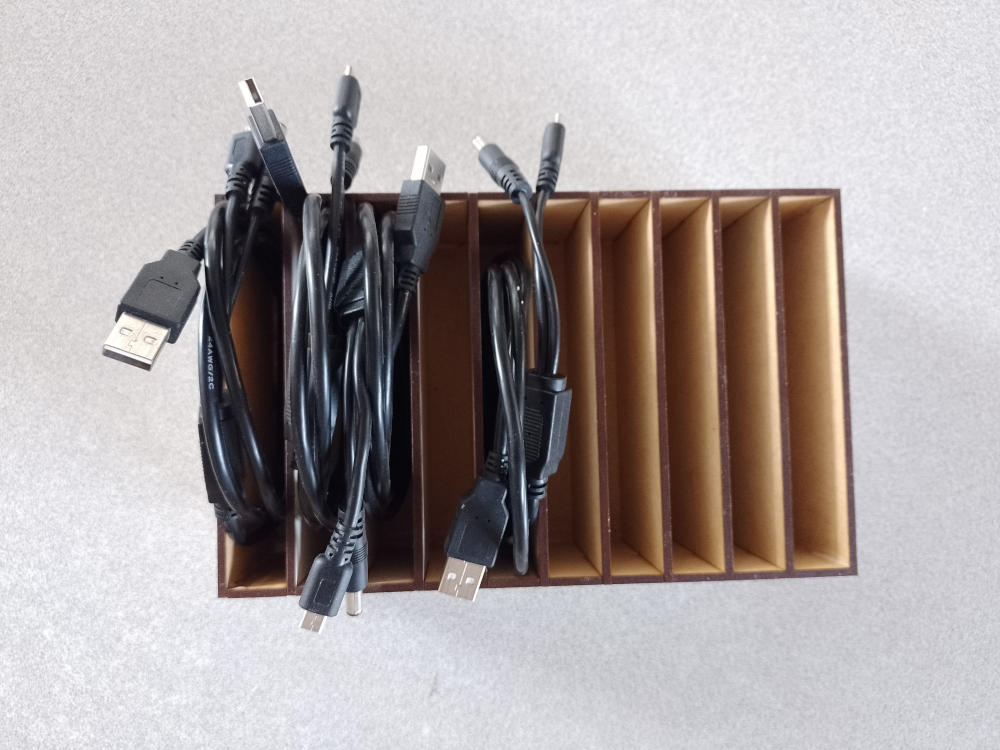
... and it is very easy to check if any is missing.
Relfection questions
-
How your press-fit can be utilized in education? How other teachers could use it?
It can be used as an example and reference. It shows that using simple tools and techniques (not just the software for making boxes but also the simple action of taking measurements) can go a long way and be the basis for creation. Starting form this simple model students and other teachers can begin to imagin how to extend the model, adapt it to any other material they want to use it for, or even create something totally unrelated from scratch, just because they see it as a simple and achievable task.
-
What has been your experience using Project Based Learning / Problem based learning in the past? What were the main challenges? How DF can support Project Based Learning / Problem Based learning?
I've have mixed results when trying to use PBL. The main challenge is trying to do it with some level of inerdisciplinarity. I think DF cand help by giving teachers and students tools that put them closer to the things they want to create as part of the solutions they develop (or want to develop). DF enables everyone to build something (almost anything) and get into the prototyping, testing and evaluating cycle faster.
-
When organizing DF activities with kids, What are the aspects that you think should be prepared beforehand? What aspects can be improvised?
I think you should always have a general plan laid out, even if you are in the disposition of changing it during the course of your classes. And examples and reference material that can help students find their way around the tools used in DF. Also, if you are guiding your students in the path of making "something", then you should make sure that said "something" actually works and can be made the way you are teaching. In other words, test it before handling it to the students. On the other hand, tthe actual products being built by the students can change and most probably will change, in line with student's ideas or preferences - a big chance for improvisation and experimenting lies there.
On the second week we explored making with sustainability in mind. We learned about biomaterials as an alternative to other kinds of materials and got to experiment with different formulas and methods of making our onw biomateials.
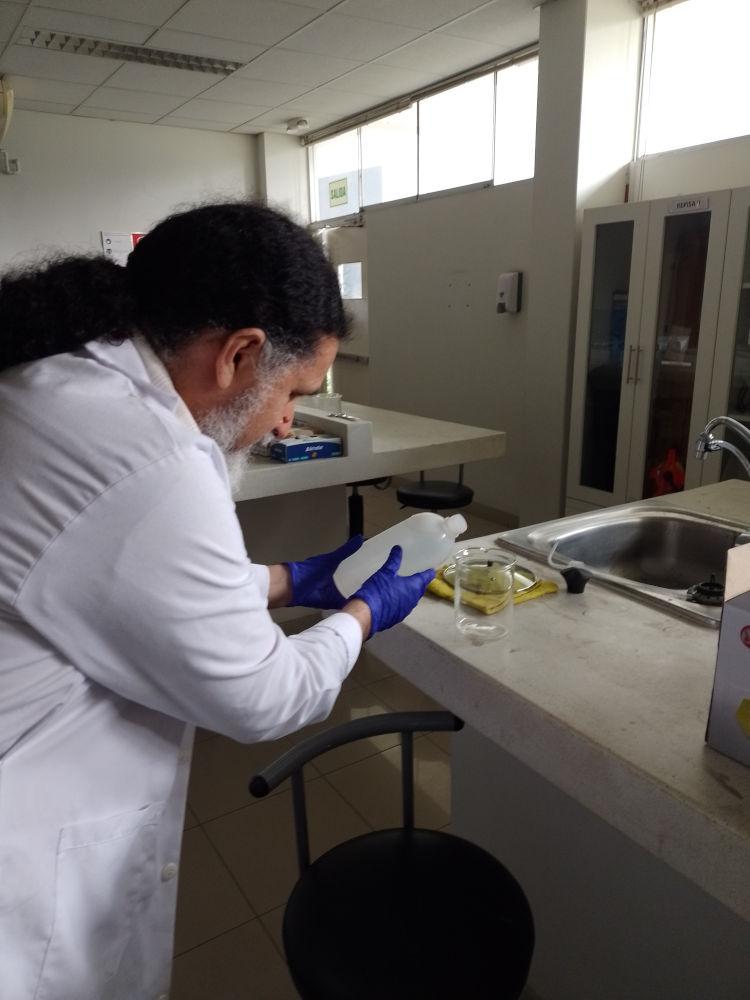
The activity - laser cutter, lab, white coat and everything!
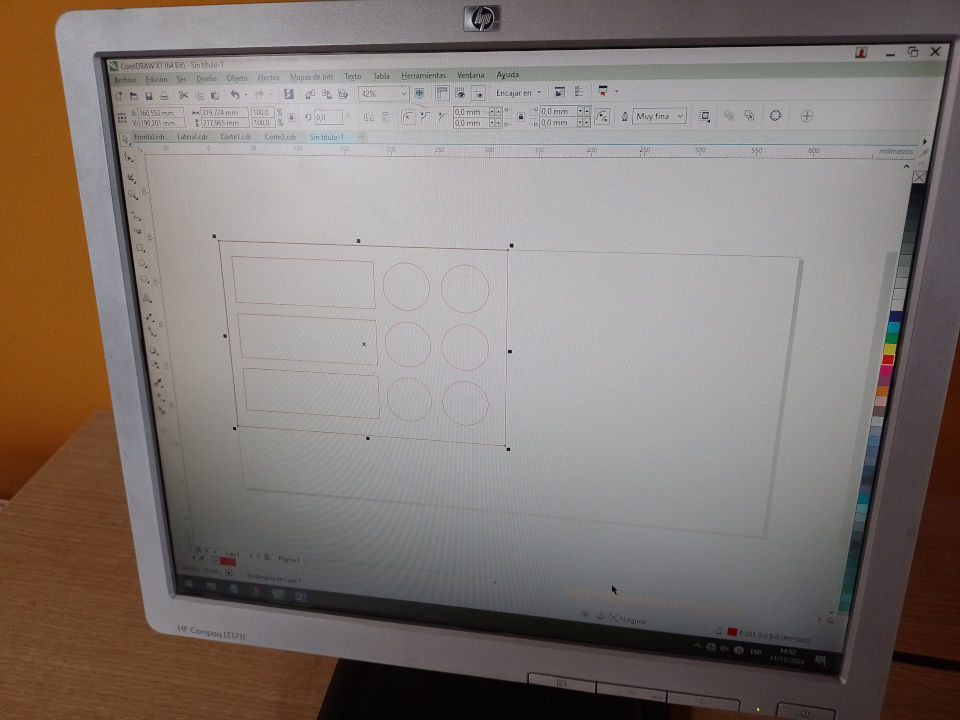
Preparing the mold in vector form
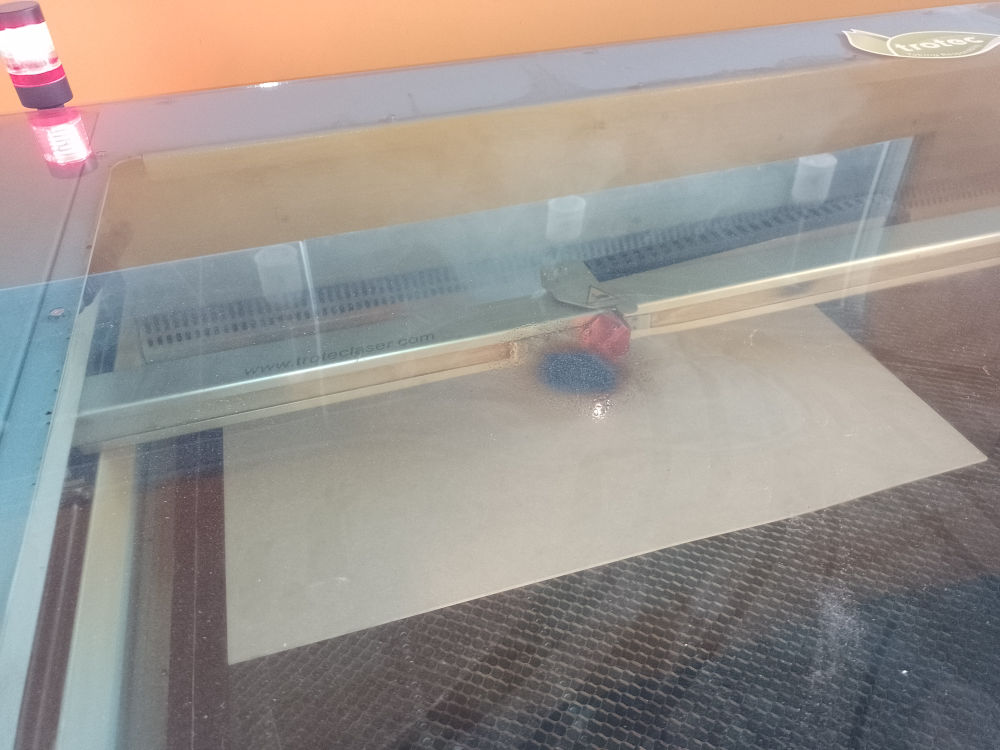
Cutting the mold with a laser cutter
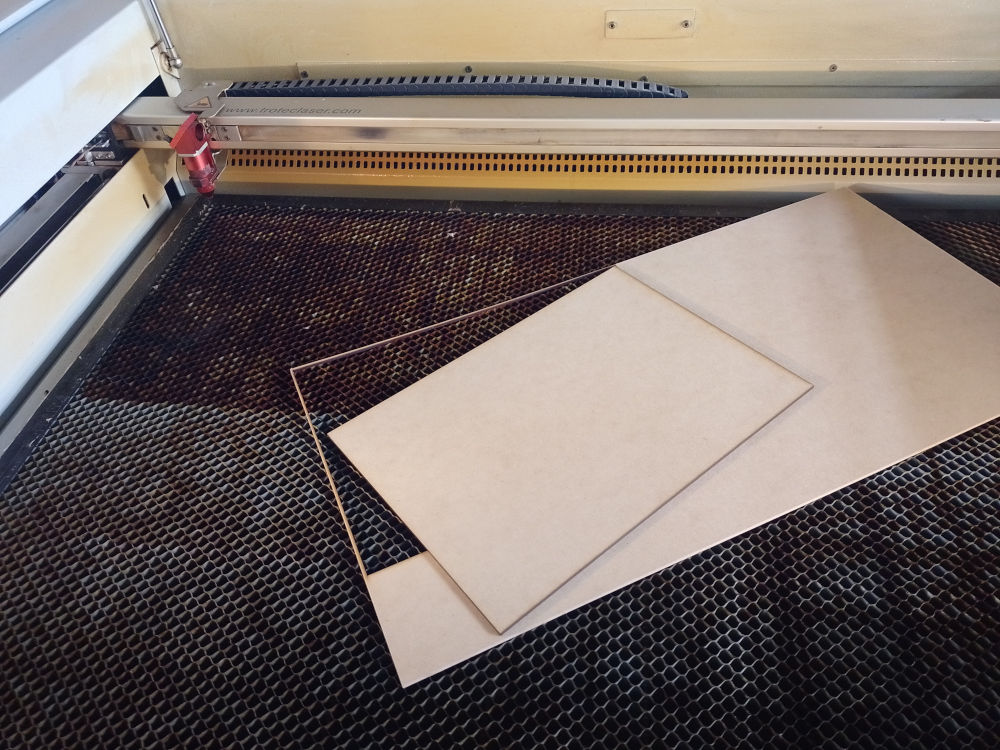
Removing the mold from the laser cutter
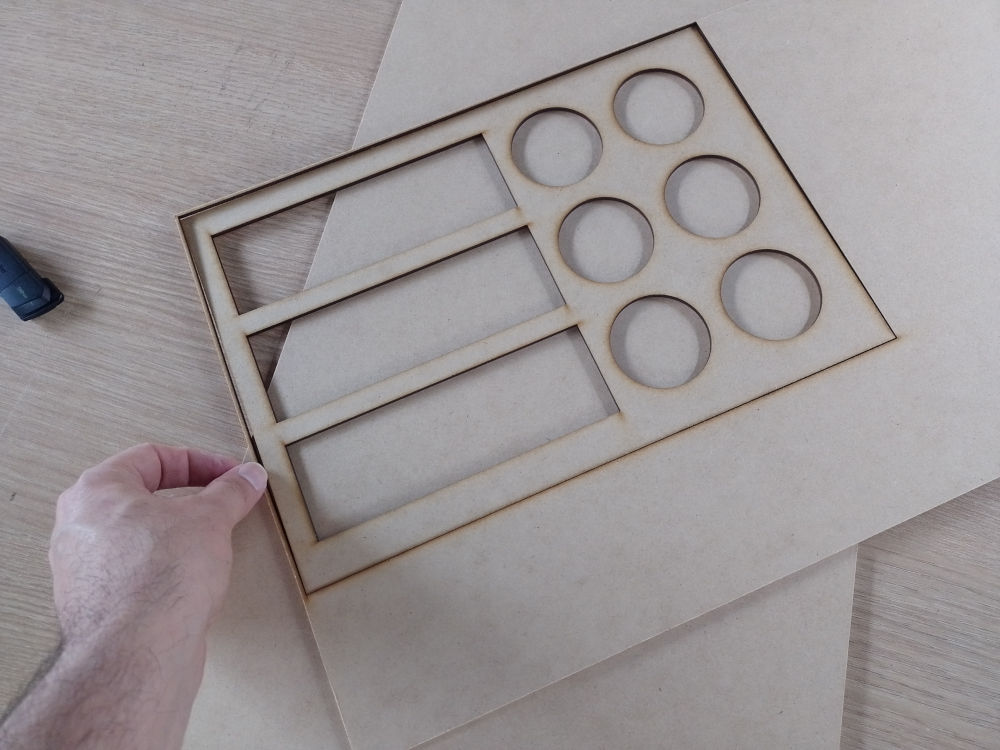
The mold
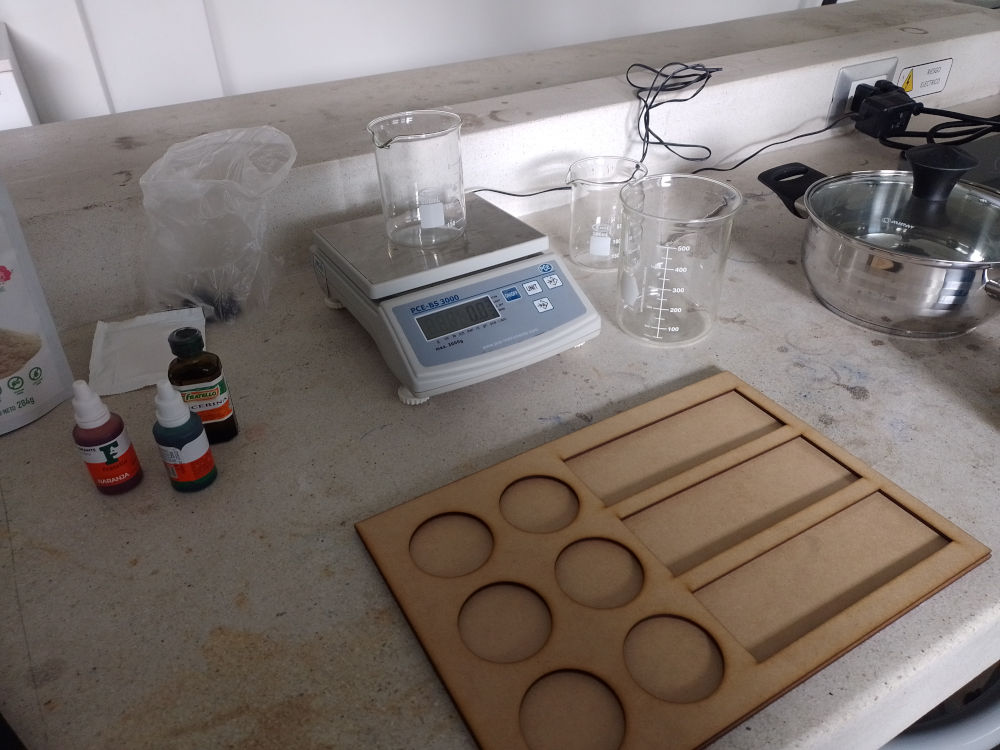
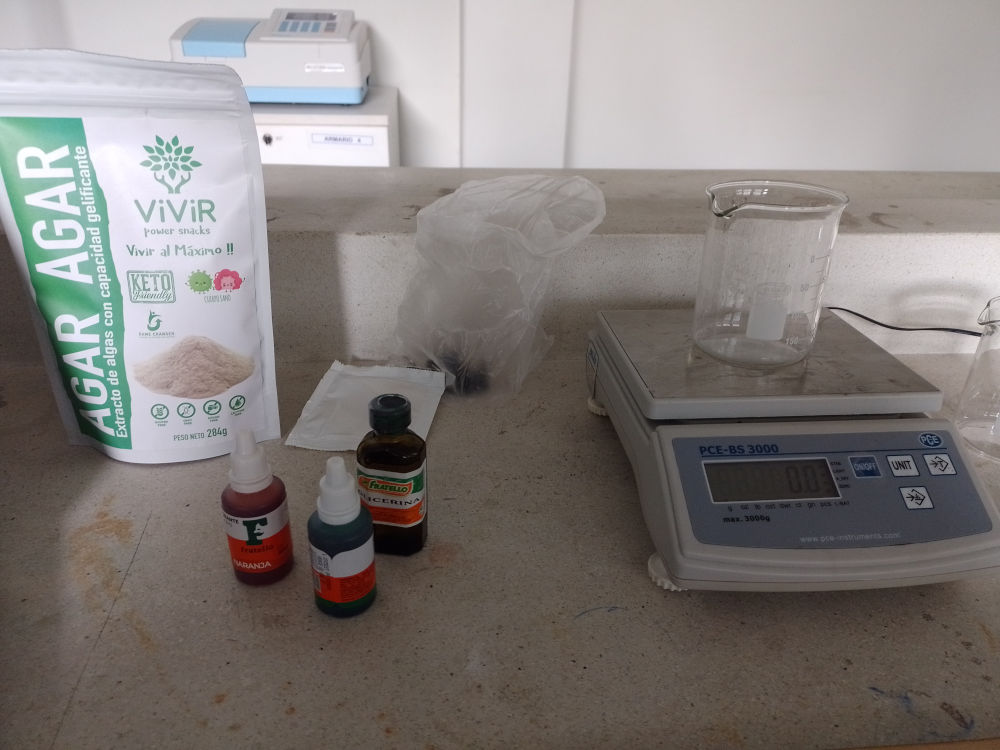
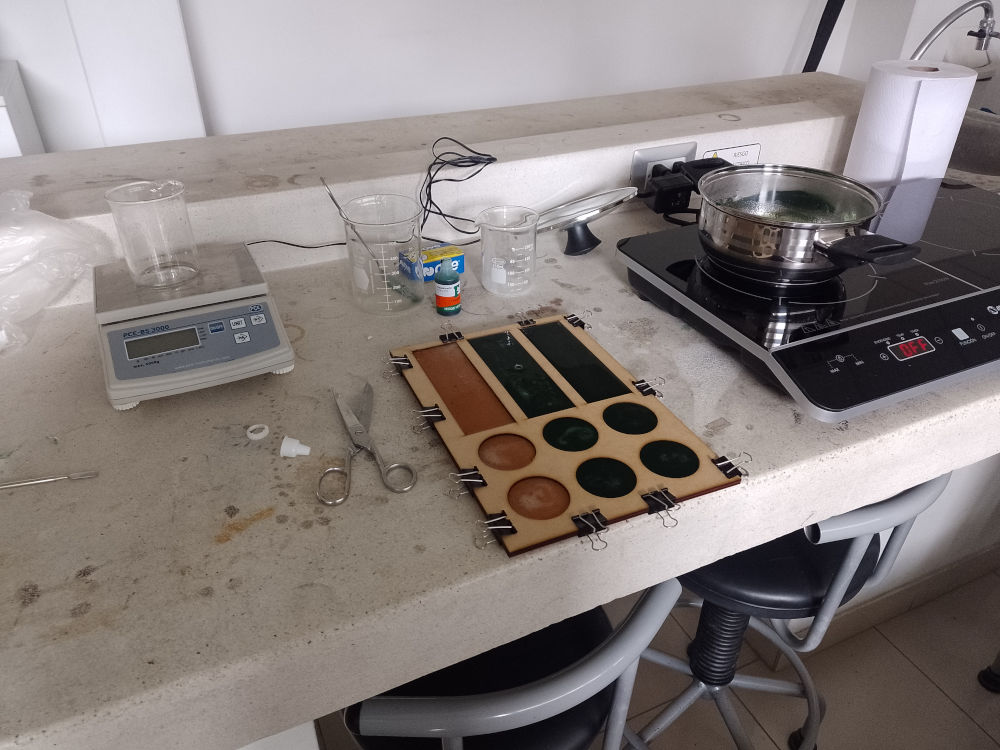
Preparing everything in the lab
Mixing the ingredients for the Agar-agar based bioplastic
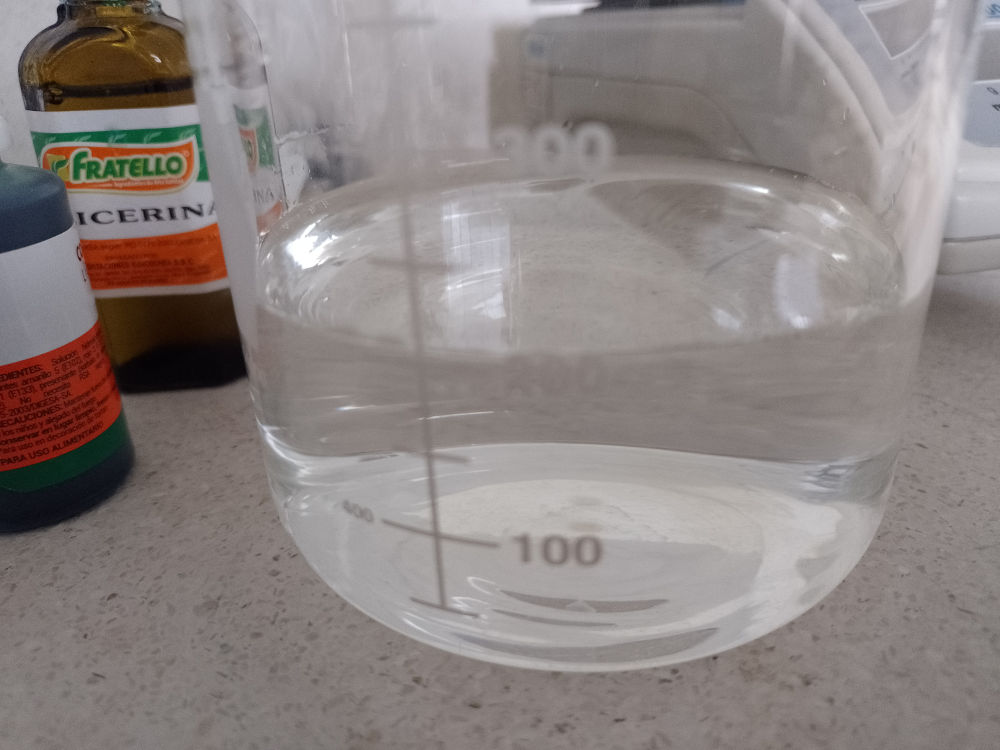
Water!
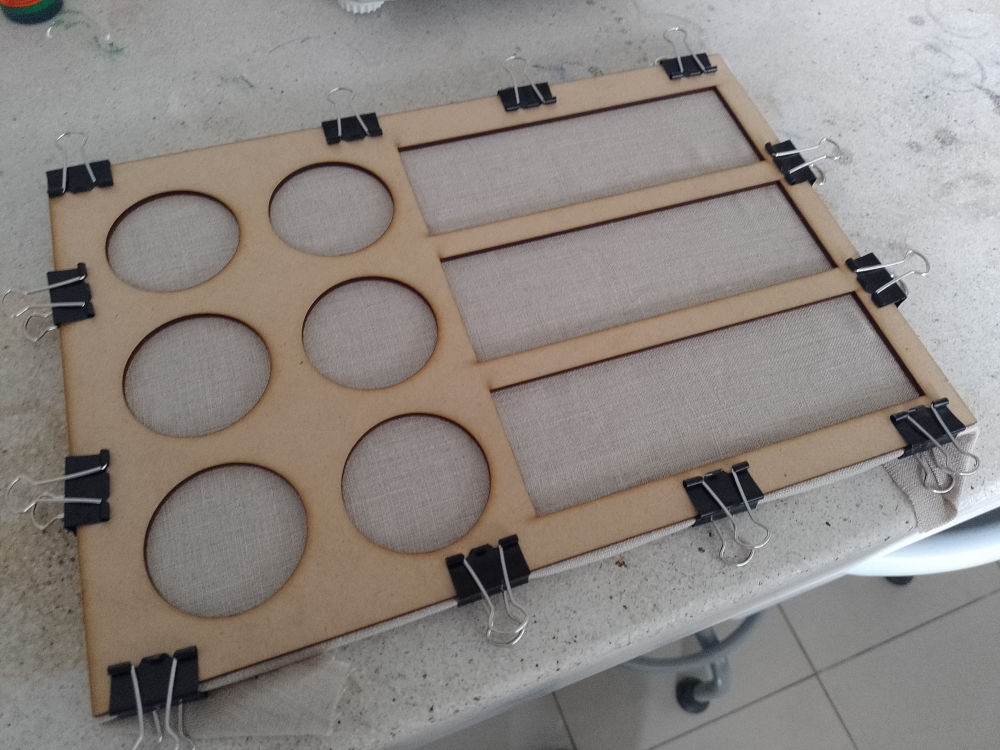
Assemibling the mold
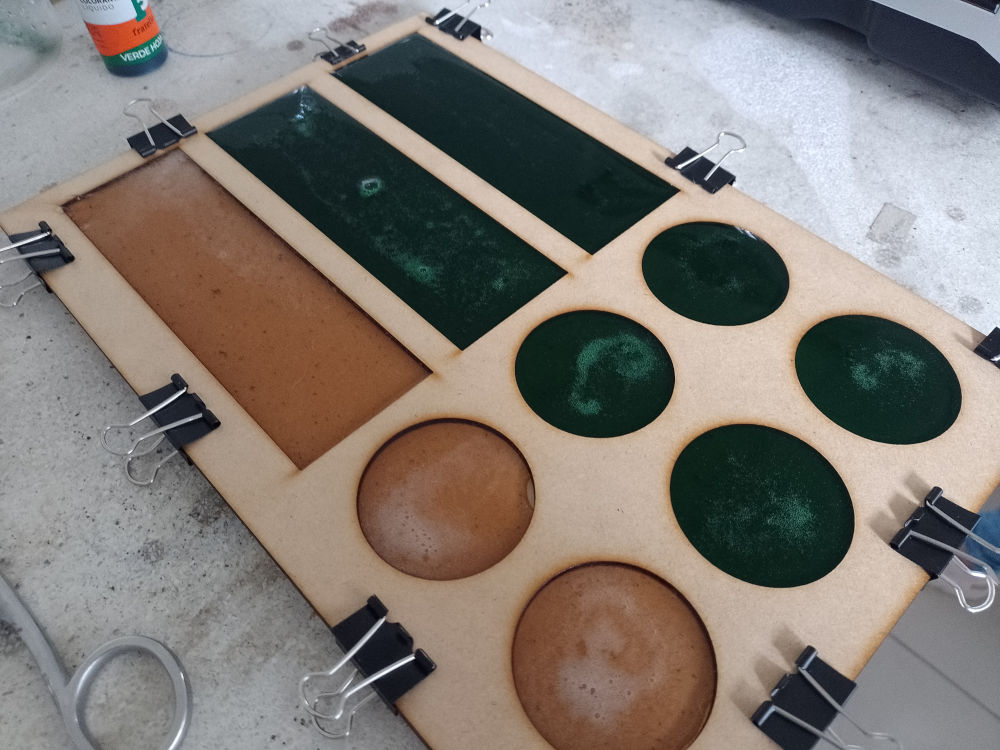
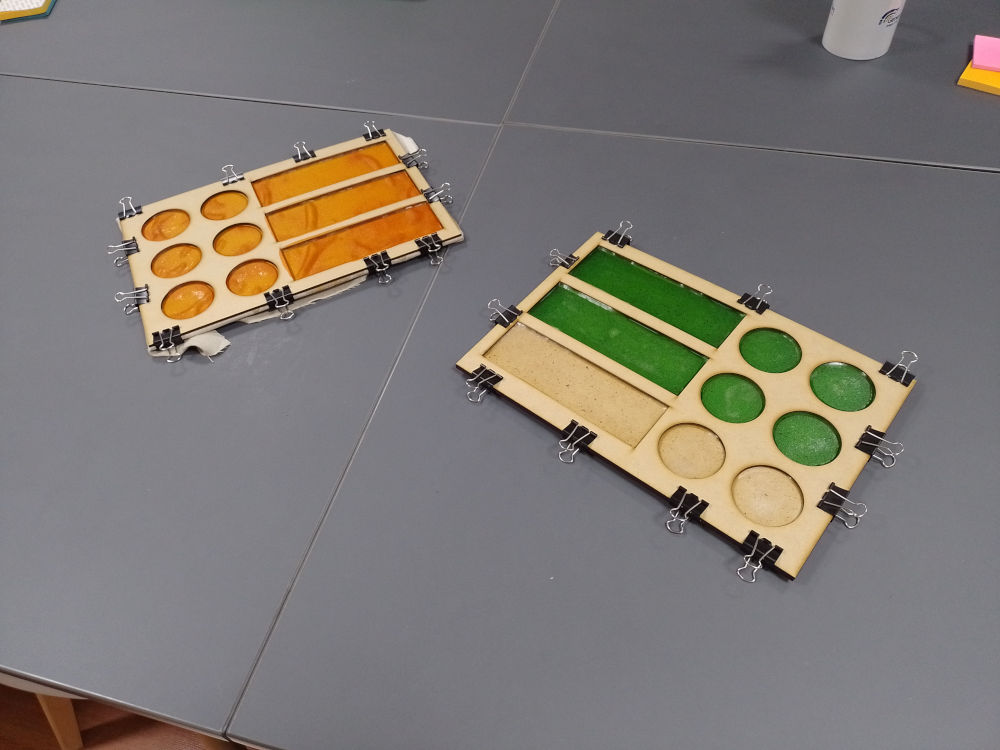
Pouring clear and green liquid bioplastic into themold
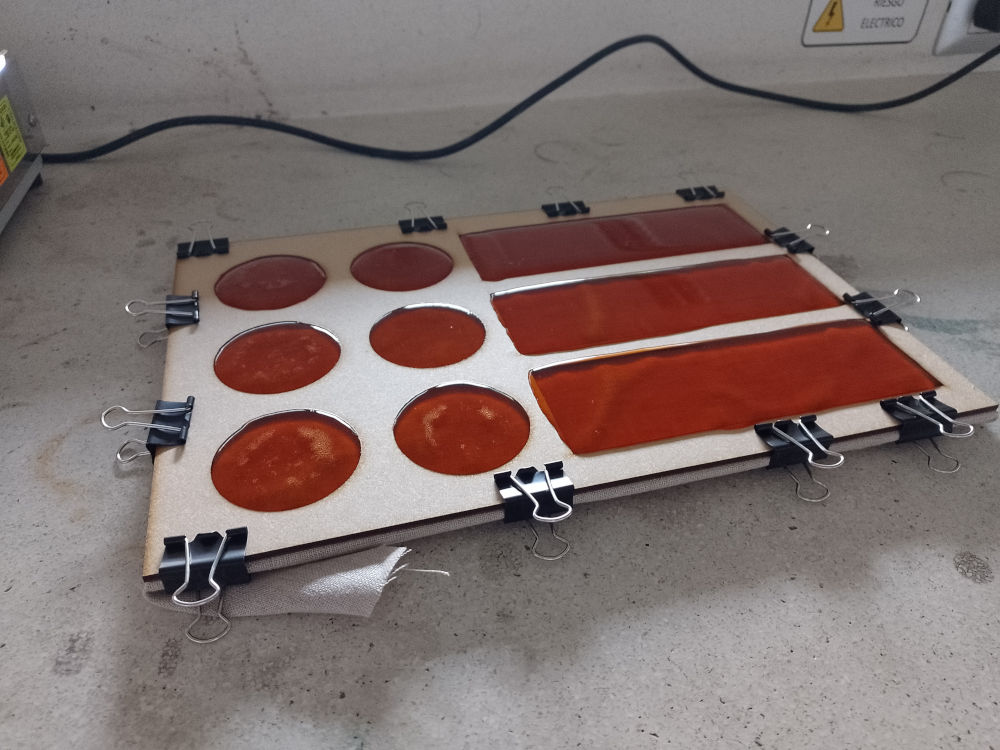
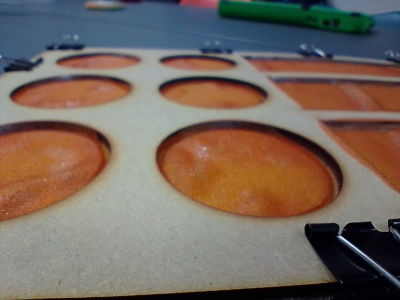
Orange bioplastic in mold
Time to wait for the bioplastic to dry (for several days)
Once the bioplastic is in the mold, one have to wait for several days for it to dry enough to be ready for removal.
We prepared 2 different formulations, varying the amout of glycerine introduced in the mix. We also usad two different "coatings" for the mold, one with the bottom covvered with fabric and the other without any cover at all.
After more then a week, the material seems to be ready for removal.
Ready to remove bioplastic from molds
Volume of the material has reducen significantly
Separating the two parts of the mold
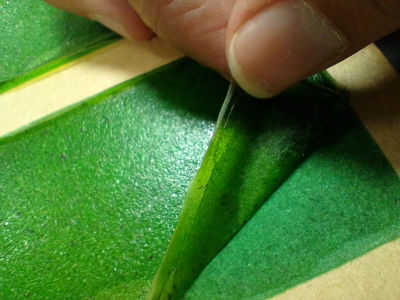
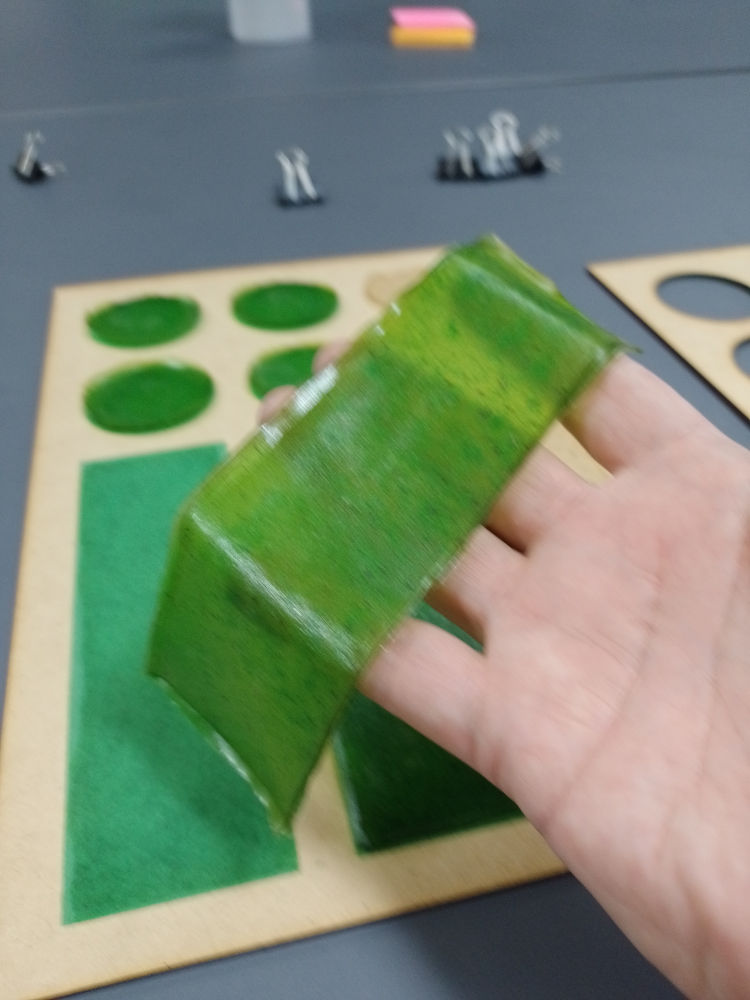
Peeling off the green mix of the bioplastic
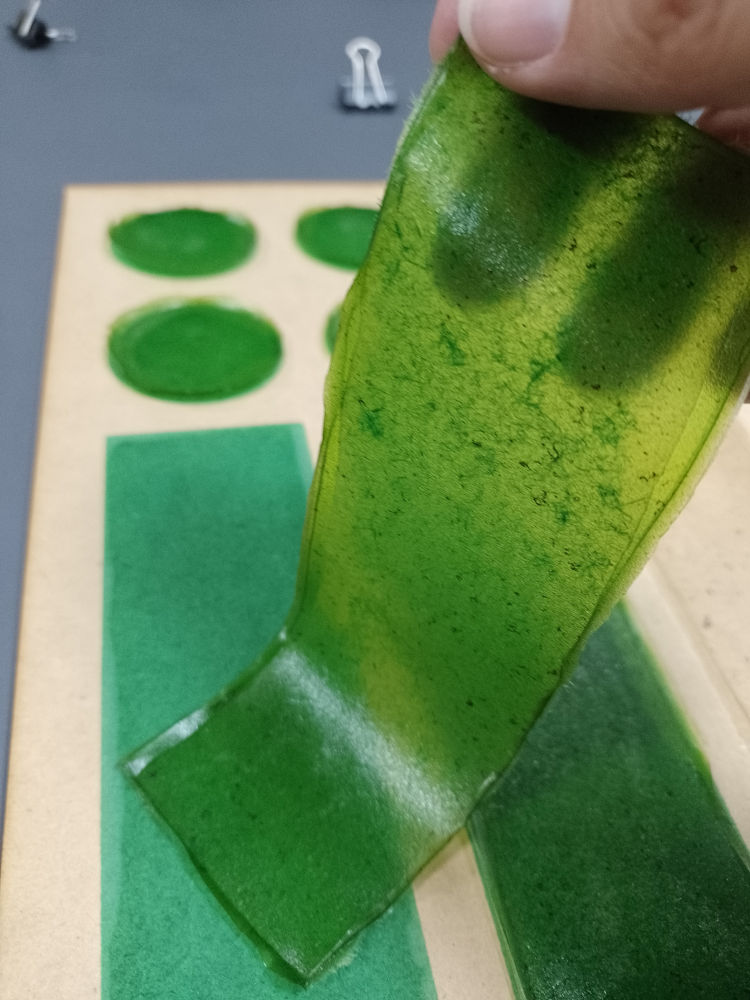
Small parts of the mold got in the mix
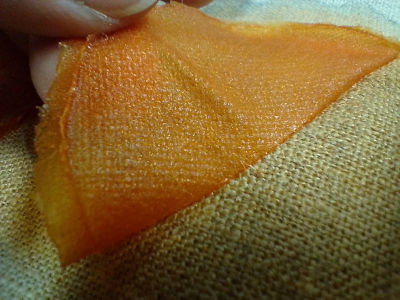
Taking the orange mix off the piece of fabric
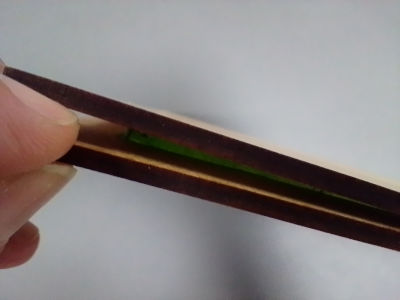
The bioplastic shows exhibits some transparency
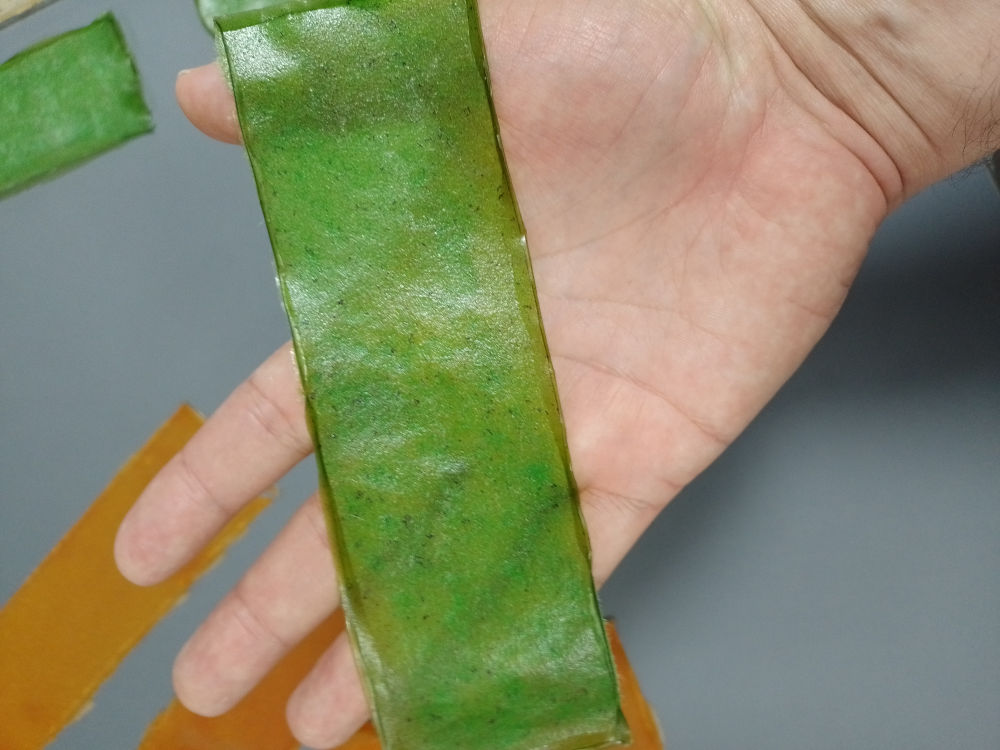
See-thru plastic - green mix
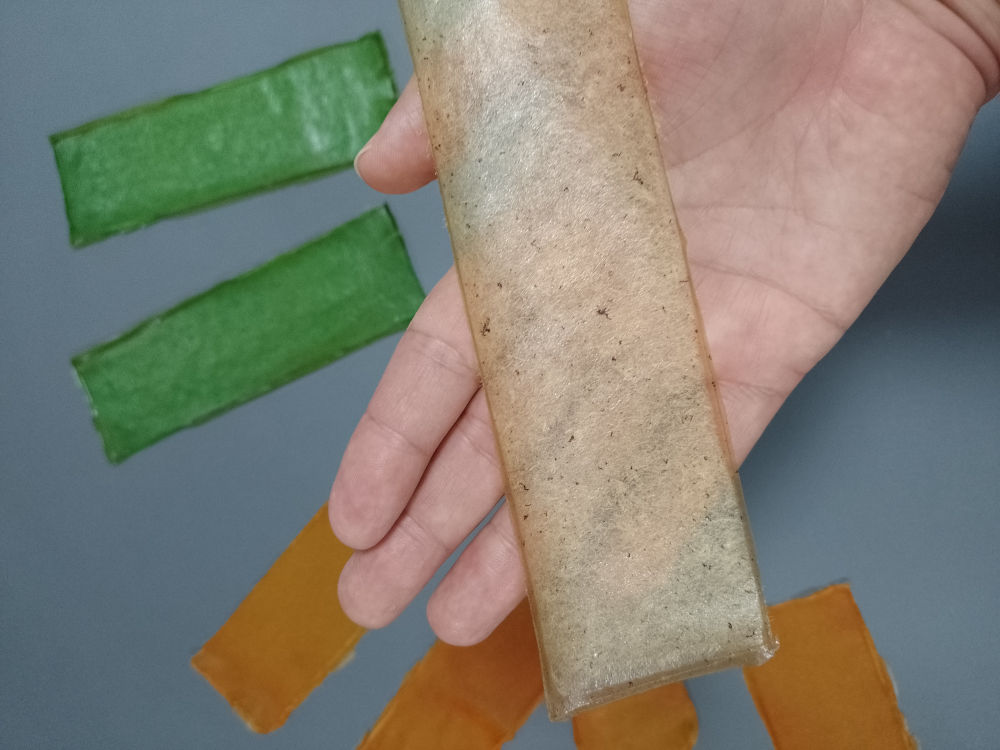
See-thru plastic - clear mix
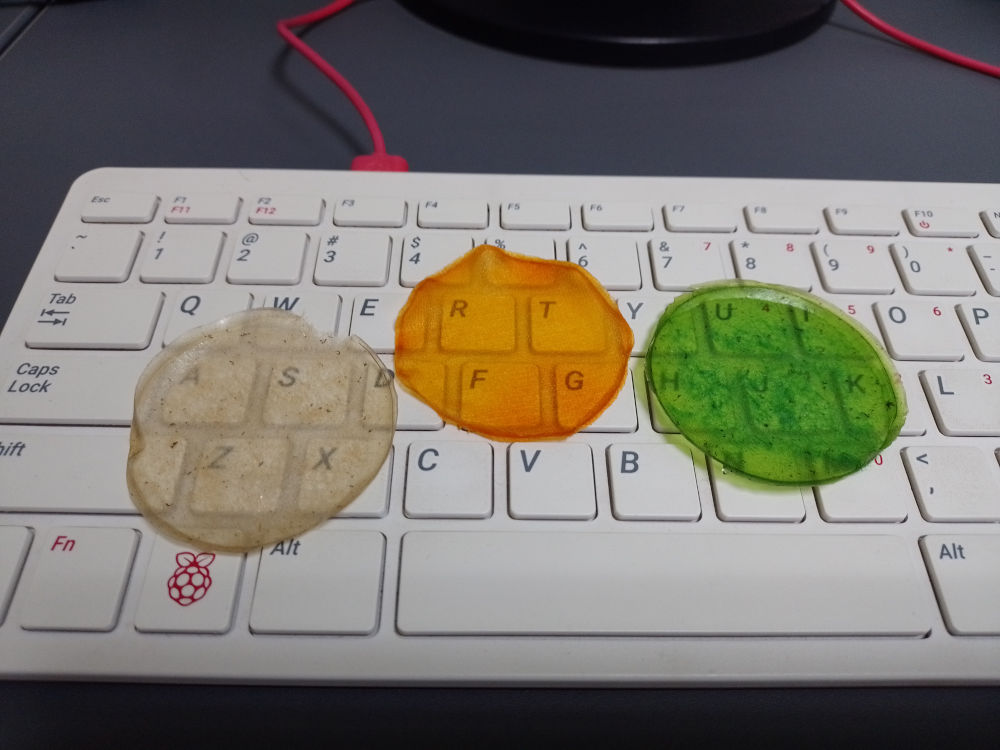
Three different versions, three transparency levels
Reflection questions
-
Have you considered sustainable practices in your teaching in the past? How? What aspects do you think should be improved in your own teaching environment? / How Digital Fabrication might support sustainable practices? When using Digital Fabrication what actions you can take to support sustainable practices. / Do you think your school is ready to a change in mindset? Why? How can you get support from other stakeholders? How would you structure a training for teachers?
In one way or another I've always been aware of the need to include sustainability in my own practice. For example, the last few years I've been pushing a project to turn our Makerspace into a solar powered one, and now we are very close to doing it. The idea is that the space will be not only a place for fabrication, but also a place where students can witness the impact of such a system, and teachers of other areas can use it as a point of reference. I also encourage the use of reusable material for the things our students build, and in the future I'd like to get into recycling of plastics for 3D printing. I'm also planning to introduce some other teachers into biomaterials, and see what we can come up with in a collaborative way. The school has been very supportive and is open to change and improvement.
For the third week's assignment we were asked to create a 3D object with a 3D printer. This 3D object should provide some support for our class or some of our teaching lessons.
I decided to create some things to help me organize the devices I use on my classes, specially electronics boards but also tools like screwdrivers. In my class I have 30 micro:bit boards, 30 Reka:bit boards and an assortment of sensors and actuators so I really needed a way to keep everything under control.
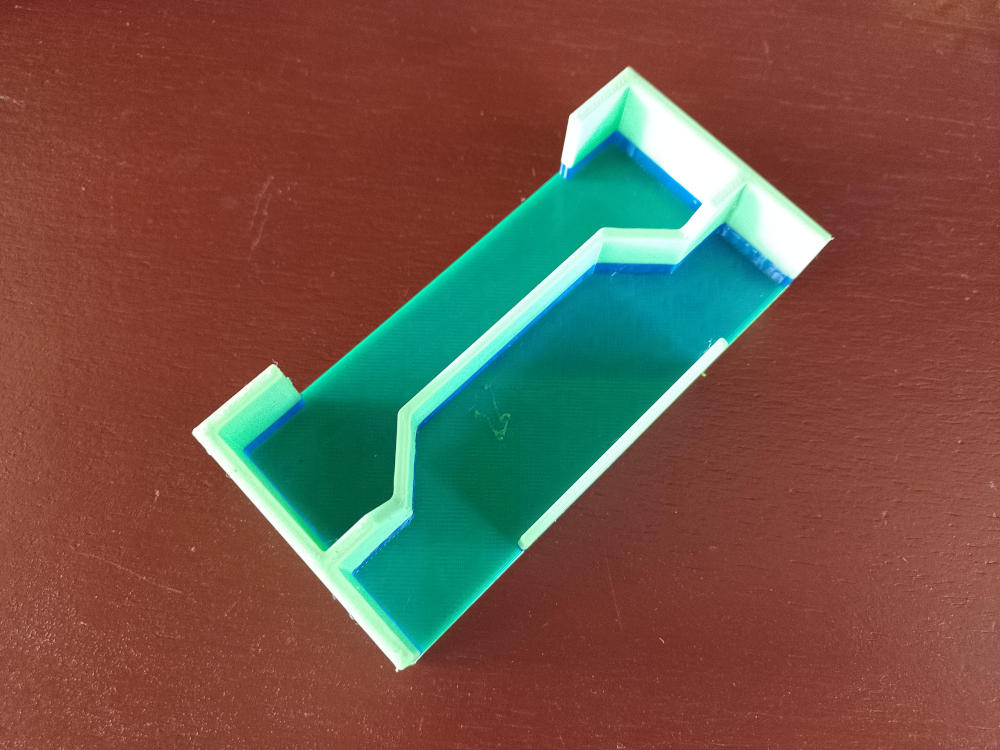
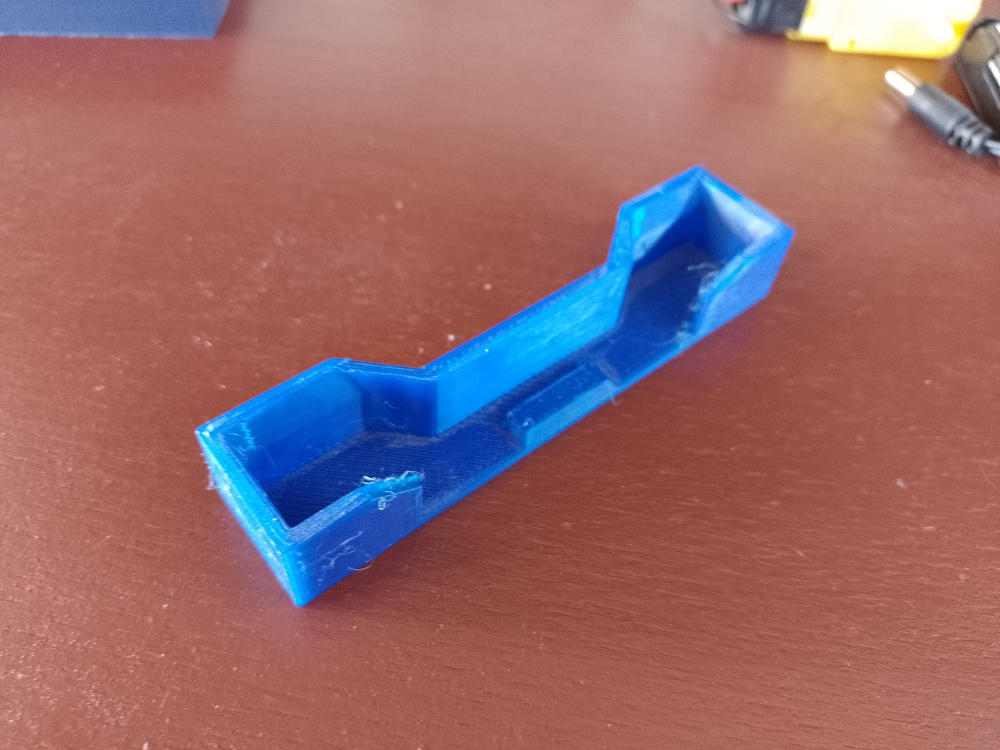
I started modeling a carrying box for the Reka:bit boards. I took some measurements of the board and created a dummy of it in Tinkercad. The idea was to use that dummy as a guide to model the box around it. I wanted a box to accomodate at least 5 boards at a time and have them standing on the box. The box should be designed in a way that the boards should be easy to retrieve and replace.
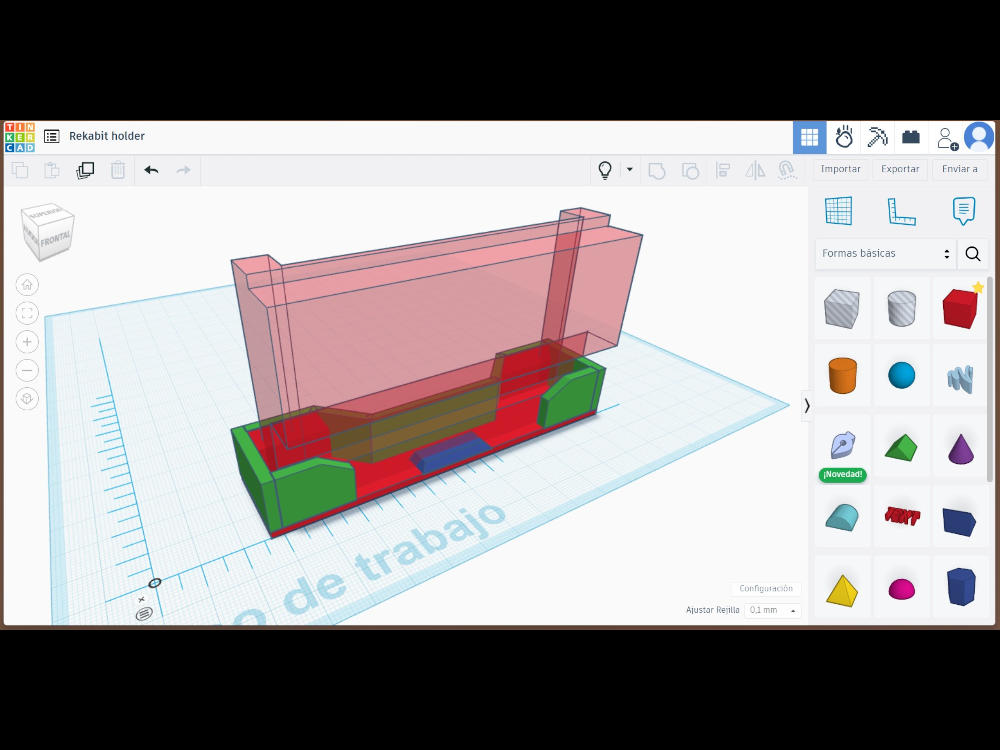
To make thing easier I modeled a slot for just one Reka:bit board. Once I have that working it should be easy to duplicate that model many times to build a larger case. I want through a few versions of the case. The first ones were ok, but didn't make the boards stand vertically. The final version has a small bump on the bottom side to help the boards stand on their own.
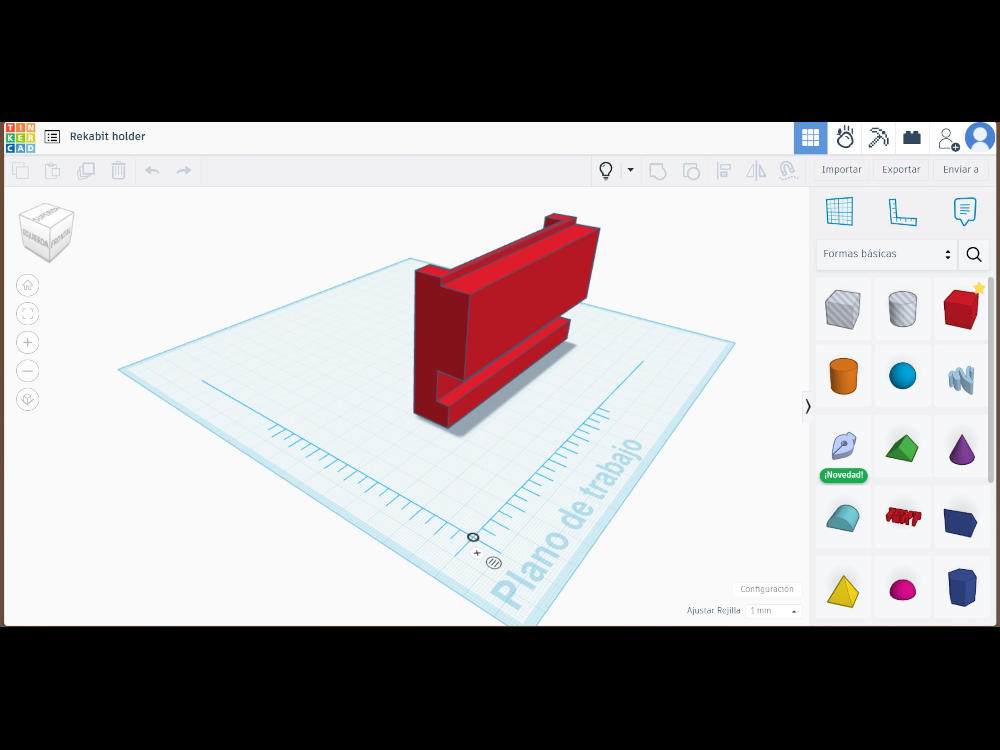
Reka:bit dummy in Tinkercad.
Modeling around the dummy model.
Early prototype...
... but the boards wouldn't stand straight.
Another prototype.
Better, but not there yet.
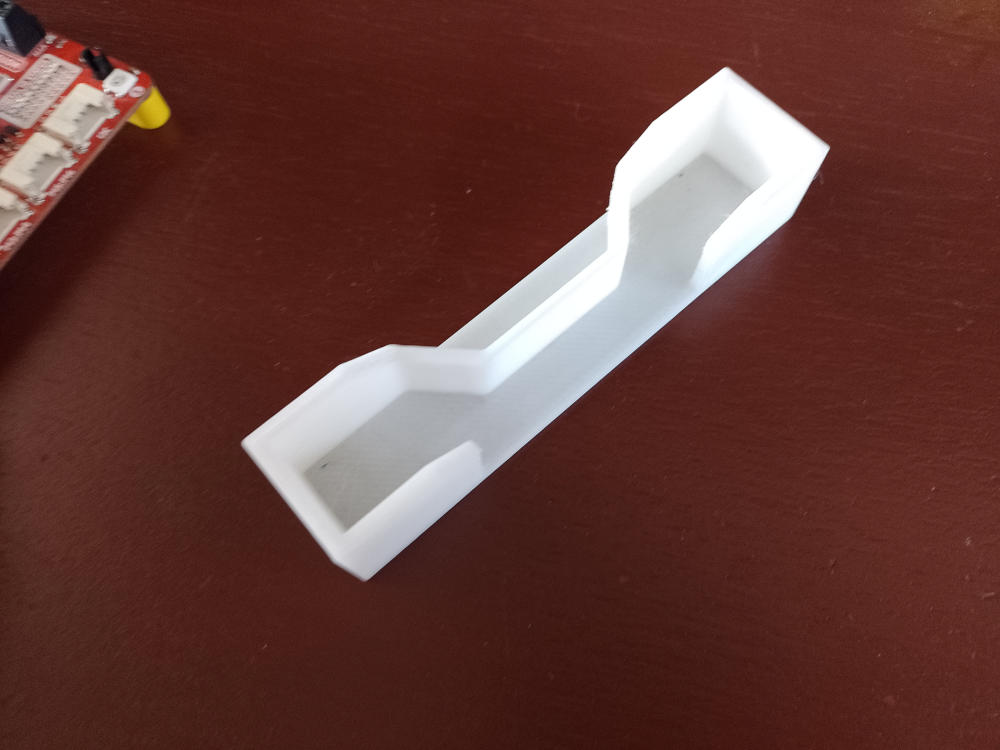
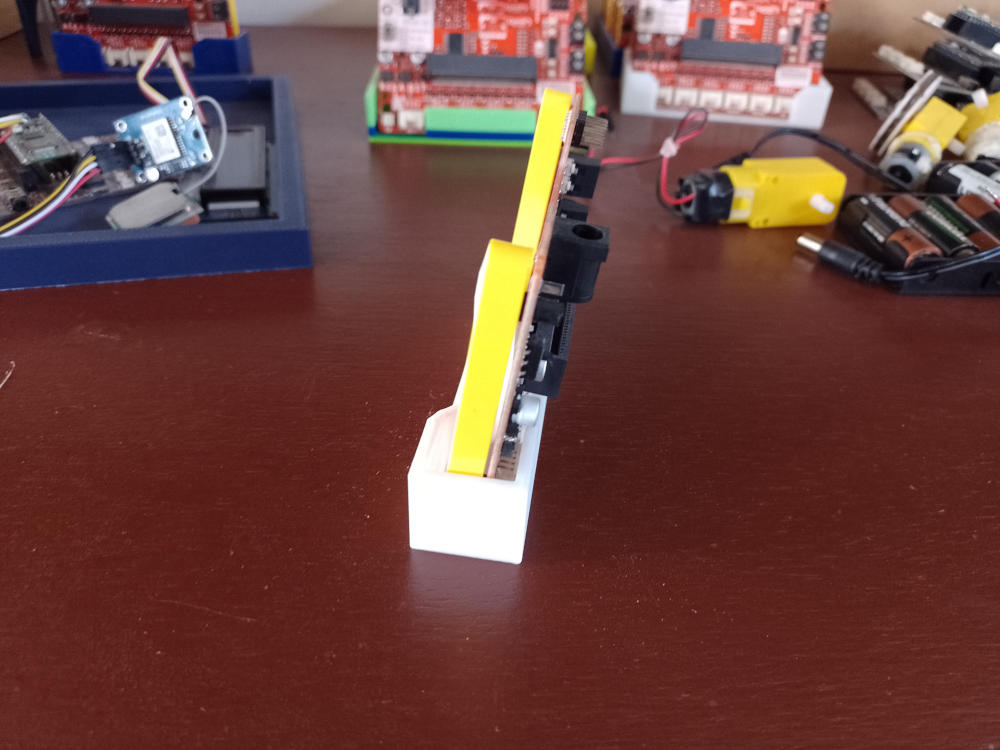
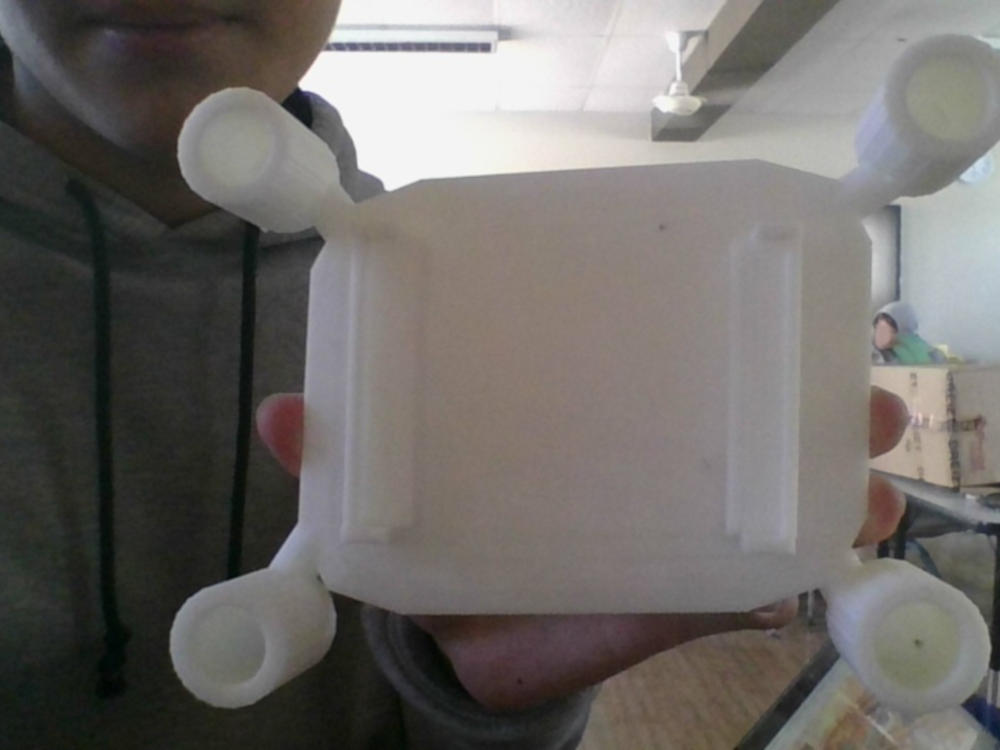
The final version.
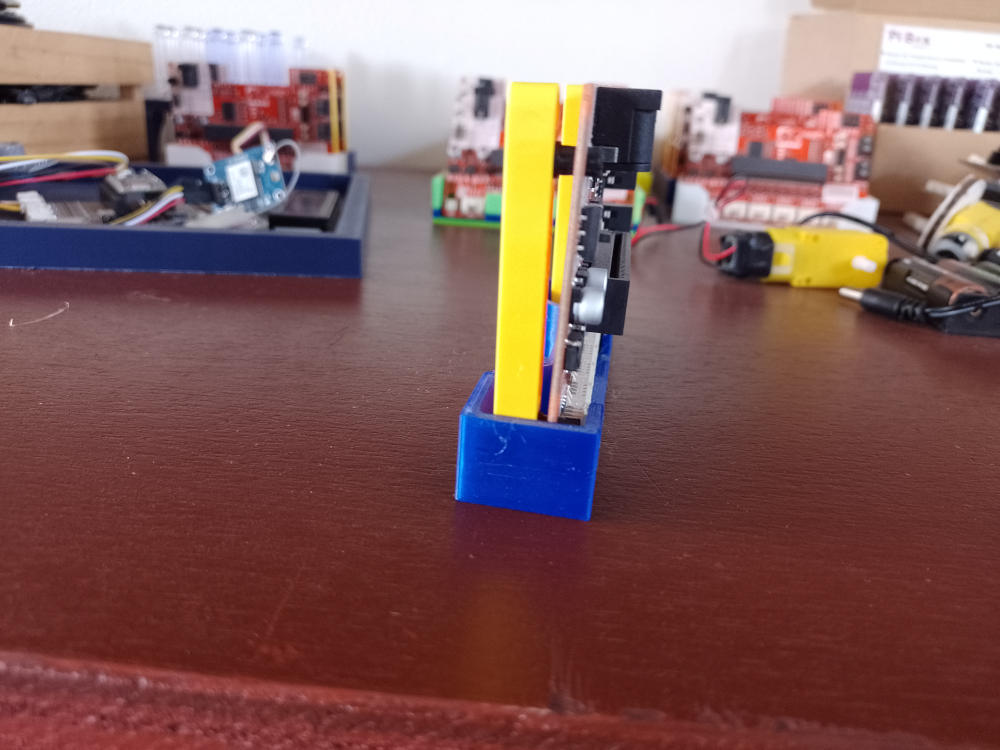
Perfectly straight!
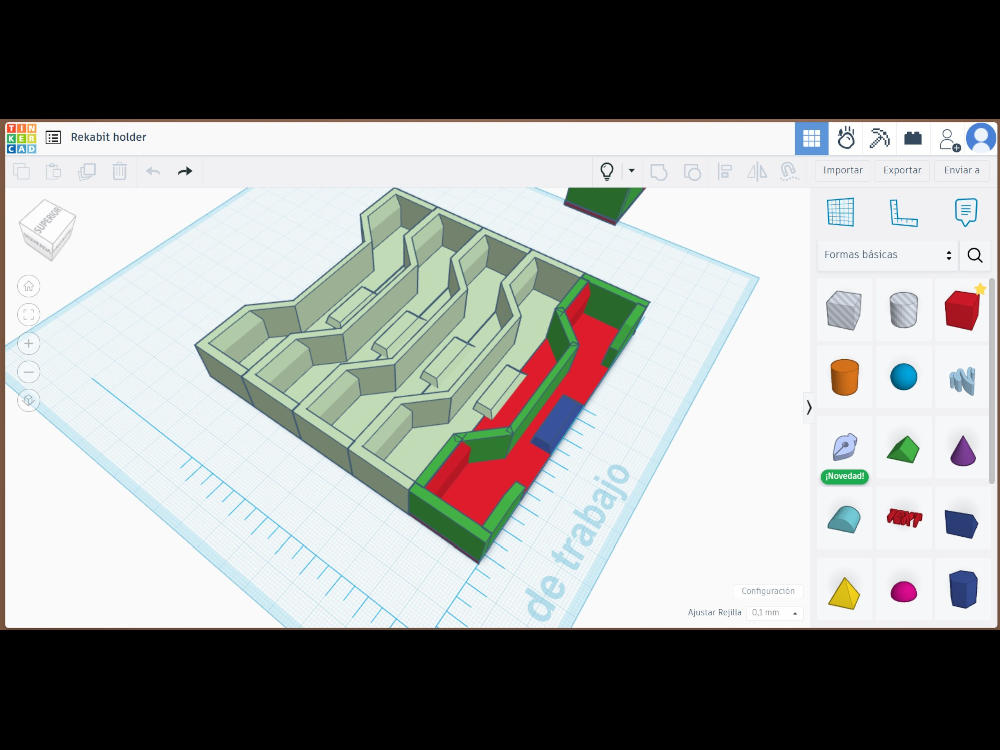
Copying the final model to build the complete case.
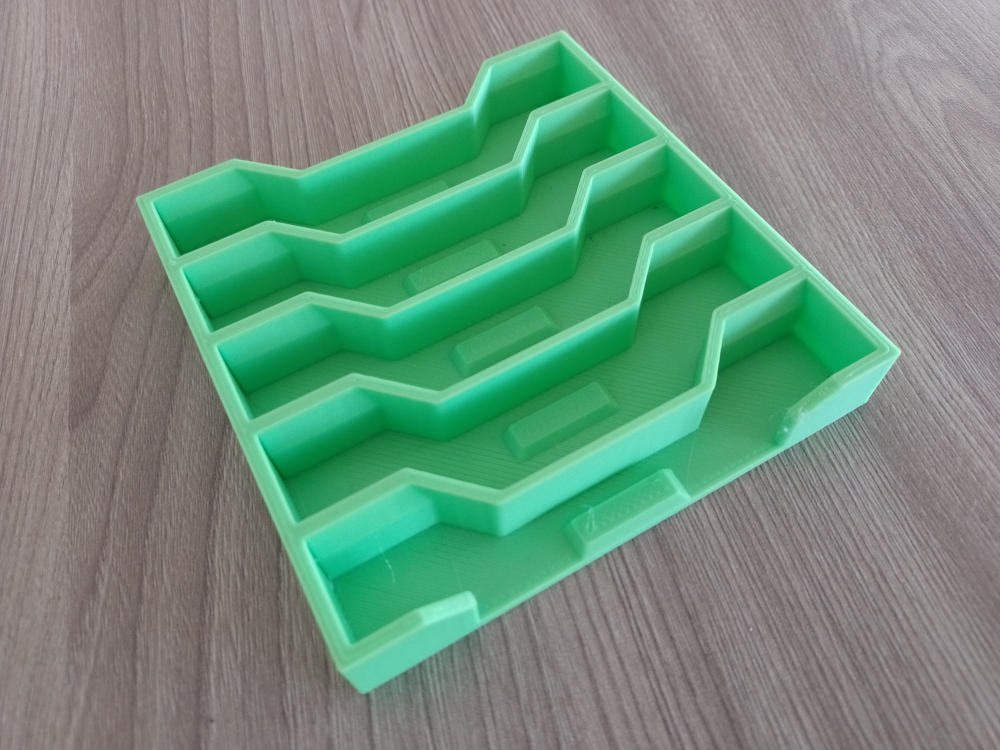
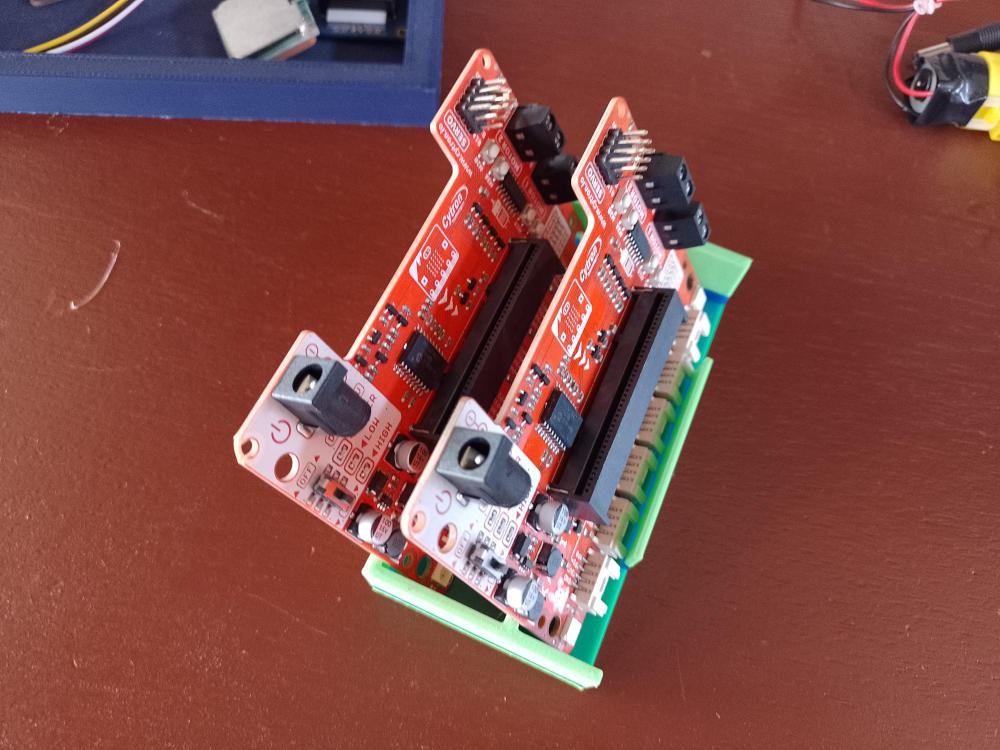
Carrying case with slots for 5 Reka:bit boards.
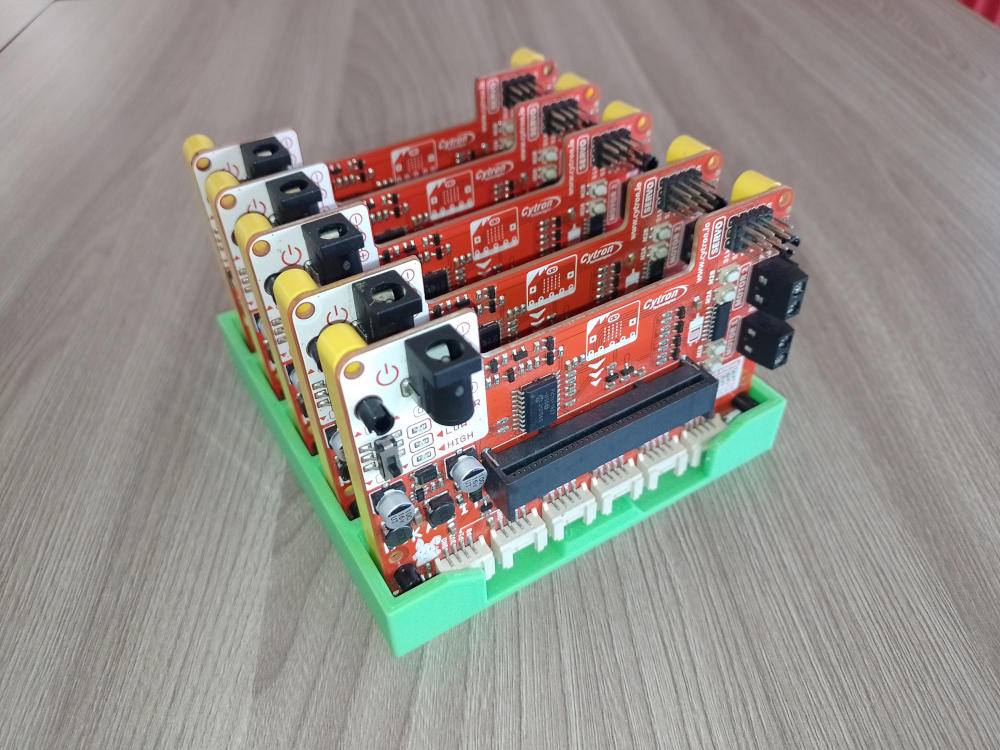
Just what we were looking for.

Everything looks nice and tidy now.
Everything went perfectly and now we have many of these cases printed for our different labs. It makes easier to carry the boards around, and store the in the cabinets. I also took the chance to design and print a small holder for the screwdrivers that come with the boards.
Reflection questions
-
Are you planning to use the fabricated object in your classroom? If so, how?
Yes, totally! In fact, I'm already using it and it works just as intended.
-
Think on a learning activity involving 3D printing. How could it be aligned with your curriculum / standard? What are the challenges?
Digital fabrication is part of the tools and techniques we try to have our students using as part of the projects we make in our classes or as part of the collaboration we have with our colleagues, so 3D printing, as part of those tools, is totally aligned with what we already do.
-
Have you started an educational portfolio? Why or why not? In your opinoin which are the advantages of having these education portfolios? How do evaluate success a learning activity and how do you keep track of possible modification/improvements ideas?
Not really. Until now all my work, projects, lesson plans and everything reside on my school's cloud and I often revisit it to check the work I've made and see how I can improve on it. Much of these work is shared between collleagues of the same area and we use to build these experiences together, so I guess that is part of the evaluation we do on our work. Now that I've learnt about these kind of tools (educational portfolios) I might consider starting one - maybe ScopesDF is a good starting point?
For the Field Activity we were asked to design a lesson on a subject we teach that include students engaging in the digital fabrication process. The lesson plan must include one of the following digital fabrication processes: vinyl cutting, laser cutting and 3D printing.
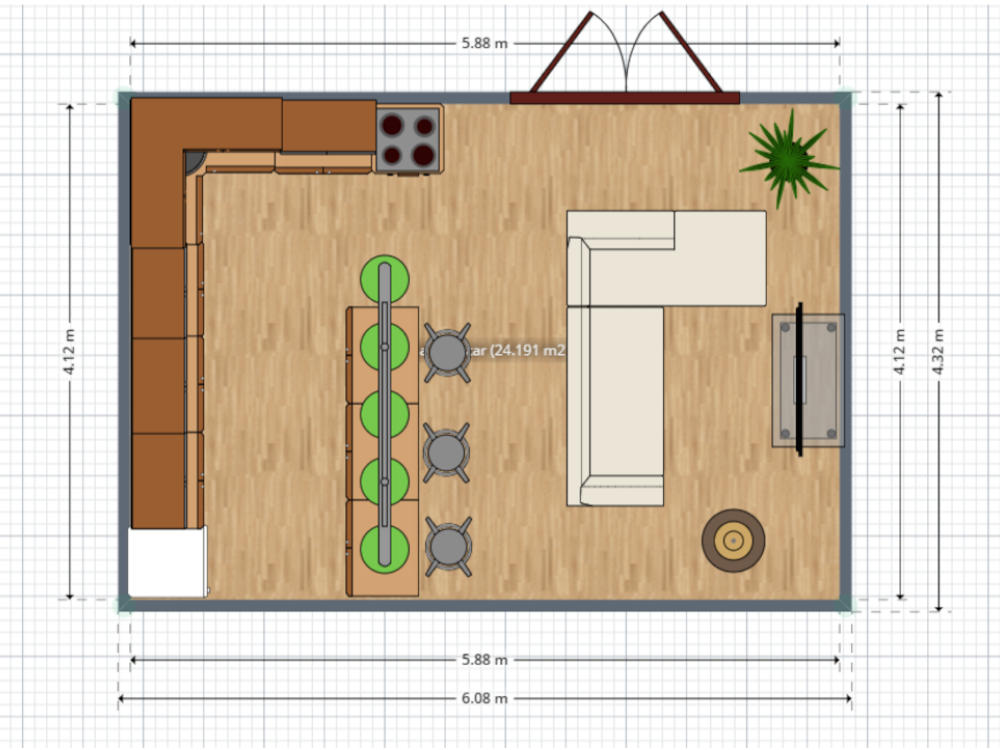
For this activity I chose to design a lesson plan based on an activity I had a few years ago. I introduced my studnets into the world of robotics and automation by asking them to create a model of an automated space or a mobile robot. The first step for the activity was to investigate about domotics, robotics, sensors and actuators, and decide wether they wanted to build a robot or an automated space. After deciding on what to work, they were asked to use Tinkercad (or any other CAD software of their liking) to create a 3D version of their models, taking into account the electnroics they wanted to use, their placement and sizes and they way everything would be connected together (wiring). Finally, they had to decide what tools, materials and technologies they wanted to use to build their models. They were presented with the different options we had available And one of that options is of course 3D printing, and many of the student wanted to use that technology, be it for small parts or accesories or for the majority of the model.
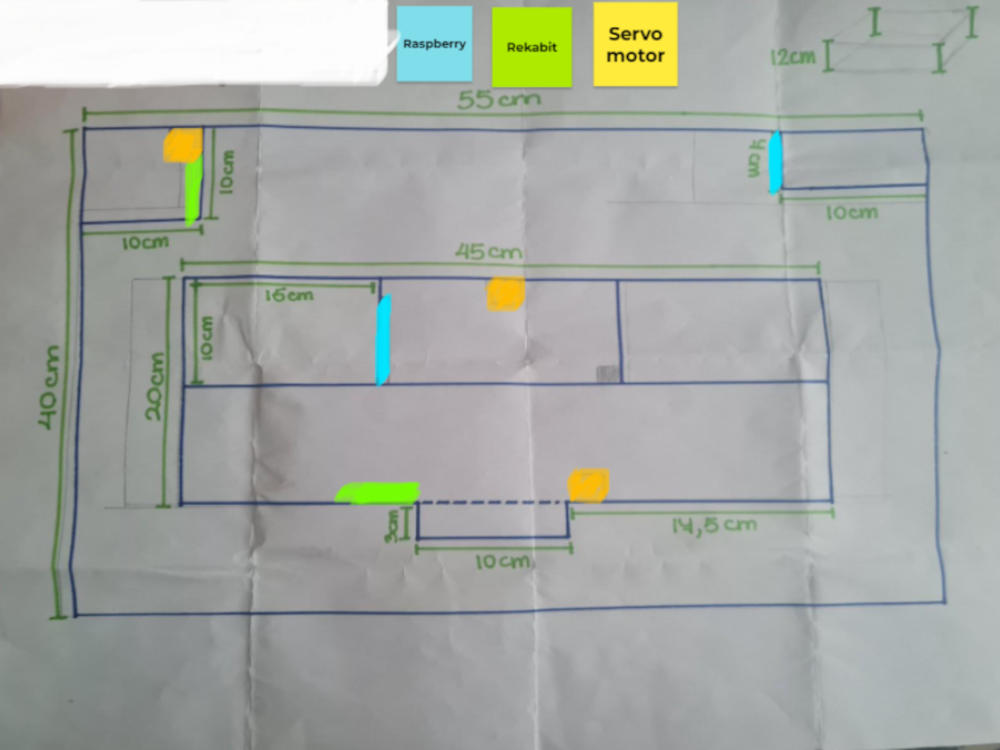
First draft of the automated space on paper...
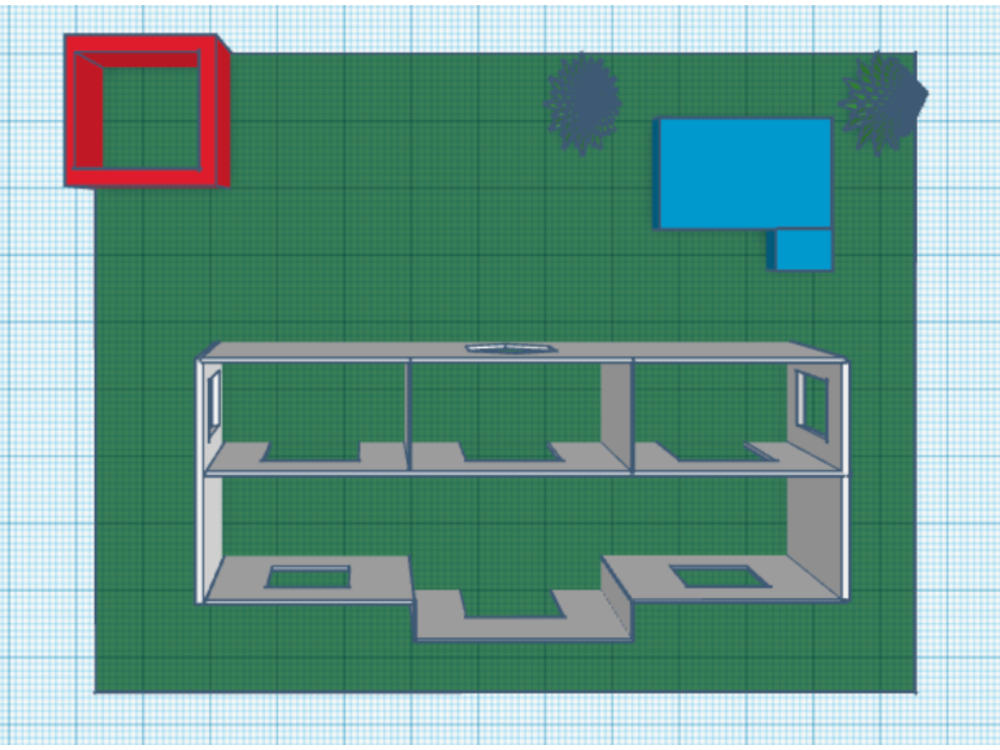
...and then modeled using Tinkercad.
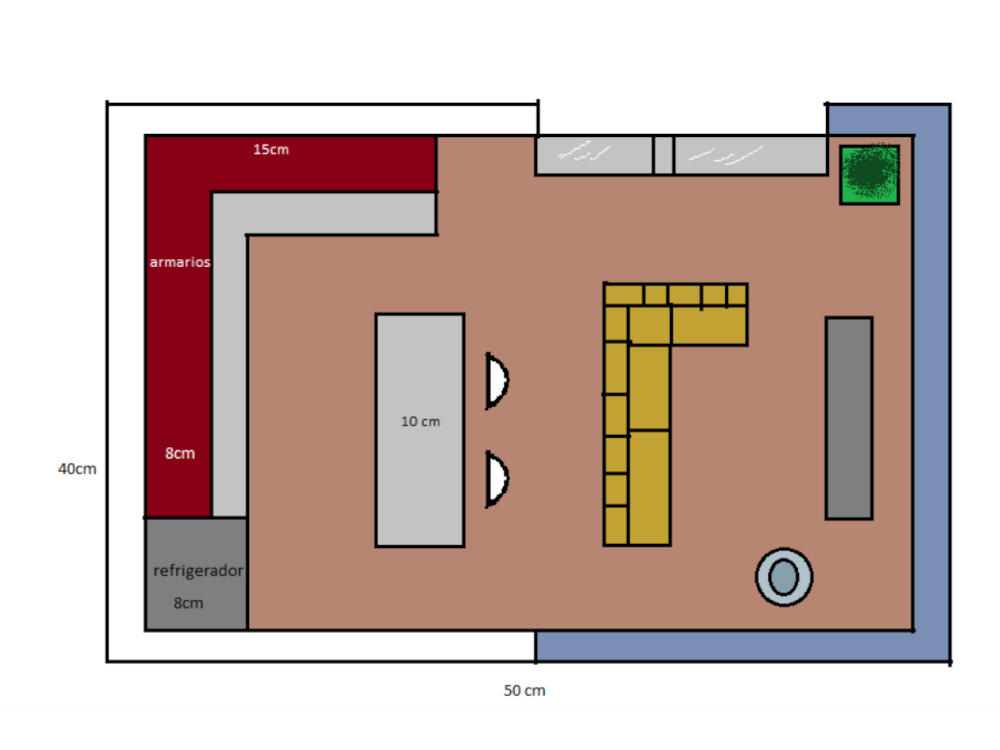
Others used Paint to draw their first drafts...
... and then chose other CAD software for modelling..
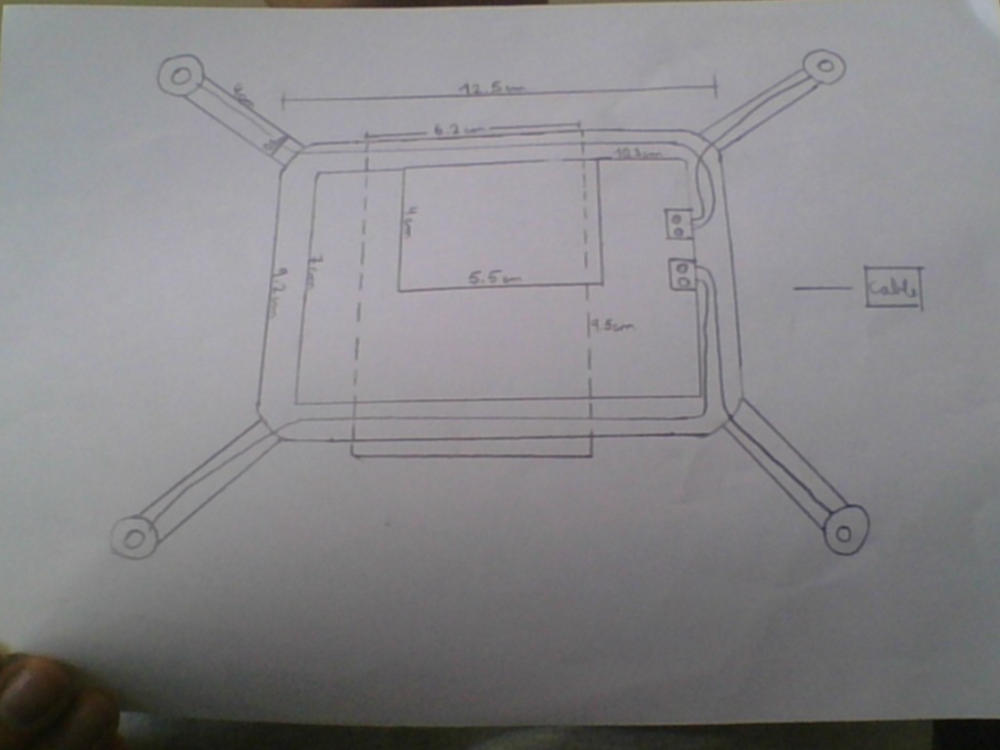
Starting on paper...
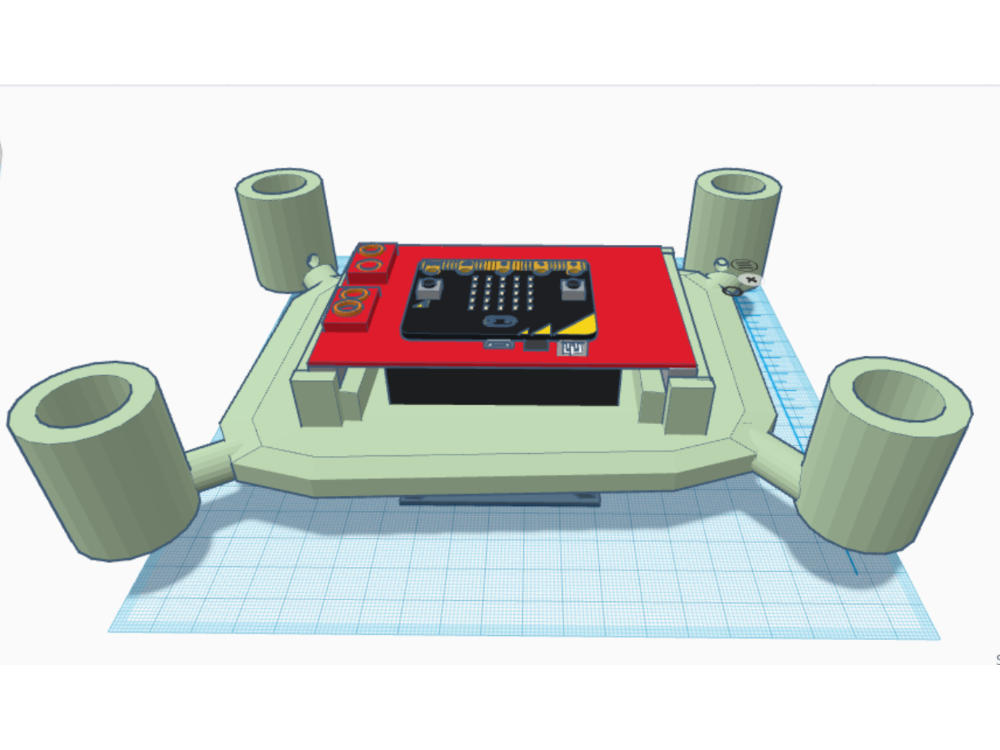
...then modelling using Tinkercad...
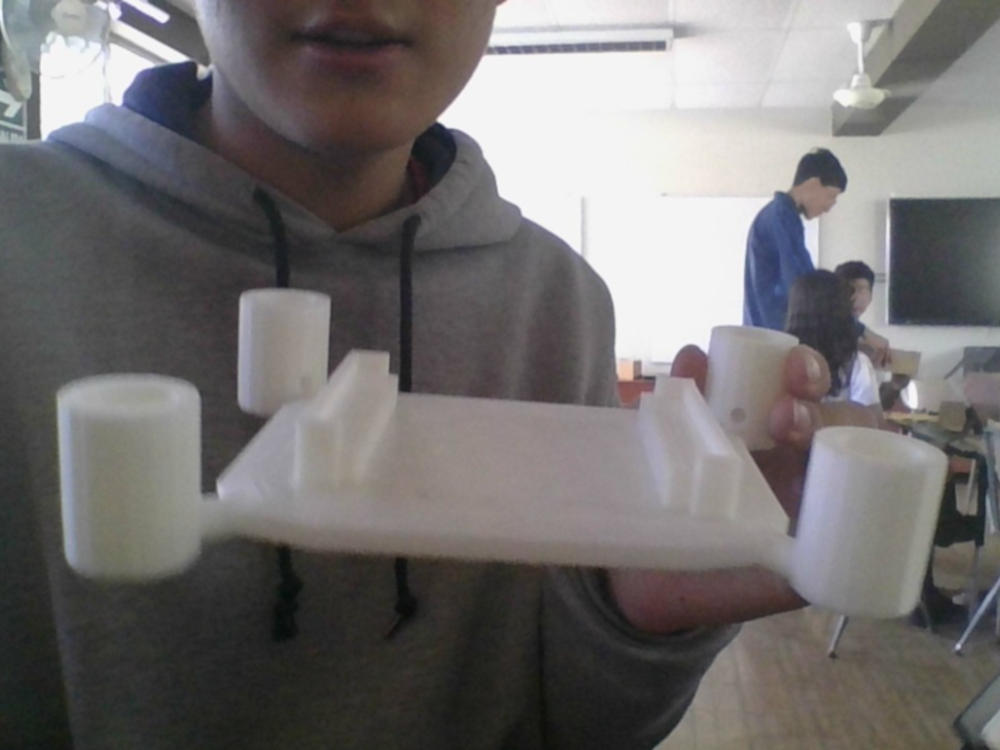
...and finally having it 3D printed.
Will it fly?
For both categories (domotics and robotics) there were certain requirements that the models should met, and at the end of the activity students had to show how their finished models were able to perform as expected. For the automated spaces the idea was to have at least three automated elements (lights, doors, curtains, etc.). For mobile robots, they had to follow a certain path, either manually or autonomously.
You can find the complete Lesson Plan with instructions and learning goals using this link.
This activity is aligned to the following competencies of the peruvian National Education Curriculum:
-
Area: ICT (Cross-curricular Competency)
Competency 28: Effectively navigates virtual environments generated by ICT. This involves the student interpreting, modifying, and optimizing digital environments to create objects, collaborate, and manage information.
Associated capacities:
- Customizes virtual environments.
- Manages information within virtual environments.
- Interacts in virtual environments.
- Creates virtual objects in various formats.
Learning standard for Cycle VII (Secondary):
“Effectively navigates virtual environments by optimizing their strategies for participation, creation, knowledge construction, and expression of individuality…” -
Area: Science and Technology (for the example given in the activity)
Competency 22: Designs and builds technological solutions to solve problems in their environment.
The student is capable of constructing technological objects or systems based on scientific and technological knowledge, responding to contextual problems with creativity and perseverance.Associated capacities:
- Determines a technological solution alternative.
- Designs the alternative (structure, functionality, requirements).
- Implements the alternative (assembles, tests, and verifies).
- Evaluates and communicates the functionality and impact of the solution.
Learning standard at the end of Cycle VII (Secondary)
“Designs and builds technological solutions by justifying the scope of the technological problem and its possible solutions based on scientific knowledge... Verifies functionality and makes adjustments.”
When I did this activity with my students, many of them were greatly engaged with all the steps of the process and found ways to solve the different problems they faced along the way, be it programming, 3D modelling, assembling the electronics, building the final prouct or testing. Nevertheless, there was a small group that didn't reach the goals and got stuck at the modelling phase. Some of them had problems getting their ideas transformed into something that could be built. For example, using Tinkercad they would model the body of a robot and place motors "floating" on its sides, without realizing that they had to build some kind of structure to hold them and provide a way for the wires to get to the microcontroller board. For those working with cardboard it was easier because of the nature of the material, that can be adapted to changing conditions easily with the appropriate amount of scissors work and hot glue. But with 3D printed parts solving structural problemas is more time consuming because most of the time it involves redesigning and printing again.
It is also important to consider the knowledge stundets already have about the different aspect of DF when facing the challenges of this activity. In my case, my students have already had some experience programming microcontroller boards and using 3D modelling software to create simple objects, so this tasks were not as big barriers as could have been if they knew nothing about those topics. This previous knowledge helped them work in an autonomous way, and let me focus more on helping them solve the prolems of the actual activity instead of teaching them how to make a 3D sphere or turn on a motor.
Time is also something to have in consideration. This is a tim econsuming activity , so depending on the amount of thime per week that can be dedicated to it, this could easily take a whole semester to complete. Nevertheless, I think this is totally doable by one teacher alone (I did it that way), although help is always welcome.