Week 4
Assignments
- Task 1: Circuit digital model
- Task 2: Circuit physical model
Process
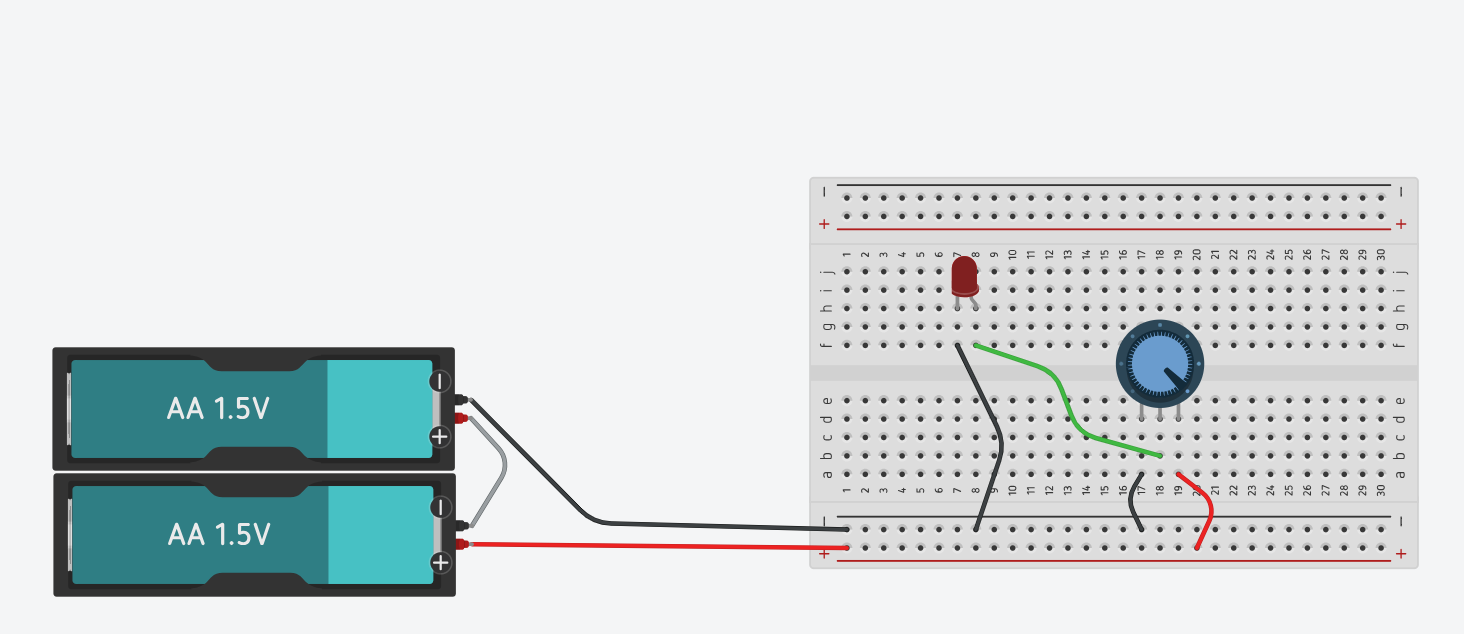
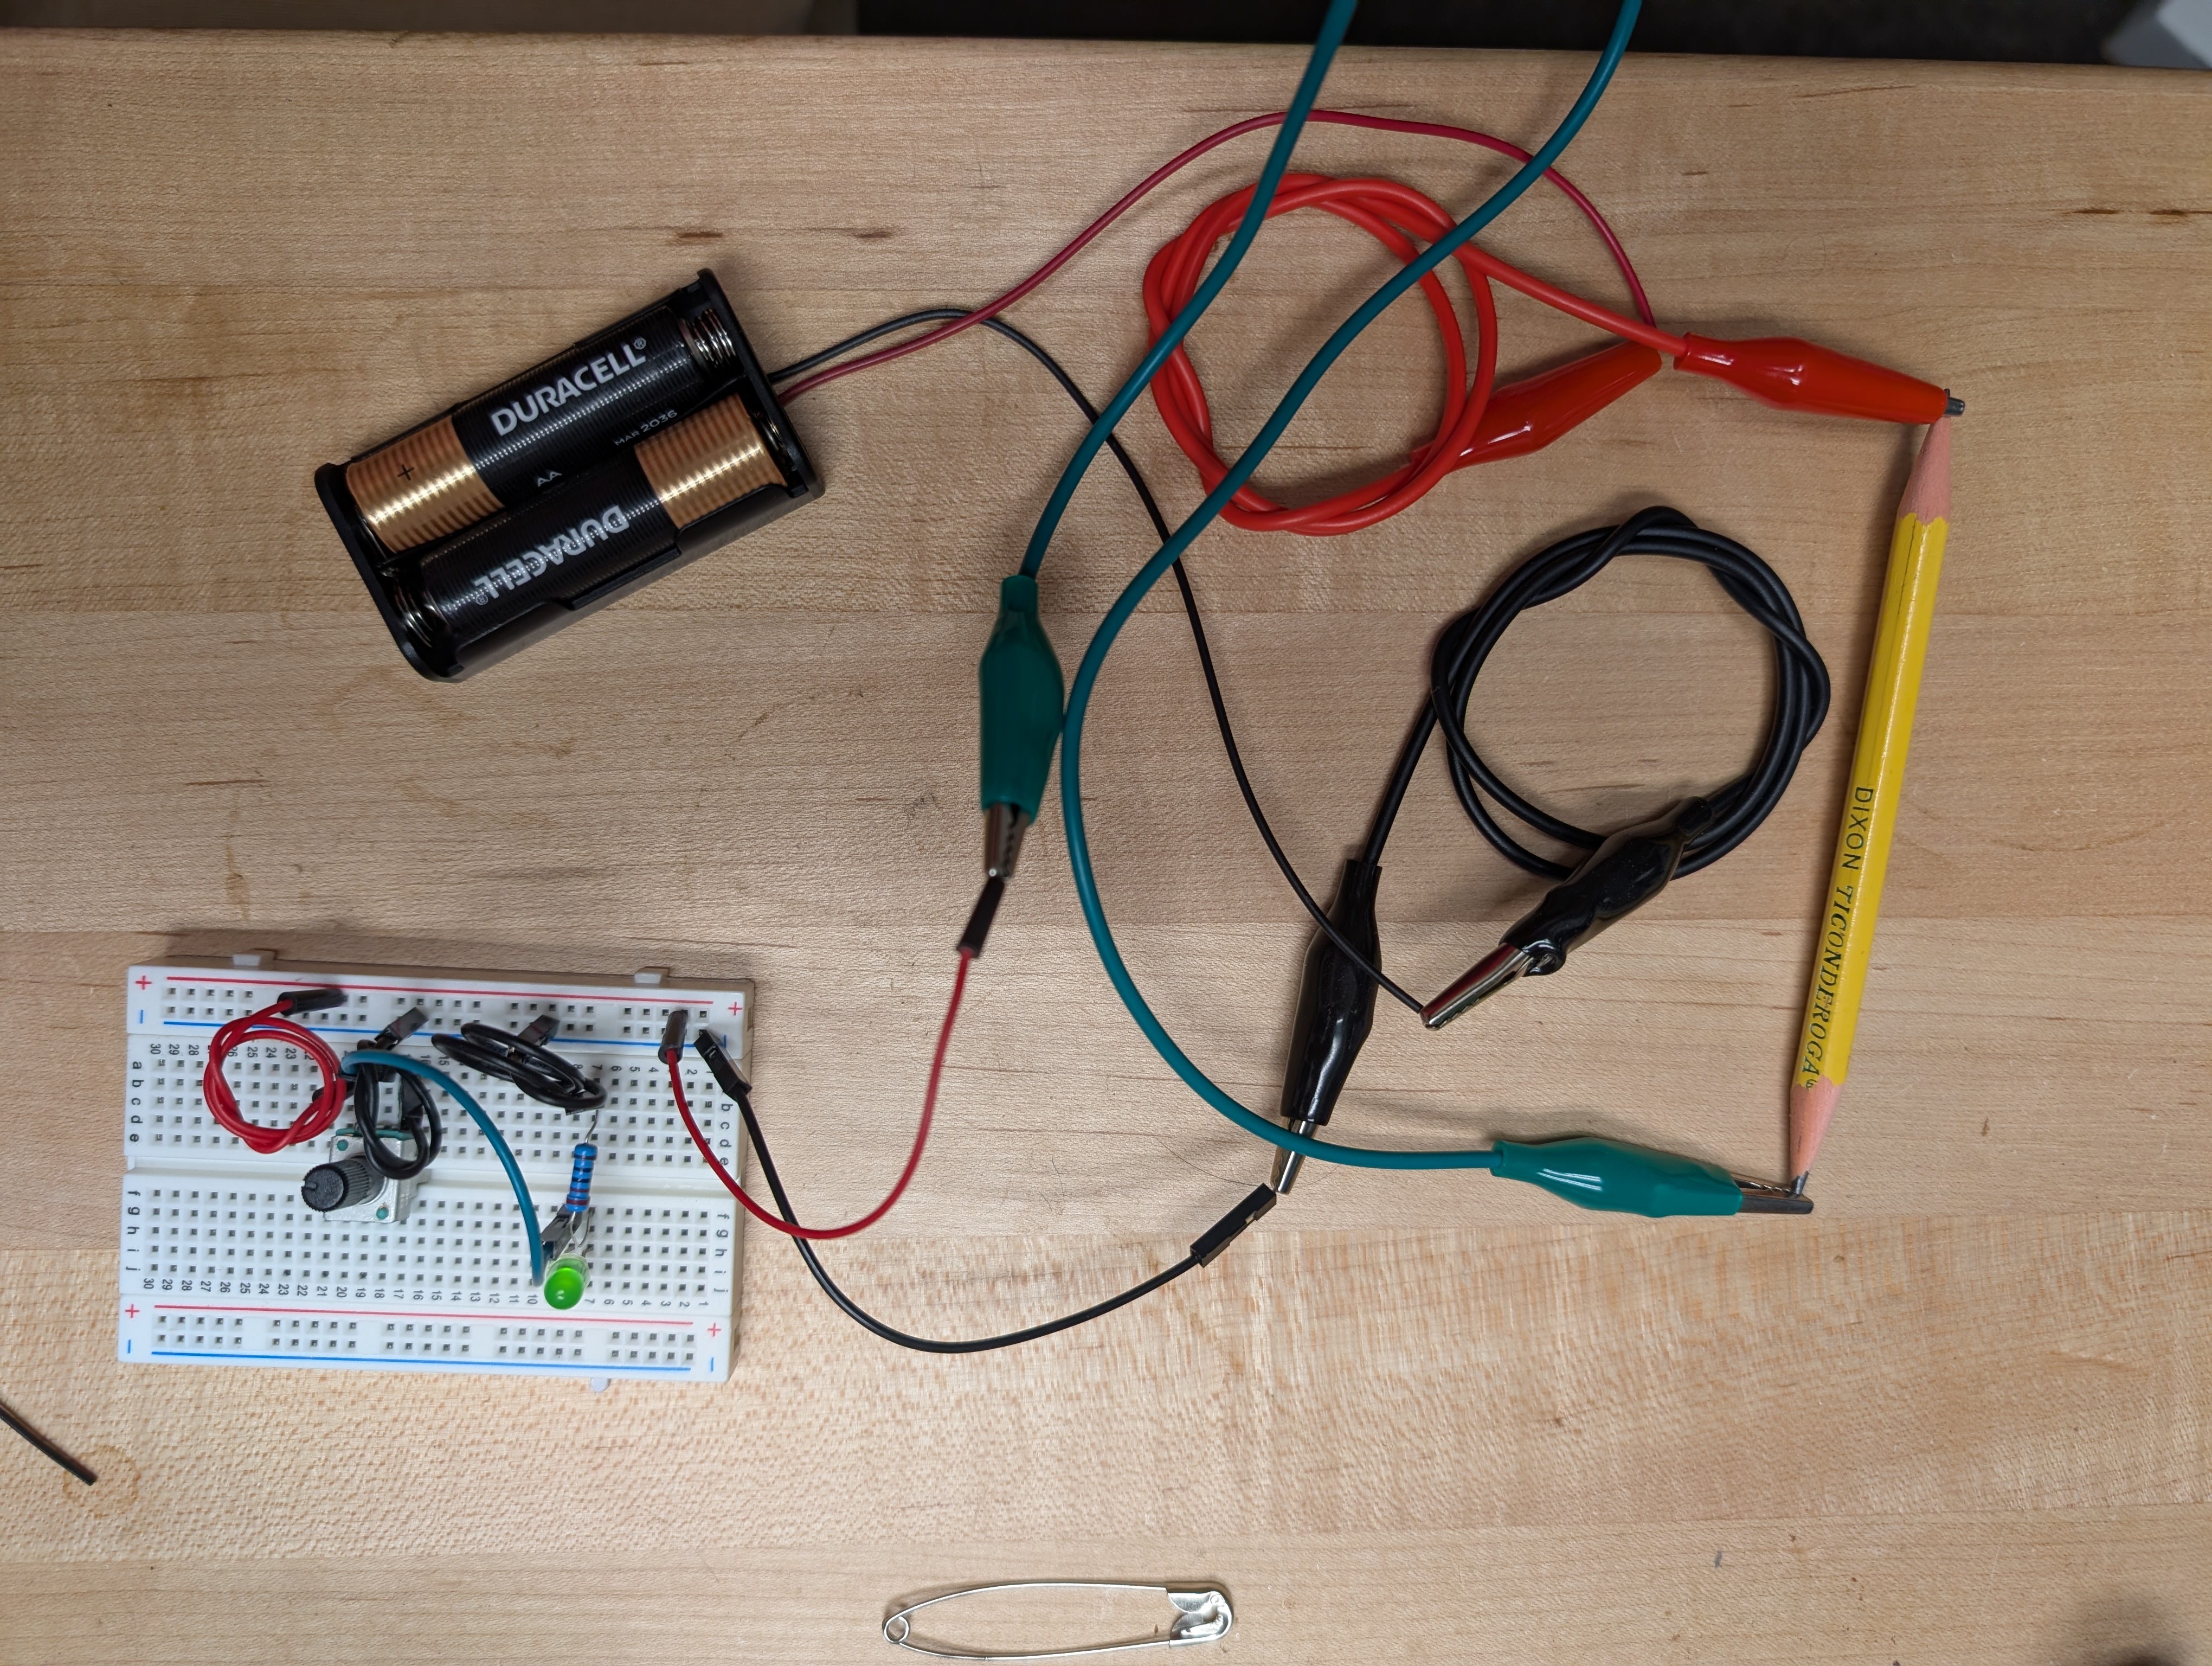
- For my sensor/switch, I ended up using a potentiometer, which ended up working a bit like a switch, but with some nuance.
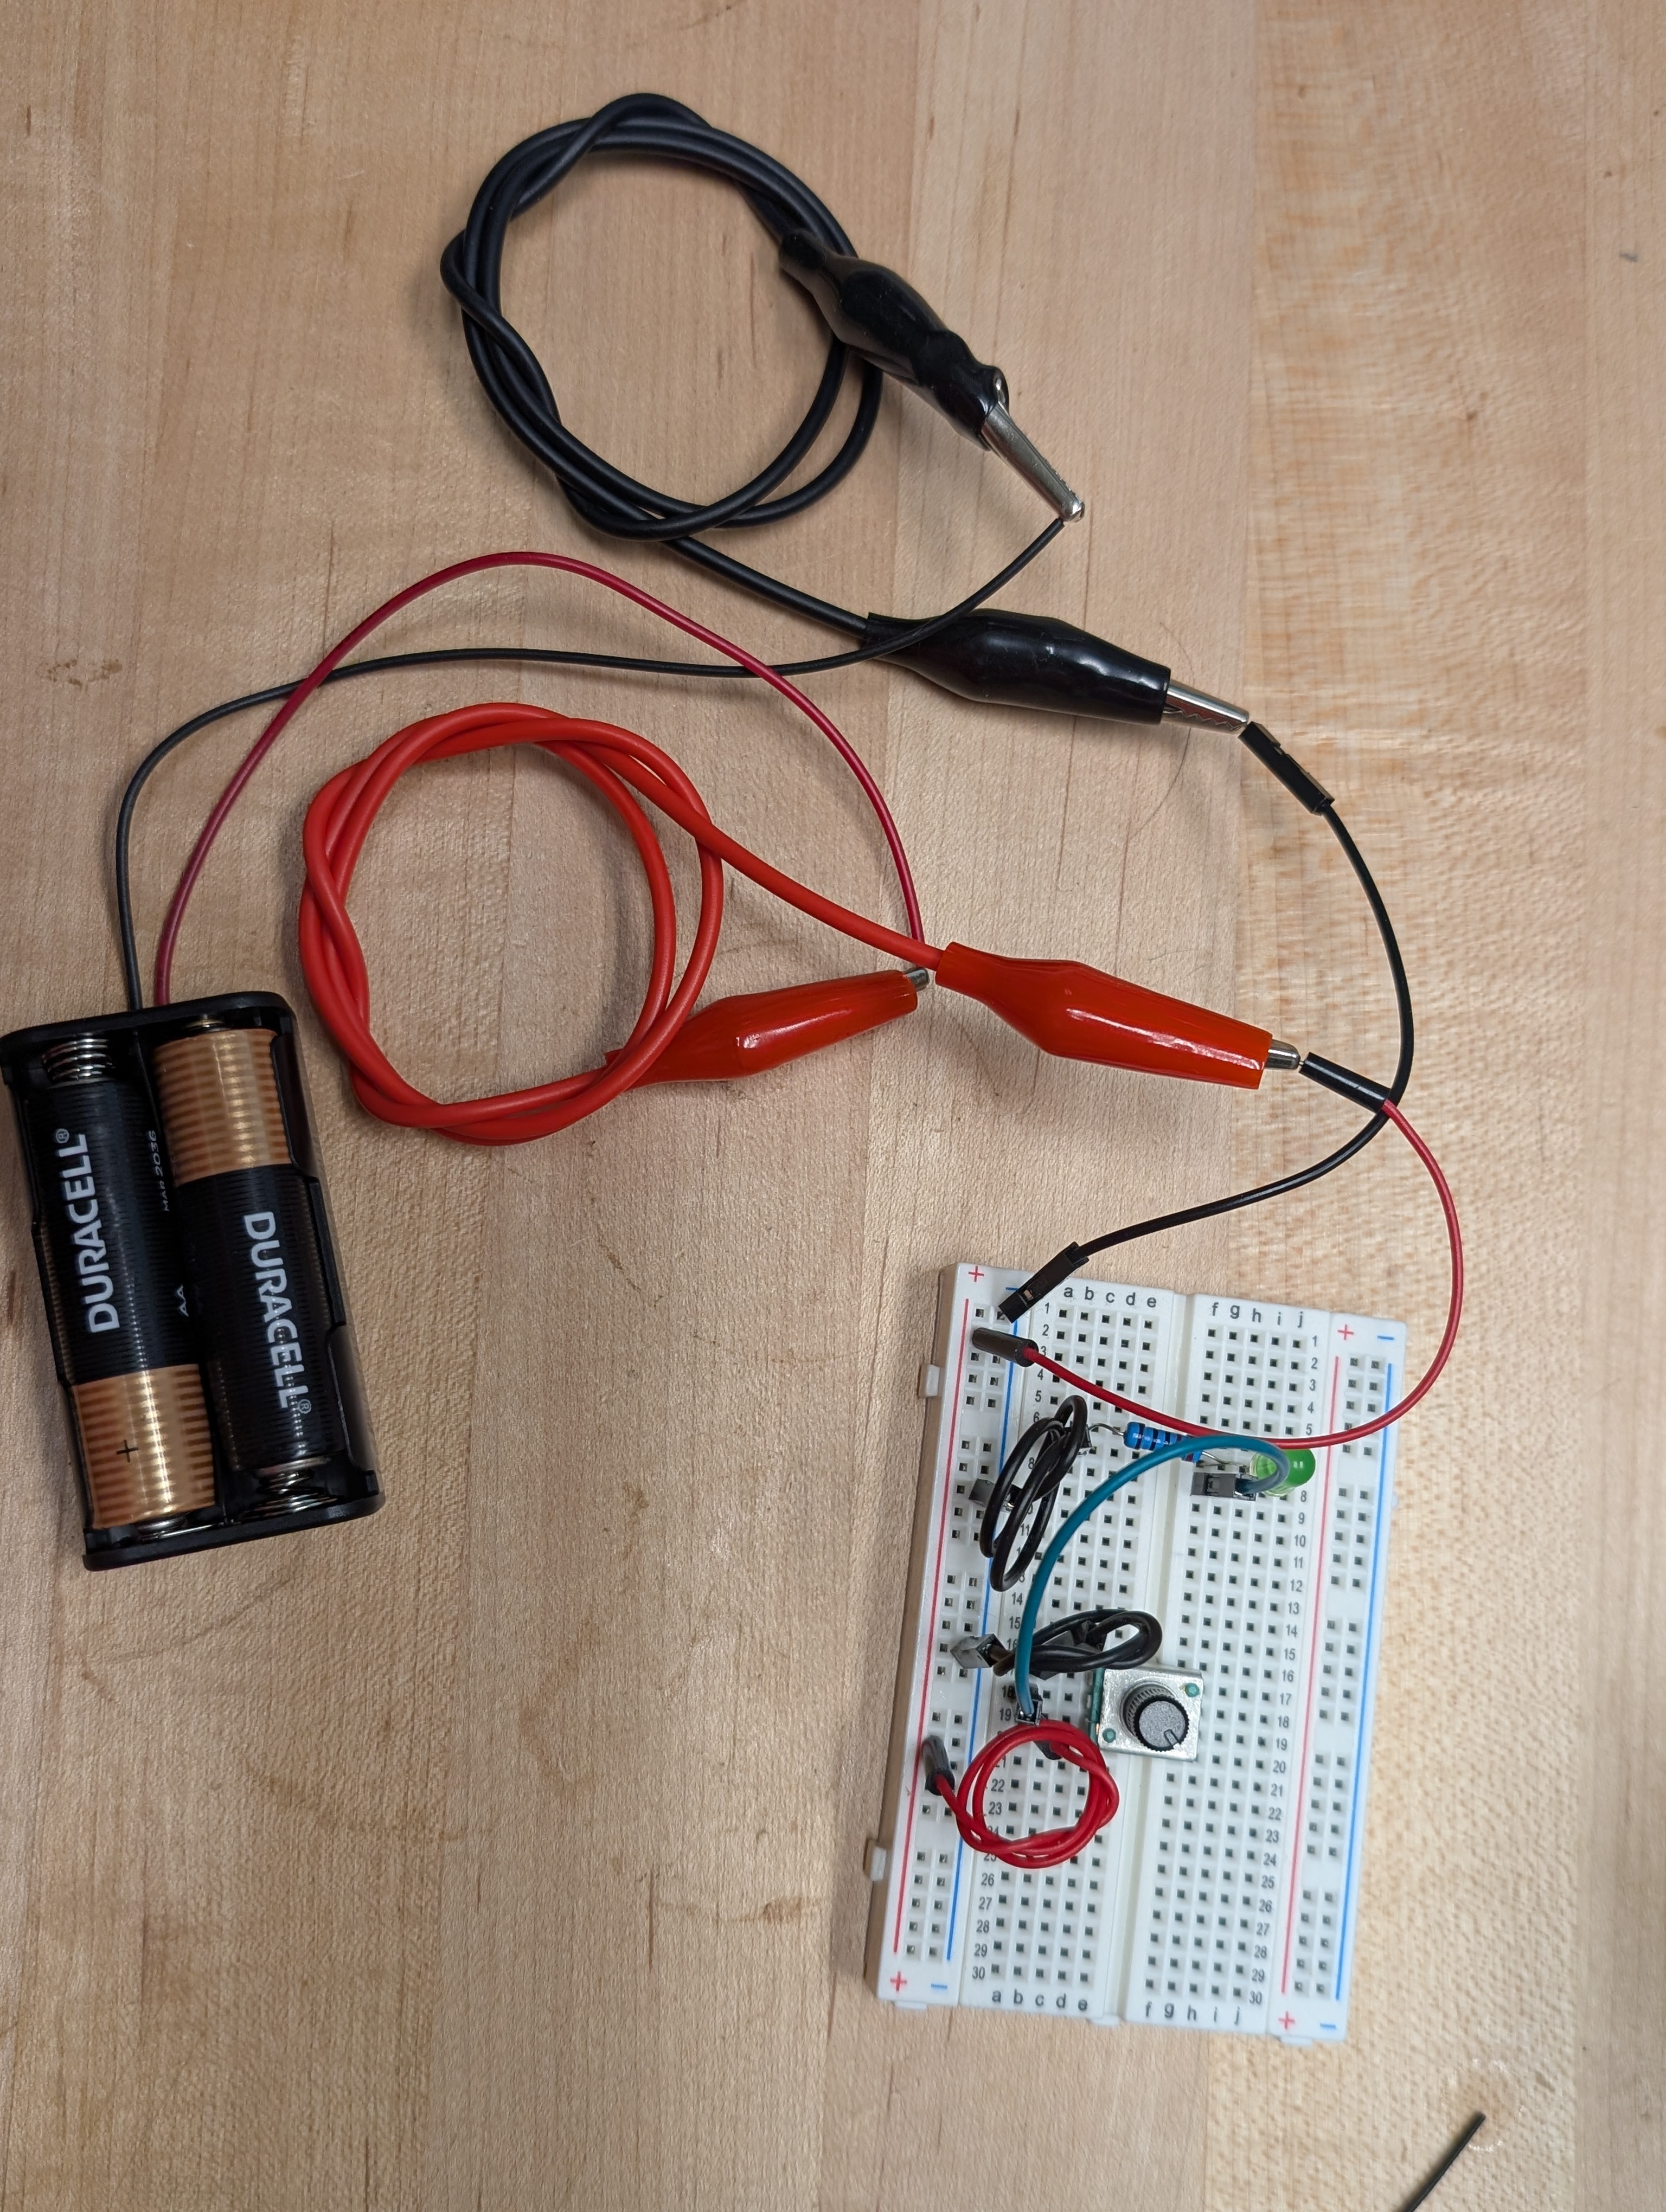
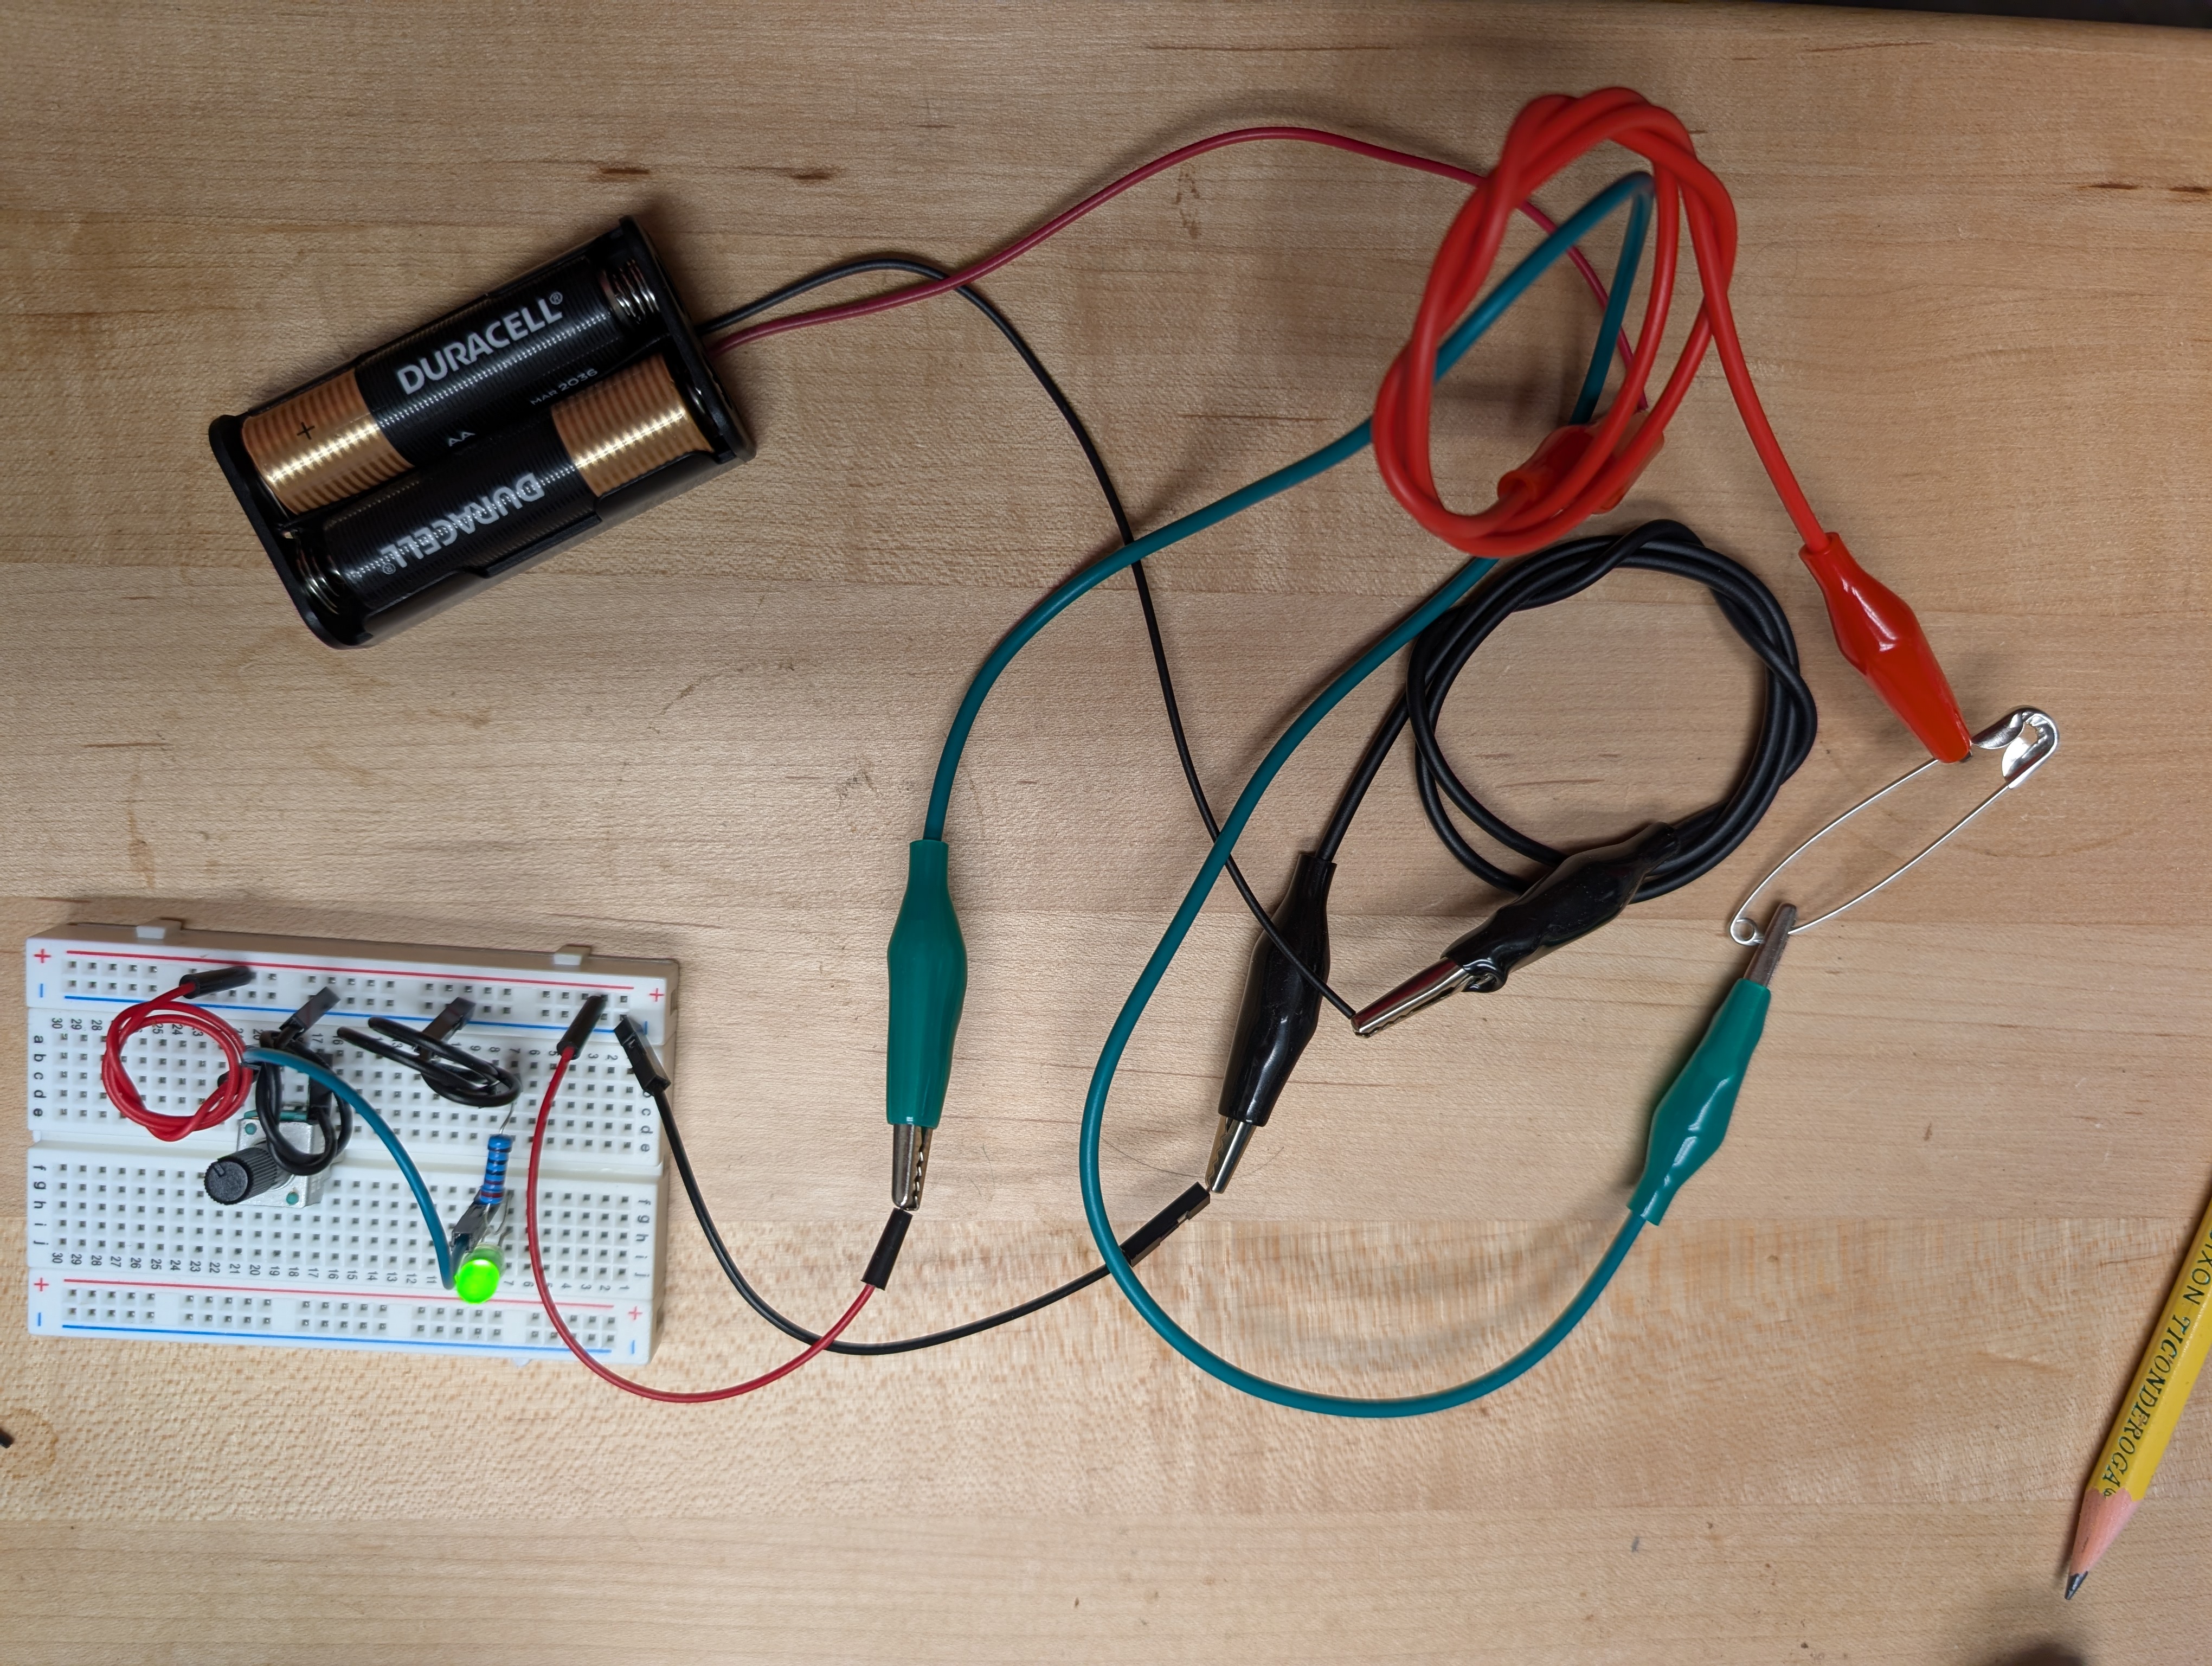
When I tested it in the simulated circuit, I only used one AA battery. In the real example, my selected holder had room for two, so I tried adding it to my digital model, just so they would match.
I discovered that Tinkercad models will show when safe limits for components are exceeded,
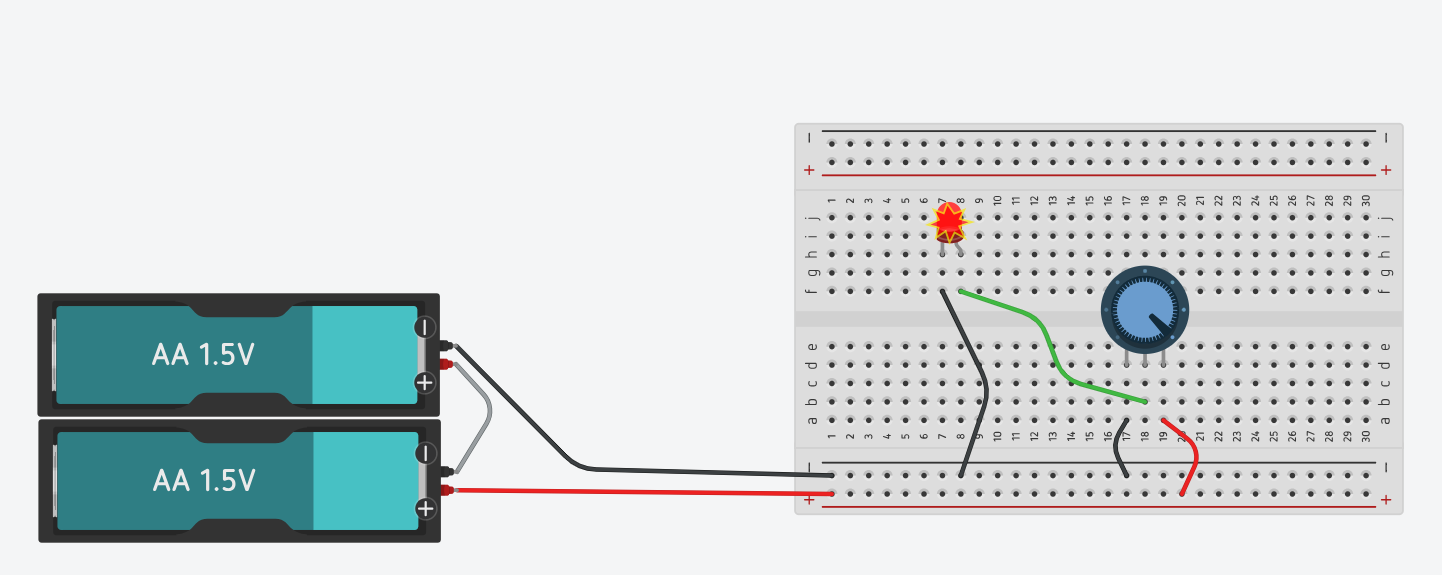
so I added a 220 ohm resistor to my model, and to my physical circuit.

The light turns on only when the potentiometer is rotated very near one extreme end, demonstrating that simply using its value of resistance reduces its effectiveness near that of a switch, which is a great way to note for students the distinction between analog and digital methods.
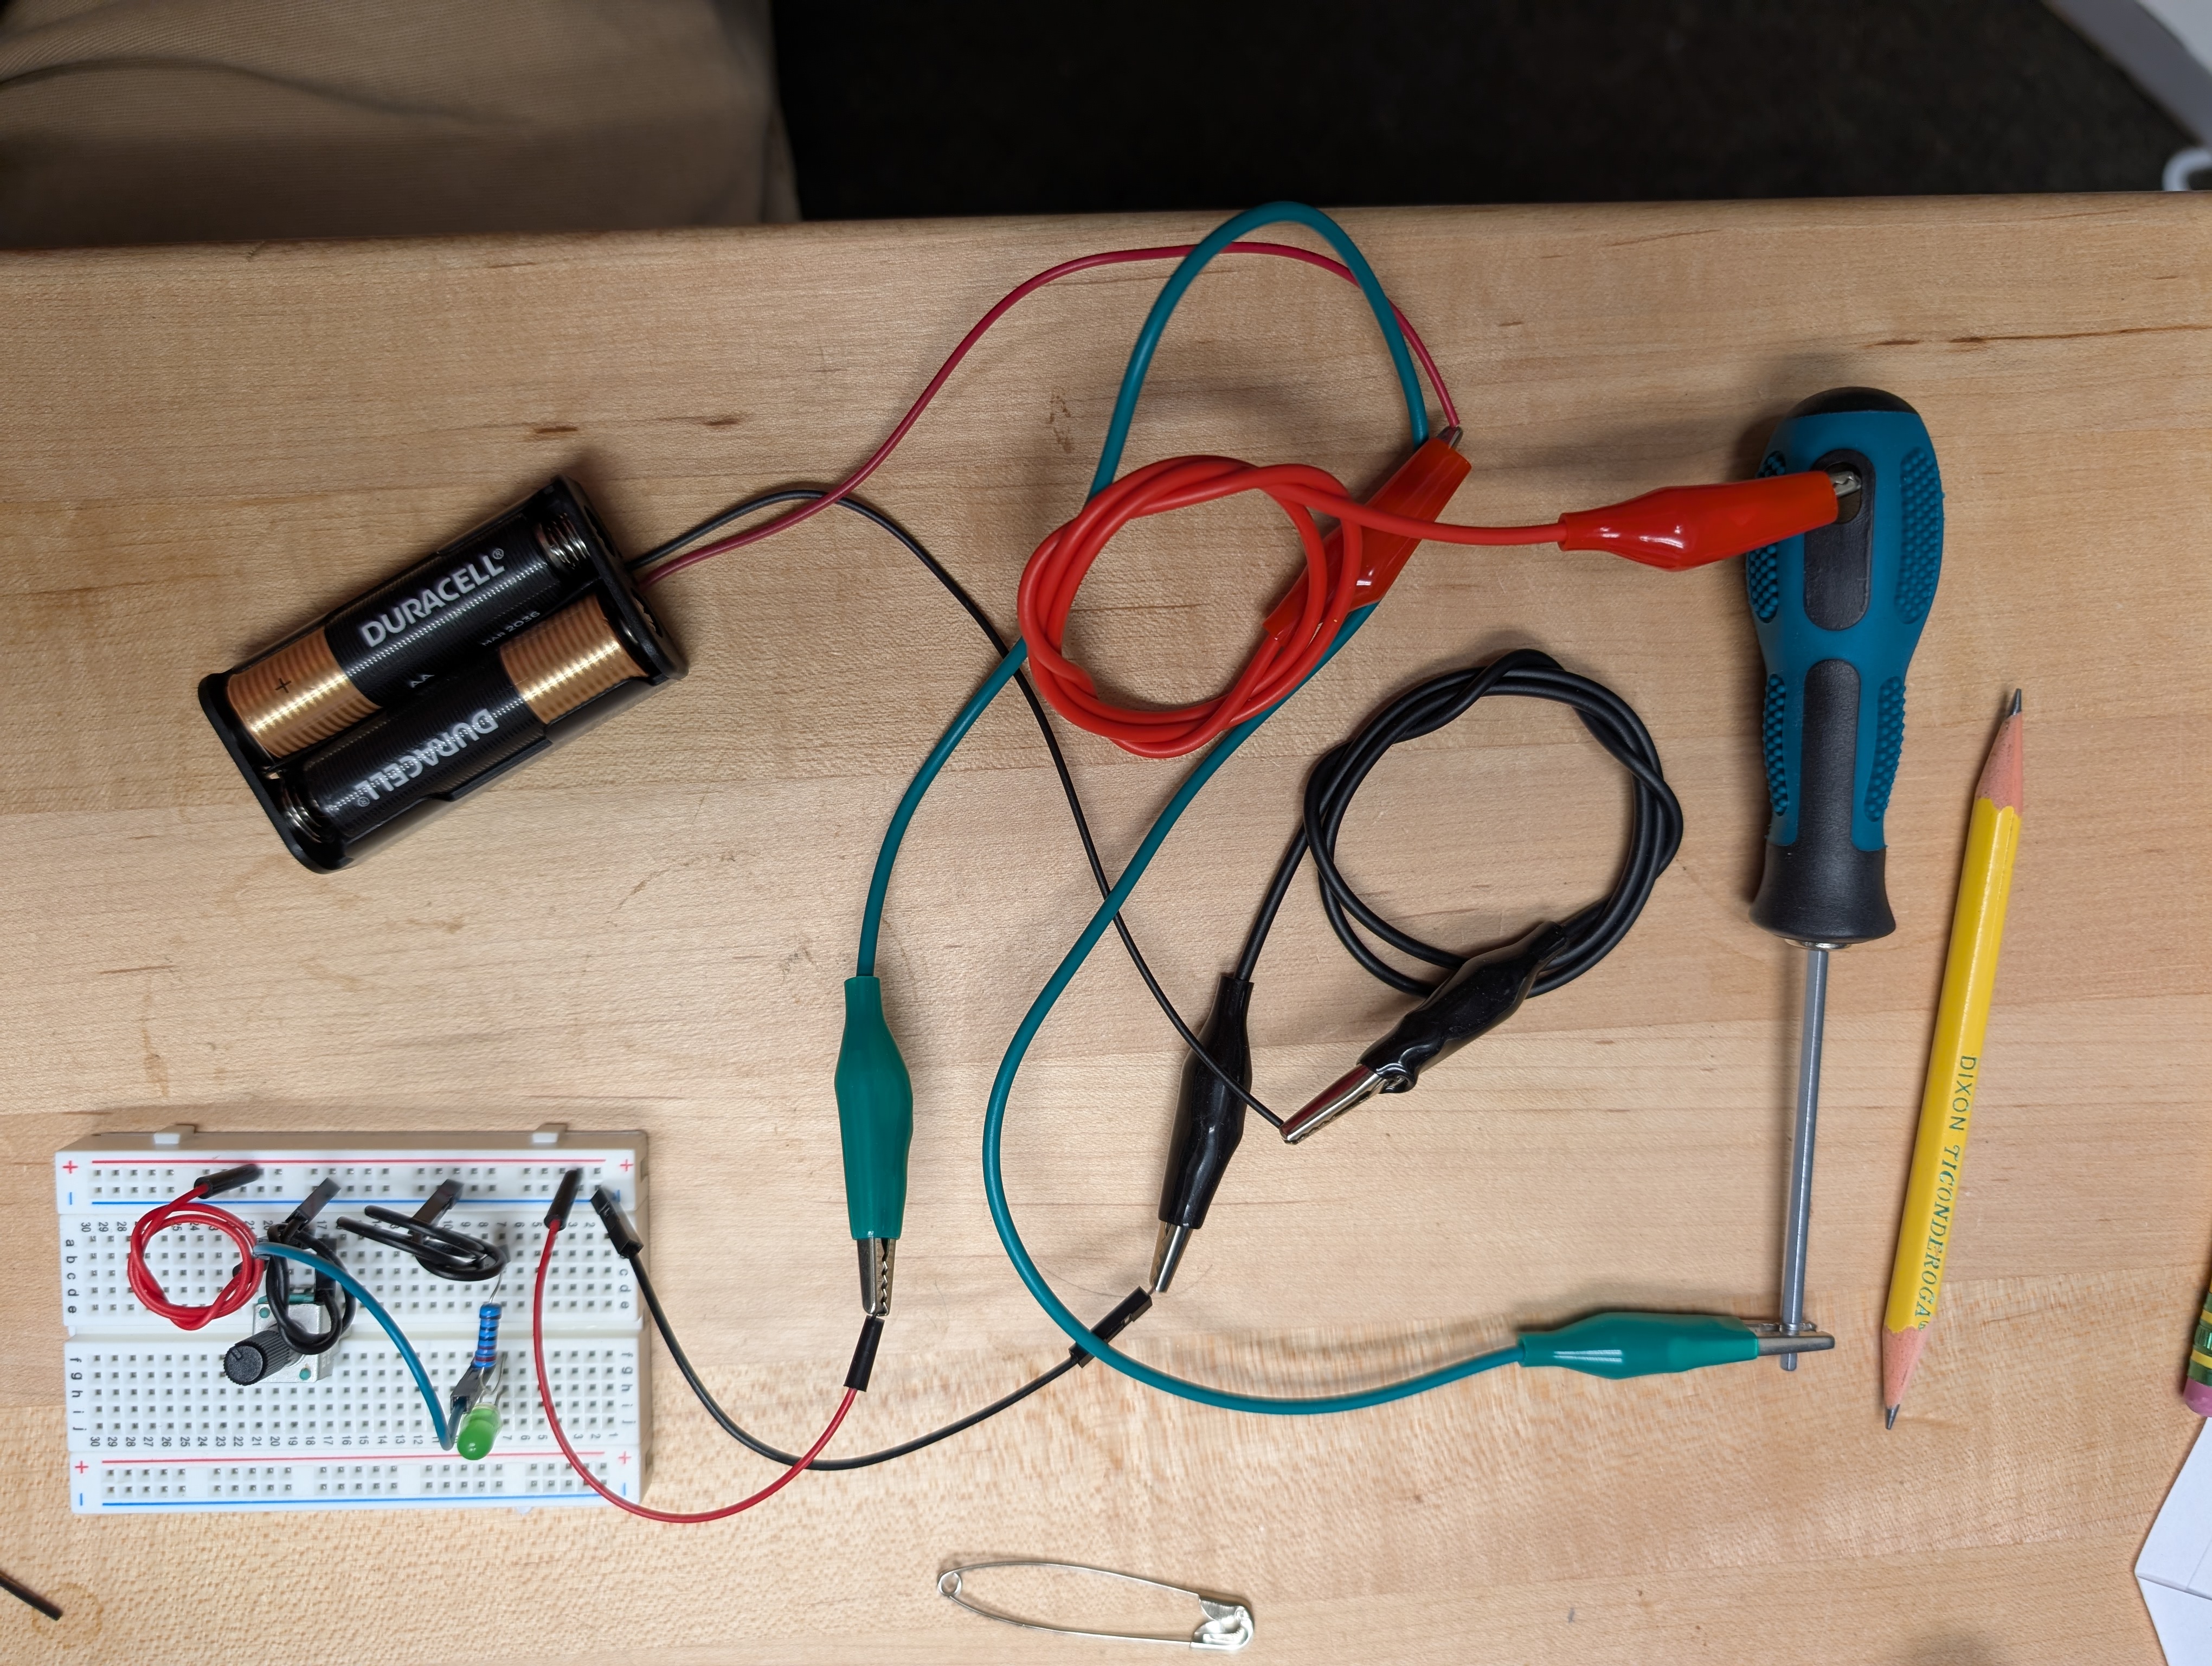
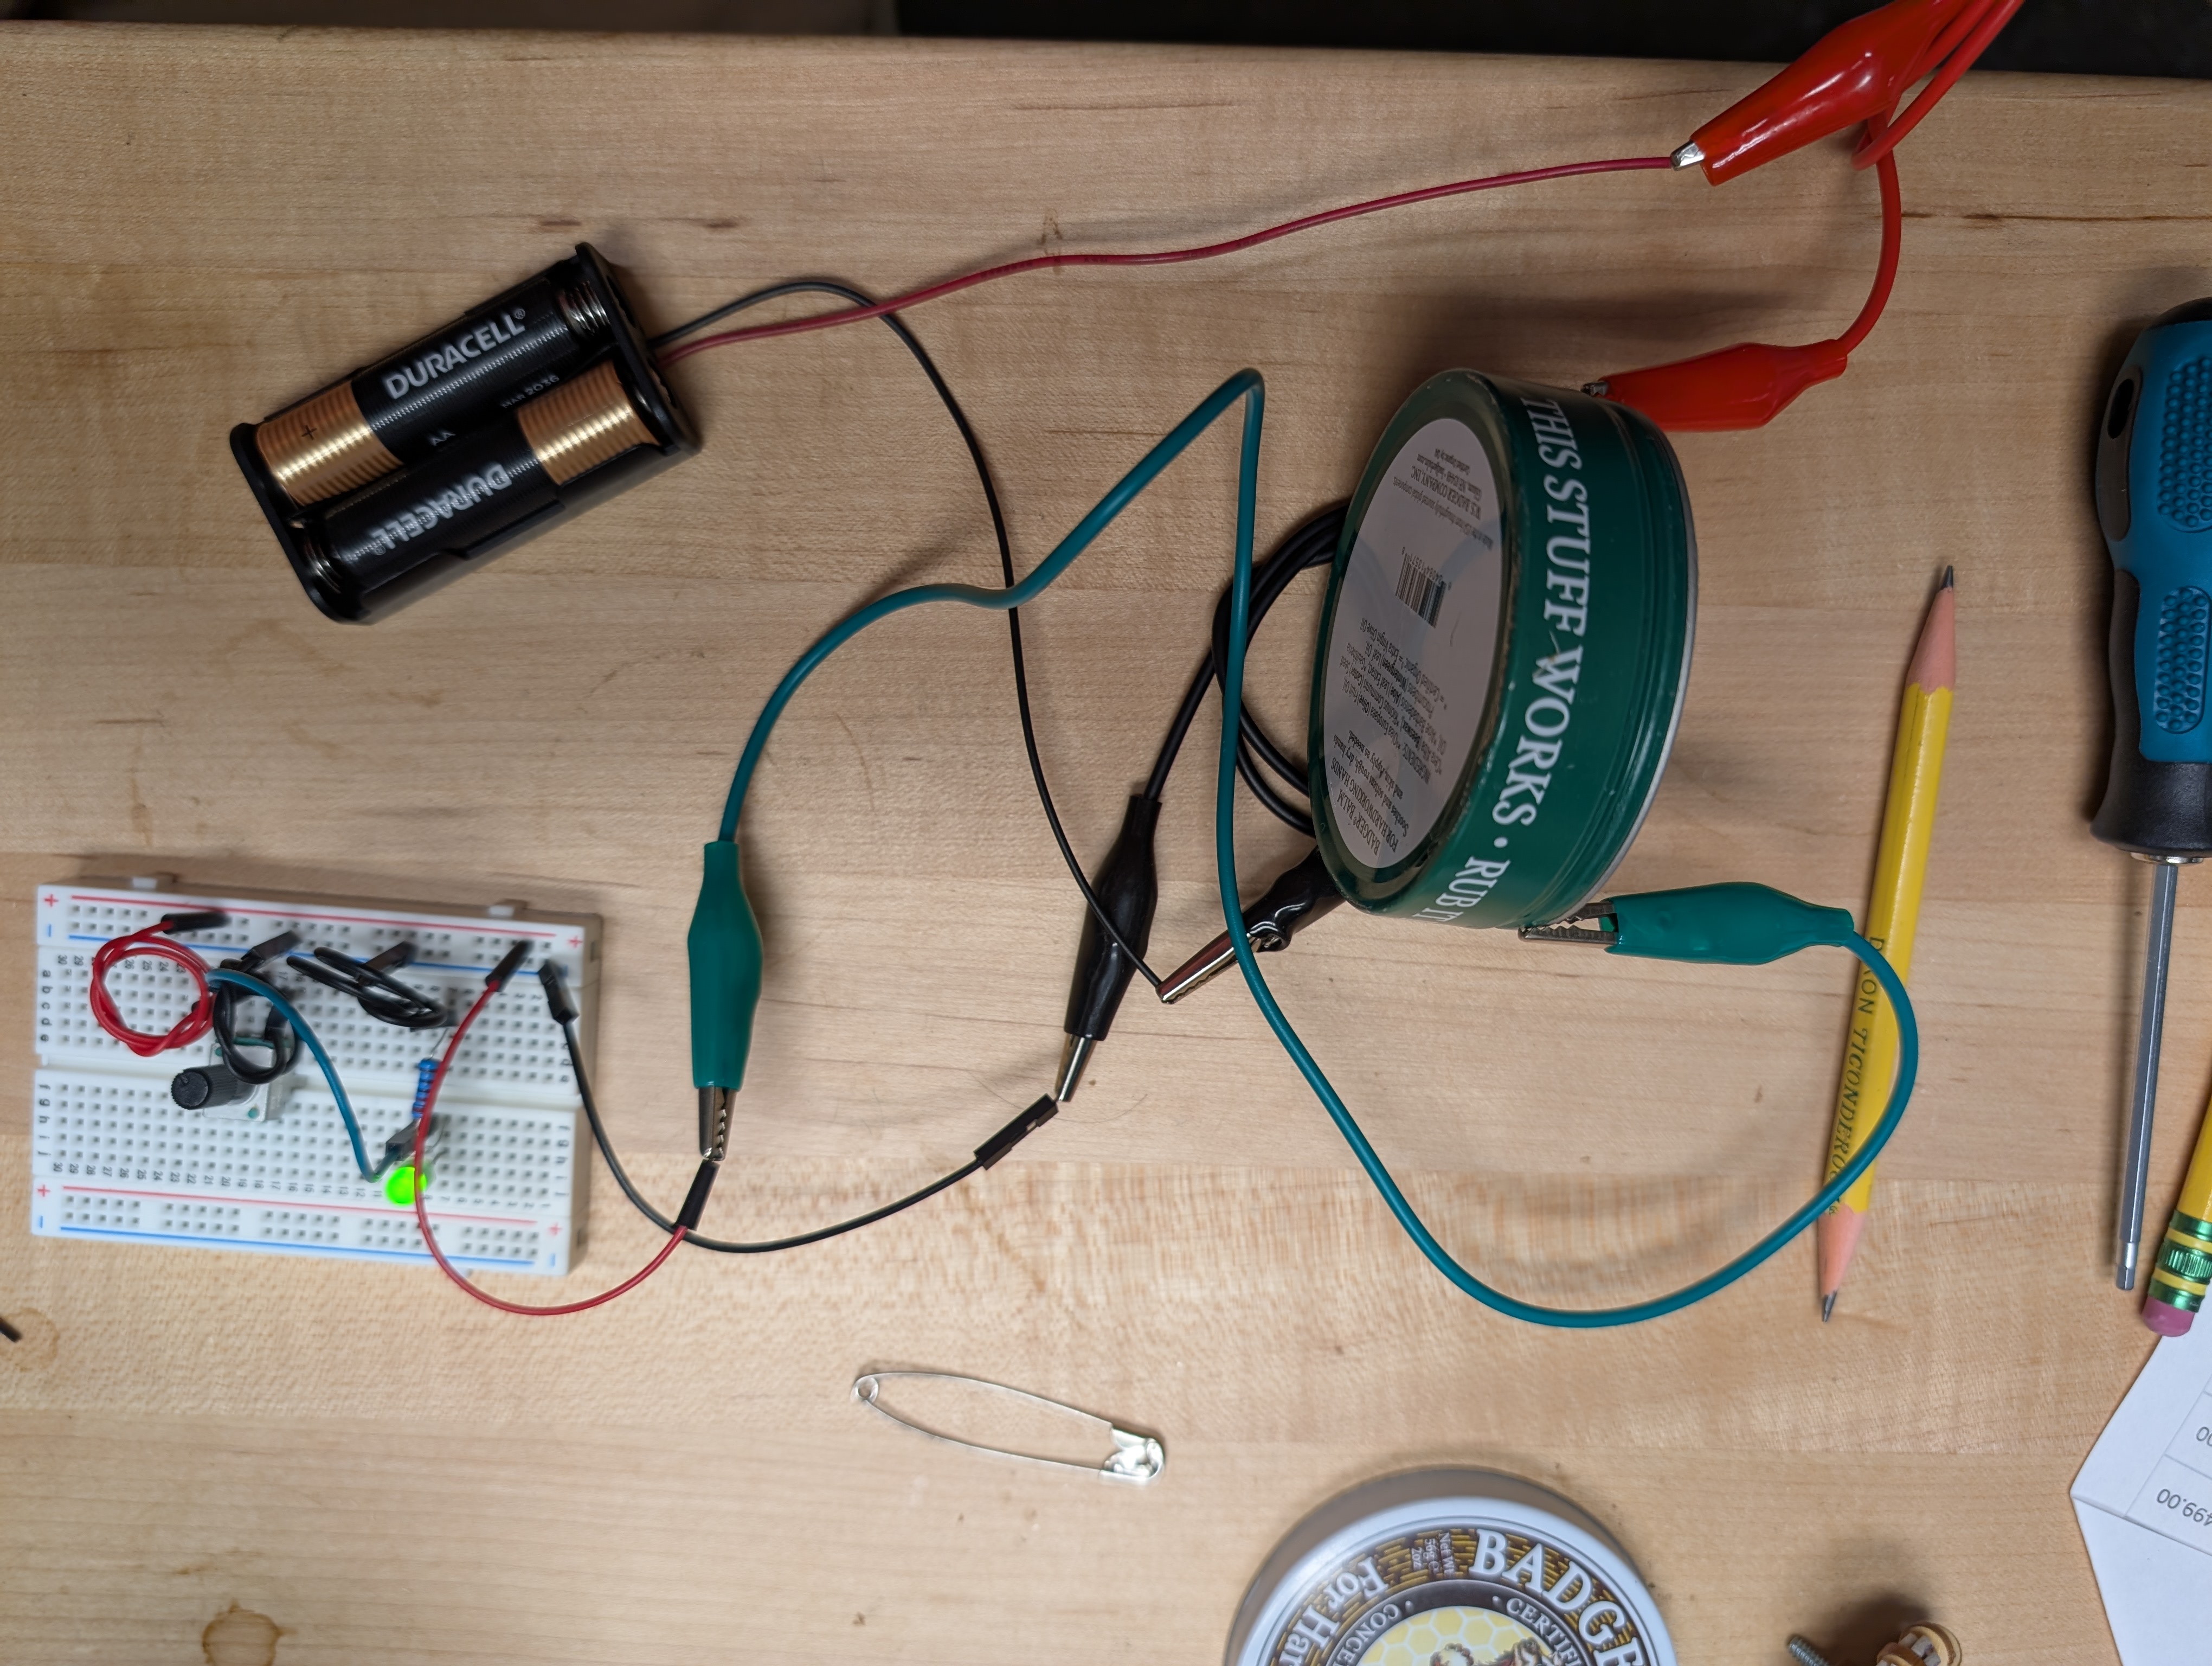
Then I reset it using two different pencils, a safety pin, and and a tin of hand cream which was fortunate enough to have a label on it which said, “This stuff works” – When contact was made between two points on the tin itself, it did indeed work, but the hand cream itself was not a good conductor.
Reflection
There are a few different ways to interpret this challenge, based on the wide range of ages I teach.
I imagine that for younger students, there is plenty of exploration to be done in discovering what can conduct electricity, and what materials fall into the “insulator” class. With elder students, I can imagine much more nuance with materials like the pencil, in demonstrations where the graphite is laid bare and shows properties of variable resistance.
In either case, the concept does seem to fit the definition of digital fabrication WITH kids, under a few criteria: First, that students go through both simulation and live creation, with similar components. The digital simulation followed by real world build seems to meet the basics of the terms, and it is already something that we do in the lab. I will admit, I probably wouldn’t implement the circuit I built in either format, as my “close-at-hand” parts availability limitation made for a circuit that had more components than it really should have. I am in the habit of using the breadboard, but I have gotten a little too comfy with using an arduino even for the simplest demonstrations, because in its default state, it can turn on an LED as soon as it has power.
With or without the arduino, a circuit could be a means to arrange content that encourages students to explore a constrained space. For example, a group of seventh graders typically will study a period of local history which catalogs a series of important battles along a map. A few years ago, my colleague asked me to print such a map, for displaying the pattern of conflict for the American Civil War… I 3D printed some naval models, and his lesson allows students to manipulate the models about the map, navigating the choices of the warring leaders through the period. I have considered that such a lesson could incorporate circuit connections under the map, so that as the students move vessels into the locations where the historical decisions were made, the map would activate, confirming the choices of the students as aligning with those made by historical captains. Since the historical paths won’t change, wiring up the display with light or sound cues, and magnets mounted in the bases of the models could pull a switch for completion of circuit, with components hidden so that the answer isn’t spoiled early. The potentiometer could be used for its resistance to decide which part of the journey is to be chosen. This would be an example of DF for kids, as the student participation might include interacting with the circuit, but their interaction might never need them to understand why or how it works, and such isn’t important for the historical content. Flipping it to a DF with kids would simply require including students in the creation of such an active model, teaching some circuitry basics and guiding them through the completion with one map point, letting them create their own journey path through circuit completions in the base, with LED indicators showing completion of the intended journey. It might be simpler if the connection points are wired simply, and the potentiometer was just a rocker switch allowing for the confirmation of the chosen spot.
One of the major challenges of using electronics in simple forms is the storage, maintenance, and inevitable disposal of alkaline batteries. Kid-kit electrical systems of any complexity often desire that simple source of power, but storing them over scholastic breaks often leads to leakage and inconsistent performance, and once they have been consumed, they are a mildly hazardous waste product, when dozens are being trashed per class. Our lab has experimented with less consumable methods, investing in rechargeable power packs for some activities, and, as in the case of using the Arduino as a power source, simply redirecting power from a wall outlet into some safe channel. We do have wall outlet transformers that will deliver 5 or 12 volts, which we can plug into a breadboard header for projects with our upper school students, and the rechargeable packs serve in similar capacity as well, reducing the need for the alkaline consumption… but at the cost of perceived simplicity, because there is yet another component in the loop.
The other factor is the physical size of components. Raw electrical parts tend to be small, and young children do not have the most nimble fingers. To that end, for simple kits, we have tried to overscale as much as possible, 1/4W resistors and 10mm LED’s are good examples of this, but not a universal solution. Microbit kits which have components mounted on parts which occupy predictable space with easy connection points are a solid way to go, but again increase a perceived complexity in the assumption that specific branded parts are necessary to accomplish simple goals.
Lastly, the challenge in my experience with project/problem based learning thus far is that such activities often include many components which take considerable time to gather ahead, more so to assemble, and can incorporate challenges that are unforeseen by the instructor, as every student will interpret a little differently. I have often found that a considerable amount of time delivering a PBL lesson goes into troubleshooting kits as students discover issues. Sure, one gets better at diagnosing user mishaps, but as components age and deteriorate, it becomes vitally important to have spares of everything, and be ready to swap out at a moment’s notice, anything which can be deemed defective. Luckily things like resistors and LED’s are not difficult to have extra of.
Tools
- breadboard
- AA Batteries
- Alligator Clip wires
- Dupont wires
- Potentiometer
- Resistor
- LED (green)
- Safety pin
- Pencils
- Hand Cream