Week 10
Assignments
- [ ] Task 1: link 2 devices to communicate to each other.
Process
-
I do not have internet enabled Arduino devices in my lab, and while I thought it might be possible to do some bluetooth connectivity with a makeblock robot, I decided to try for the learning opportunity, in using arduino to send, receive, and decode IR signals.
-
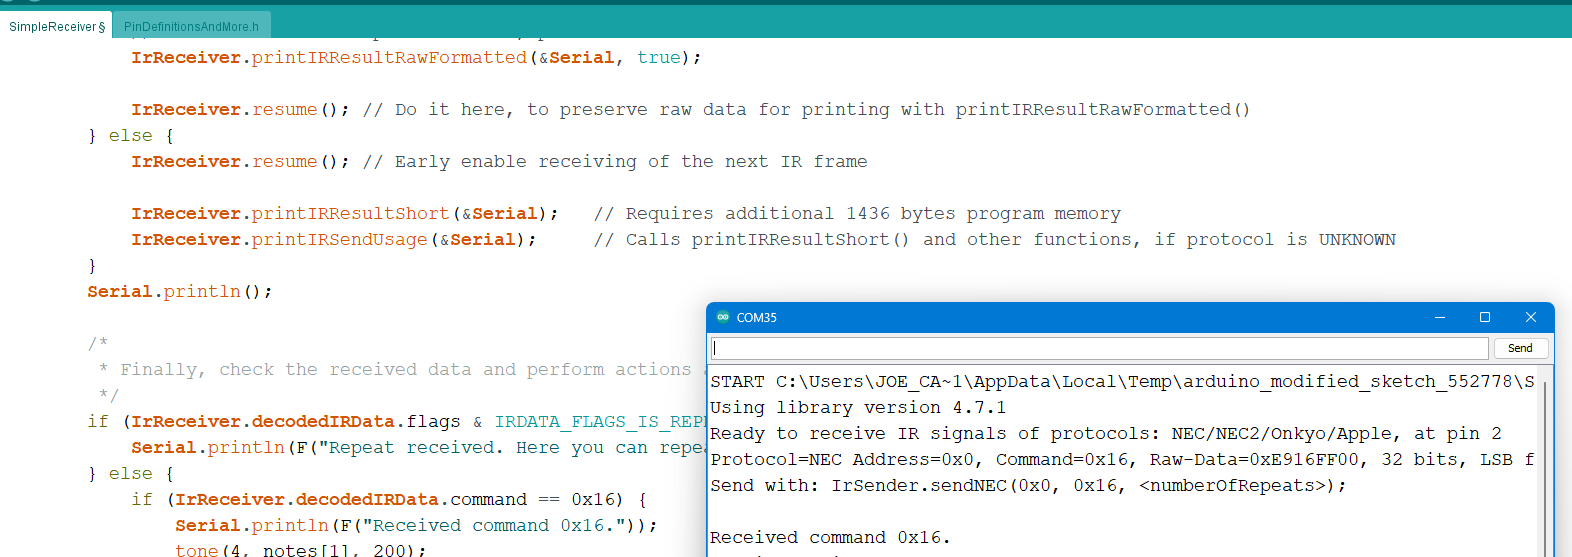
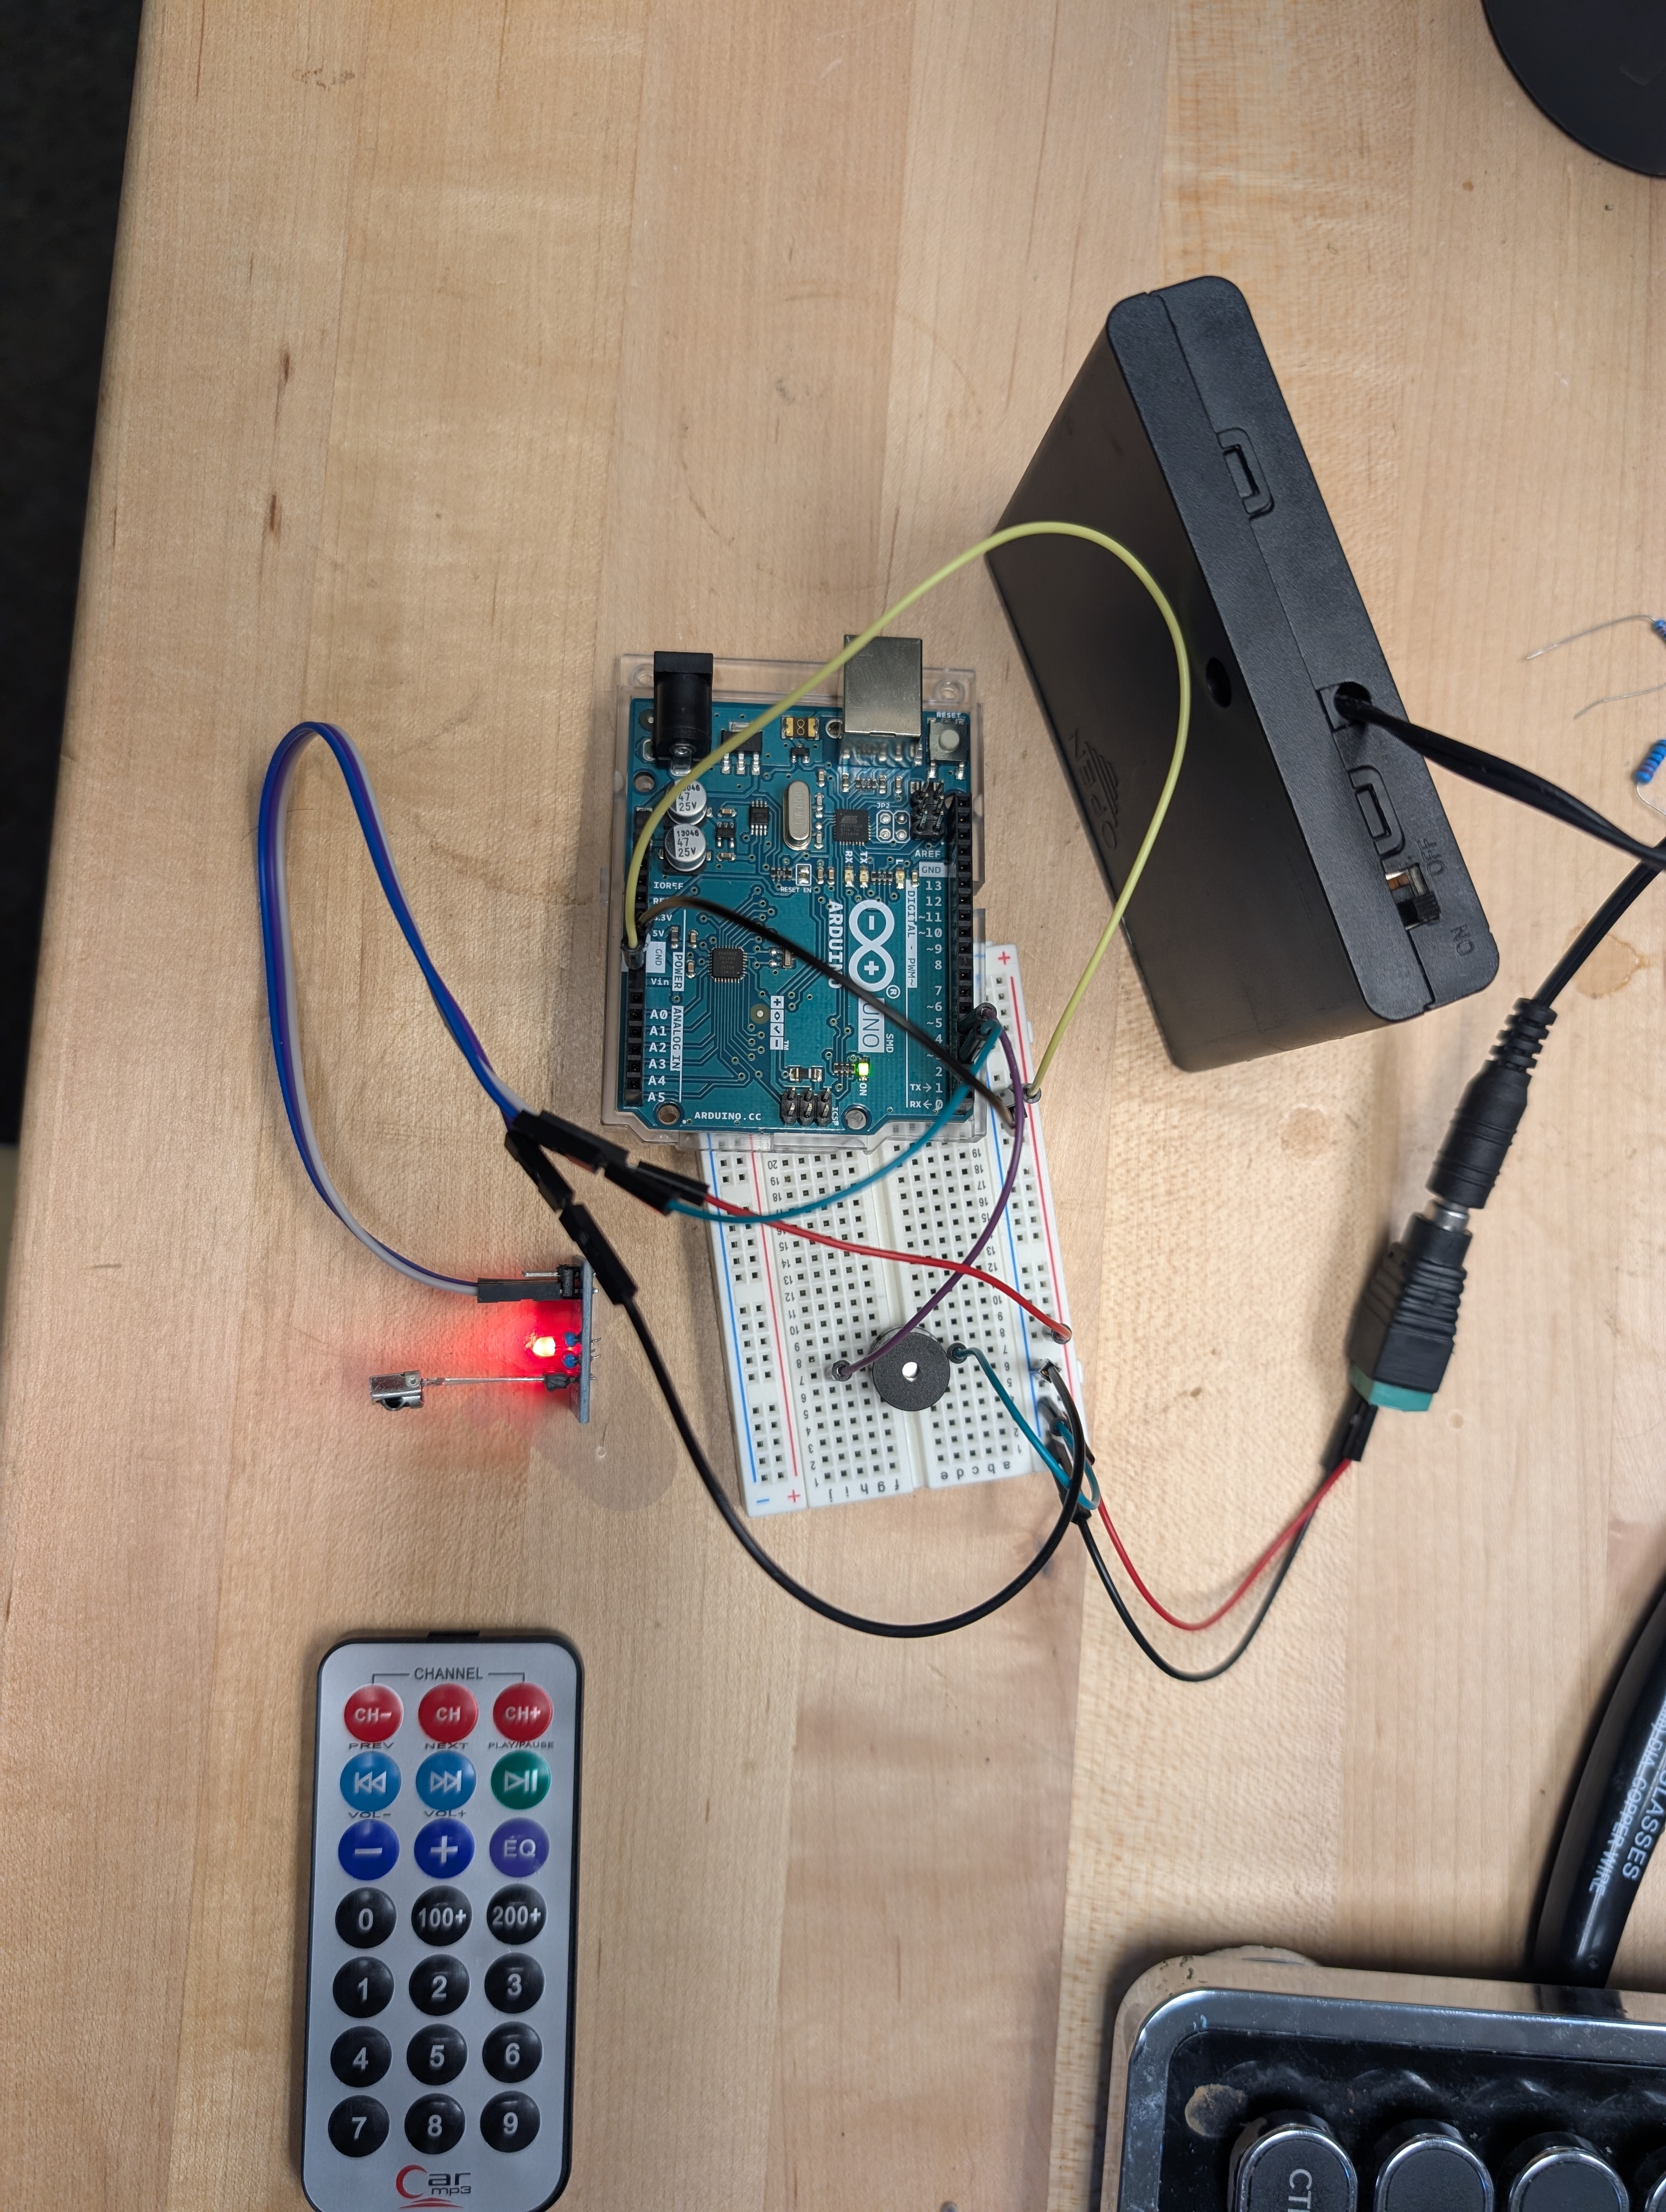
My first test was with a single Arduino UNO and an IR remote, using a protocol from a tutorial linked below. It took a little experimentation to get to a point where the received signals were anything other than gibberish, but I eliminated all the protocols which did not work, and eventually got a successful NEC encoded signal to decode into a command code.
-
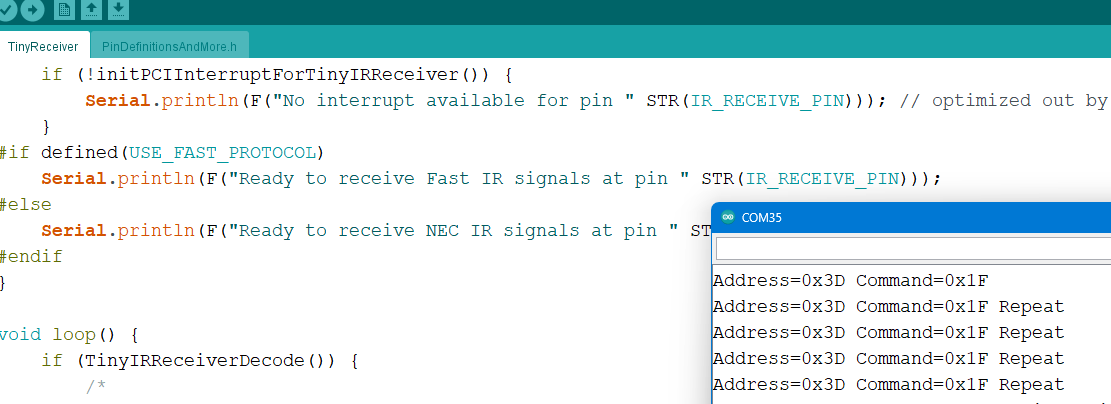
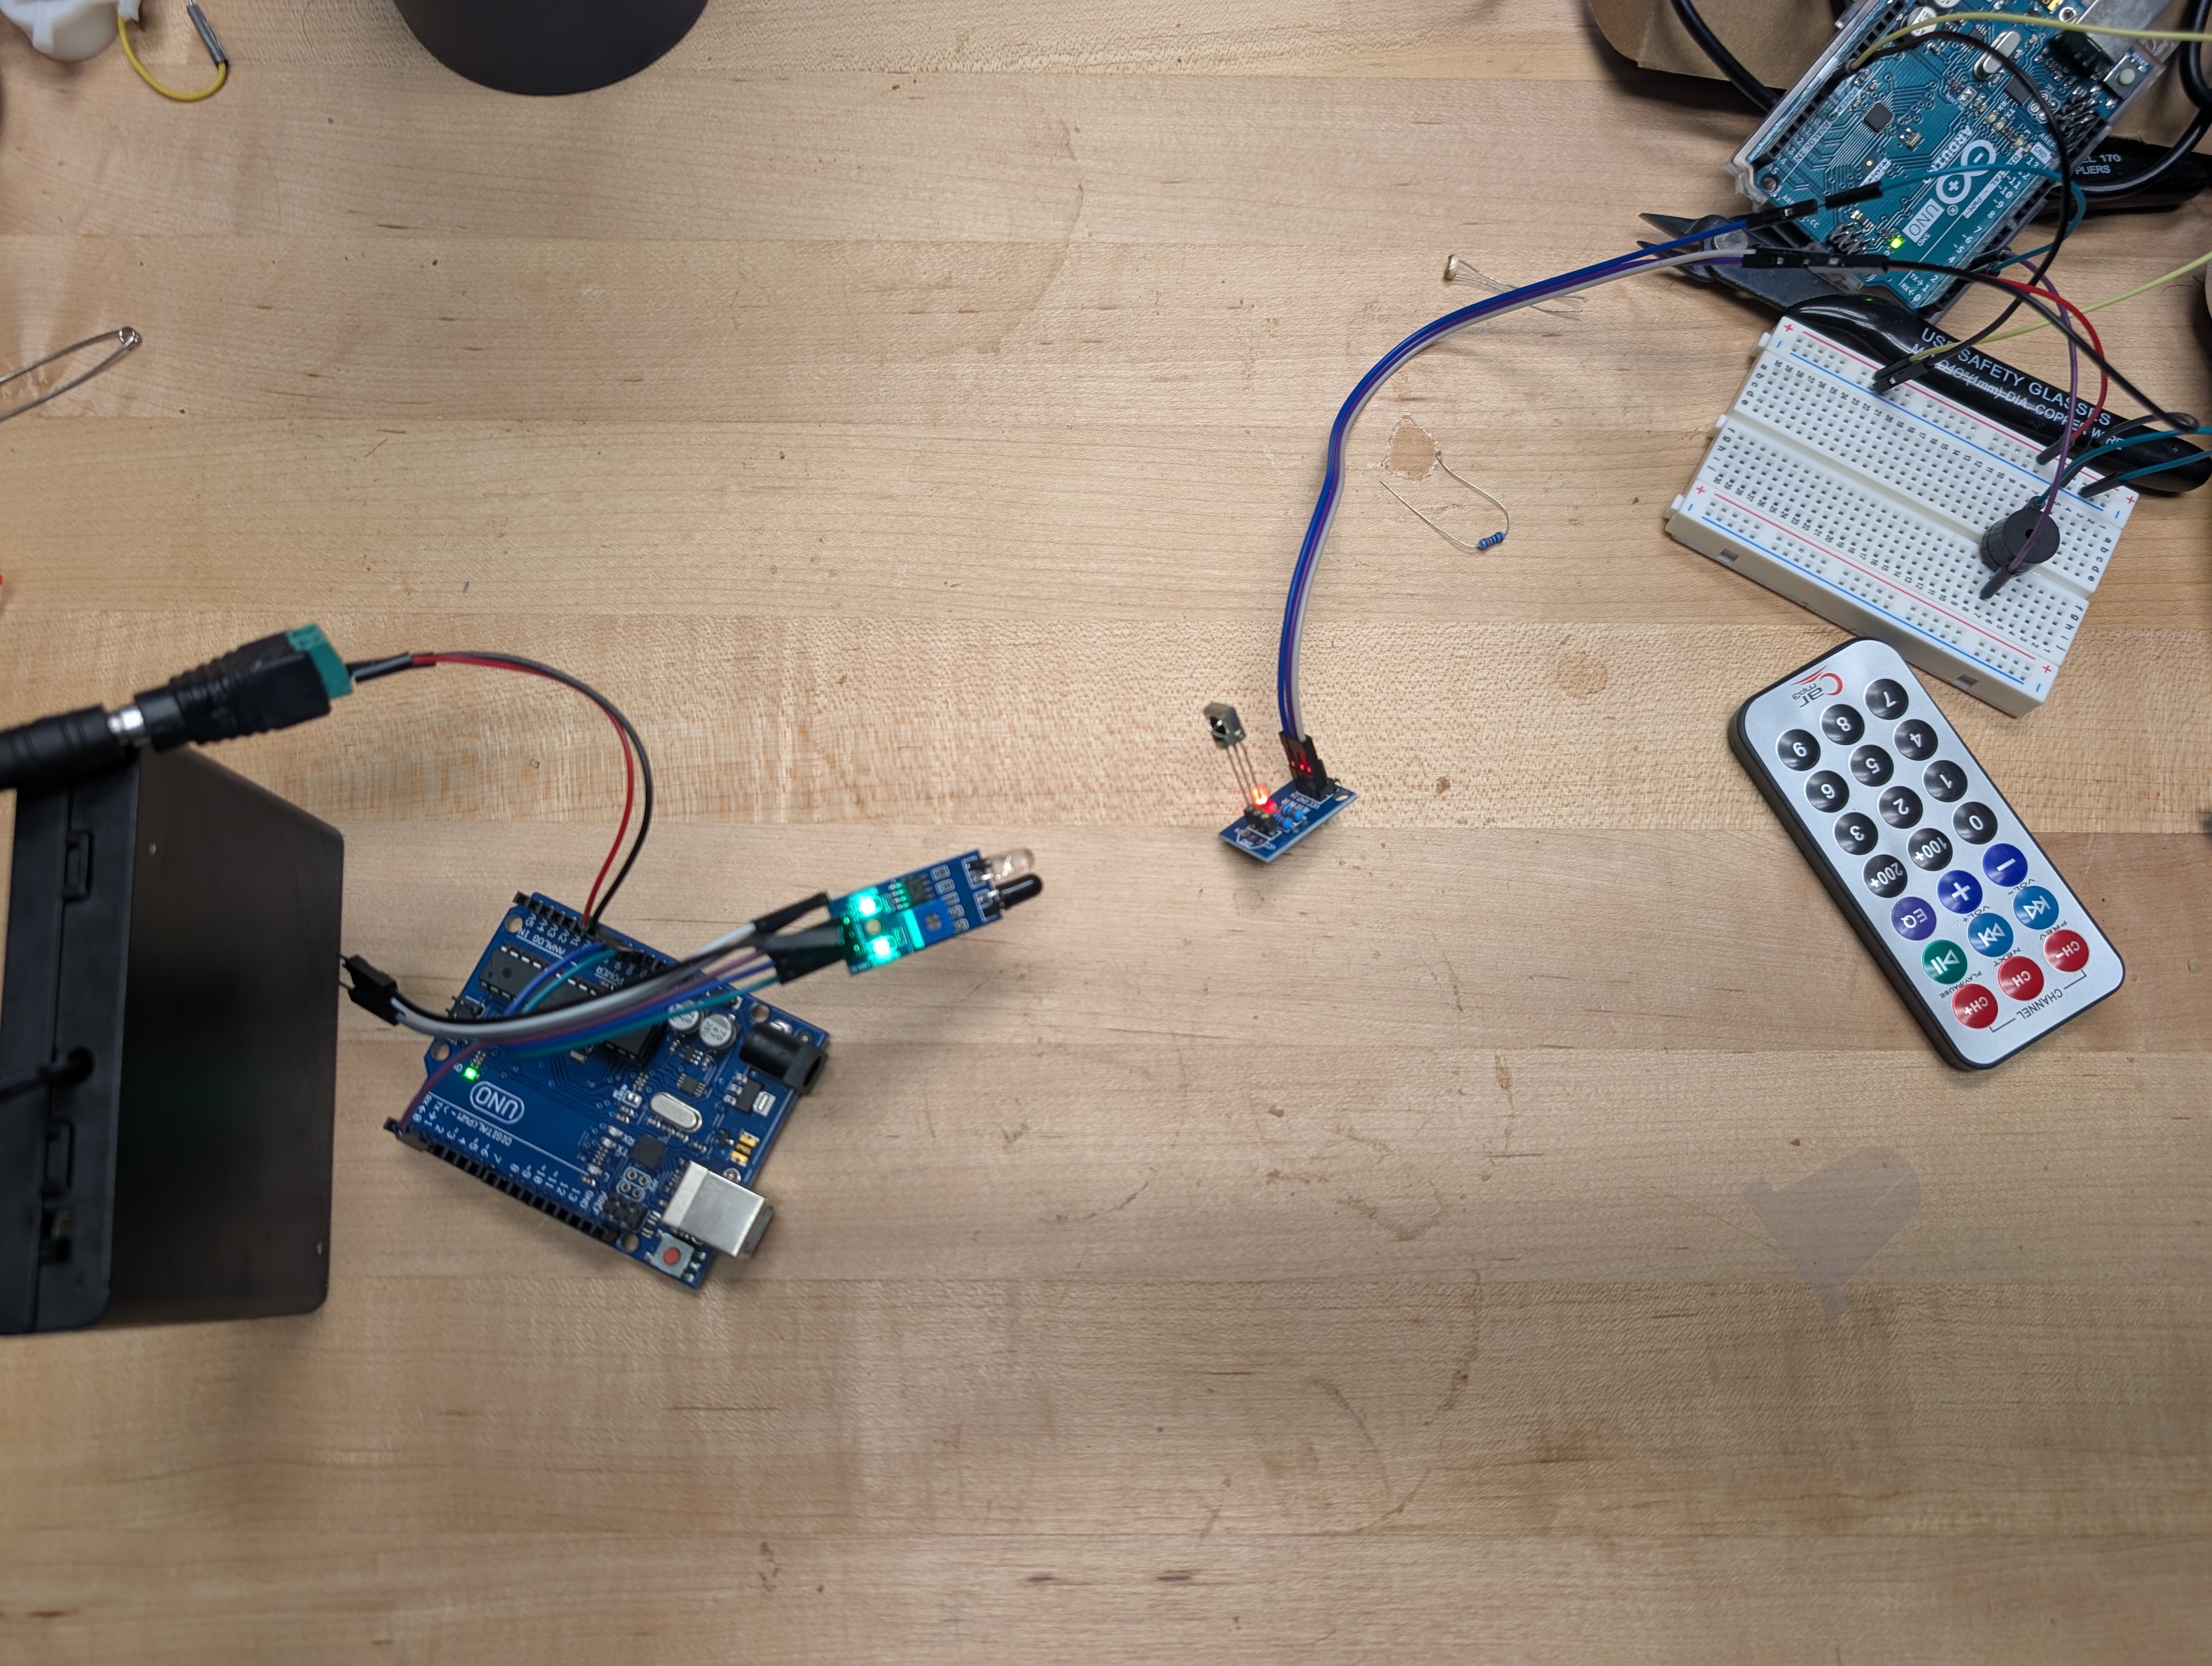
I recognize that I could parse that into a more intelligible name for a button, but I decided to move on to phase 2, and decided to try using a second Arduino to send an encoded IR signal to be decoded by my receiver. For the sender, I am using a set built together to use an emitter and receiver together to do some range-finding, so it’s more than I need, but it will certainly work to send a signal. Having installed the IR-Remote library, I pulled two pieces of example code for “tinySender” and “tinyReceiver” and set them up on respective devices.
-
I loaded the sender with its code, and a simple repeating pattern, then unplugged it from the computer and set it with battery power, so I could know for sure the messages were not travelling by any other method.
-
AND behold! There was not much consistency, it seemed the sender and receiver could not be very far apart, and alignment was key, but I was able to get the serial monitor on the receiver to display that it had received commands from the sender. I even modified the code a little so that when a certain signal was received, it would be acknowledged with a beep on a piezo that I had plugged in. I imagine with a little work, these could be paired to share info across spaces where wires would be impractical, but I am not sure how effective it could be, at least, the way I currently have it set up.
Reflection
-
I do work as a service technician for other maker spaces in my community as needs arise, and have often collaborated on projects for Mardi Gras Parades and other large events. Currently I have been working frequently with a local Low-power FM radio station, and could see that being a means of helping to share messages of empowerment where they are needed, as well as connecting needs to resources.
-
Honestly, I have been craving a better connection between the makerspaces in the city, and may end up moving on from the school to participate in opening a new city level space that has recently been proposed, should that opportunity be open to me.
-
I know I can already use some physical computing to bridge technological gaps at the radio station, and have recently invested in hardware to do some autonomous gardening on my porch. I could imagine teaching classes on that, if I am successful in my prototype.
-
I think next steps for the makerspace will include strengthening community ties internally first, meaning increasing focus about getting every student to have an experience in the lab every year. Along with that, strenghtening ties out in the community offers broader opportunities for students. Prior to COVID, there was a network of local makerspace manages. Since in-person classes returned that club hasn’t. So there is a gap to be filled that can benefit not just our space, but spaces all over our city.
Tools
- Arduino, IR sensor, IR collision-detector, breadboard, battery.
- References or tutorials followed
Field Activity Reflections
1 Collaboration: how you worked with colleagues or FLA participants during the Field Activity. At what stages of development and testing did the collaborator contribute? Please be detailed in your description.
Jason Hubert is a 5th grade core subjects teacher called “Mr. H,” by his students. He wanted to expand on an existing lesson on shapes, and wanted to use computer science to do some programable drawings. The proposed period of the lessons overlapped an existing “screen-free week,” for the school, so simply creating a digital lesson where shapes were drawn on screens seemed tricky to implement. Jason organized a discussion in the classroom that led to an idea to build a car that could drive shaped paths. Students started with a drawn concept to consider how they might make shapes that could balance form with function, what features are important to appearance and where structure would be needed. A car, conceptually speaking, could be “car-shaped” or look however they wanted it to, but at the end of that it would only earn the term “car” if it met the functional criteria of one. Mr. H’s class brainstorm determined that the functional criteria for a car was that it needed to be “drive-able.” Materials on-hand led to a notion more ready for a shoebox than a garage, and simply recognized as controlled motion under its own power. I brought in the idea of using the popsicle sticks as more intentional modular parts, as they were already present art supplies, and as an added bonus there was one stick in the library of TinkerCAD which could be measured using the software interface. This gave an opportunity for students to compare the digital stick against a physical example, and indeed, surveyed by the students, who, each measuring their own popsicle stick, bring their measurements together to establish an average set of stick dimensions. Jason demonstrated the math on how to find the average from the individual measurements, and how rounding brought it to the same values already present in the digital stick. Now the art project included arithmetic and a digital modeling component as well. Then they were challenged to scale those sizes up for the bigger “jumbo popsicle stick,” and model it as well. This allowed practice for both modifying and creating new versions of their shapes in TinkerCAD, slightly larger circles and rectangles in the 2-dimensional view, cans and boxes in the 3-dimensional view, and all of it grounded by the growing spatial awareness as the students considered and were guided along the path toward the interlocking parts, eventually creating dimensional slots for parts to fit into one another, out of simple shapes like rectangles and circles.
How did your collaborator’s perspective change the way you developed the lesson?
As the students worked individually, Jason was in the classroom with his own relatively fresh perspective on the techniques for modeling, having only gotten a brief look at things while we were putting the lesson for each day together, so he often helped students troubleshoot models with coaching questions about the shapes it would take to make a popsicle stick, and how to key in values to achieve the right look, while also learning the TinkerCAD environment fresh alongside them. Mr. H had a genuine rapport with the group which involved a variety of questions for individuals that could diagnose if someone was struggling, or validate progress made by someone who was ahead, and some of those found their way into the drafted rubric, as key metrics of how the students were doing as the project progressed. His observations from the experience were relayed to me in planning sessions as he helped me to scale and scaffold as we went along, and his insight from working with younger students helped anticipate tricky instructions when he and I discussed plans, and ask questions with the vocabulary to describe what about an instruction might pose challenges, and how we might address it. This led me to reduce and refocus some of the more ambitious goals that might have been had, before they led to a project which couldn’t be completed.
2 Instructional Challenges: What challenges did you encounter while teaching this lesson?
Challenges arose in practicing ruler reading, as the group of students we had intended to work with were 5th grade, and the learners who self-selected to be in our little experimental group were all in 3rd and 4th grades. All of the students could read numbers, and using a digital caliper with them helped resolve the lines on the ruler with measurements that they could read in decimal or fractional form. However, fractions and decimals are still new concepts at this age range, so we experimented with metric dimensions to have more integer values. This led to a small challenge in explaining how different unit systems can still offer meaningful understanding of size.
How did you address or plan to address them?
Ultimately, this gave us an opportunity to consider and seek further simplifications still, and it is noteworthy that this project also includes several features which were intentional to the finished parts, but that this batch of students did not participate in designing, due to limitations in time and scope of the lesson. A group of students which either started from a point of more practice with fractional measuring, or had more time to work might be able to get further in having a more defined vehicle shape, and indeed, the aesthetic upper shell which was intended from early talks ended up being left out entirely, on this iteration. That said, measuring the motors and digital components for slot placements that would not crowd any parts out was an intentional choice to further the math goal, where students were challenged to add or subtract dimensions of components in order to constrain new features. These included multiple iterations of testing. Digital representations where the dimensions they chose as a group were shown in simulated configurations of parts that either fit or didn’t based on the choices. Doing these discussions as a group allowed grace for those who needed more help with seeing the relationships, while those who were quicker with theories of what fit and didn’t could be actively engaged in the validation of those theories.
How are diverse learners needs being met in the lesson plan facilitation?
Jason and I modeled techniques for measuring using a document camera displayed to a projection screen, and where one was at the helm of the screen demonstration, the other walked the room to ensure that no one got left behind. Measuring small parts and designing for explicit features is tricky from the back-of-classroom perspective, so the magnification of physical components and additional attention for the back row perspective were fundamental to meeting the needs of individual students. It also helped to have little experiments the students could try if they were ready to move on ahead of the group, like changing aesthetic features or making an even larger SUPER Jumbo version. While we did not have any students with vision difficulties, we considered in planning sessions how someone with limited vision might still be able to use a digital caliper with a modified output which announces dimensions out loud, and indeed discovered that such an adaptation already has been tried and documented, as this linked project demonstrates. Talking Calipers
3 Integrating disciplines: Where does your lesson plan fall on the continuum and why? Multidisciplinary - Interdisciplinary - Transdisciplinary
This lesson seems to me to fall in the interdisciplinary section of the continuum. While there might be multiple disciplinary elements involved at any stage, There is no singular math, physical science or engineering thinking lesson that is self contained, each subject is learned in or as a part of this project, each area is sampled from within multiple elements of the lesson. The addition and subtracting for creating scaled dimensions, reading and word comprehension at the coding terminal, simple shapes arranged to create more complex compound shapes involved conceptual understanding of some elements and principles of art, in use of vocabulary like line, shape, and balance, all combine to create our simple digital models built on primitive forms to achieve the one physically present in front of the students. While the students might have had individual sessions focused around drawing their concepts, modeling parts, joining the resultant components, and integrating electronics, these sessions were to the student experience parts of a continuous exploration of the project in the making, rather than distinct but overlapping subject studies.
How might you move the lesson plan along the continuum to the next level?
I believe I might advance this lesson toward transdisciplinary by bringing in a subject matter expert from the automotive field to share some insight into how the design elements the students came into contact with relate in the broader scope of designing and testing a car, but as we did not quite go that far.
4 AI usage: Did you use AI during the process? If so, how?
AI was tasked with evaluating our drafted learning goals against the rubric we created, and providing feedback about whether those goals were specific and aligned to the rubric. We also asked for feedback about our Standards alignment, and said feedback allowed us to eliminate weaker alignments entirely. Lastly, I tasked the bot about whether a more efficient version of the L298N motor driver existed. It offered several recommendations for assemblies with parts I had not heard about, (including the one Stephen had mentioned in one of our group sessions.) I ended up sticking with the L298N for this version, but might be able to try some of the others later.
5 How has your teaching changed as a result of this course?
My teaching has shifted about the role that learning outcomes play in lesson planning. I had entered this course from a perspective that held “by the end of the lesson, x will have occured.” While I could define it using terms suggestive of learning outcomes, I didn’t percieve having anyone to check in with about it. This often meant that by the time lessons were taught, learning outcome alignment had drifted substantially, even from a vaguely defined and often poorly measurable initial statement. Re-centering the learning outcomes as a critical component constraining the lesson activities has been a bit of a challenge at times, but has resulted in lessons which are much more clearly defined than I have ever managed before.
What are some concepts that you would like to learn more about?
While I feel relatively confident with using and adapting with machinery, I definitely feel like I could use more experience with the people-focused parts of teaching. Concepts like ZPD put a name to some struggles I have experienced in teaching, and I continue to feel like I have much to learn about matching each student in a class with the right strategy to help them gain all they can from a lesson.
How can you support other teachers in your practice to use digital fabrication with their students?
Many of my colleagues seem to feel like there is a mountainous journey for them to include DF in their lessons without occupying a seemingly overwhelming amount of lab-time. I think the best support I can offer is to reframe some of the learning that can be done with DF in terms that fit their lesson models, using vocabulary that mirrors their experience. As I learn more about pedagogical practice, I find I am more able to draw the parallels between the lab and the traditional classroom, and shorten the percieved gap.